Showing posts with label Sinful Colors. Show all posts

Tuesday, January 1, 2013

31 Day Challenge: Black and White

     Happy New Year everyone!  Today not only starts 2013, but also a new nail challenge.  In the Facebook group, Crumpets Nail Tarts, we are doing a new 31 day challenge.  I am really hoping I can keep up with this one.  Today's challenge is black and white and I decided the best way to showcase these two colors was in a water marble.  I was really nervous that this wouldn't turn out, but I couldn't have been more wrong.  This is my third one and I love it!

Base coat: Pro FX Fiberized Ridge Filler
Base color: White on the Spot from Milani -2 coats
Marble colors: Black Creme from Wet N' Wild and Bubble Bath from Sinful Colors
Top coat: Seche Vite


Tuesday, December 4, 2012

Reverse Gradient With Sinful Colors Ice Dream

       Hi everyone!  I hope you all had a great Tuesday.  I only had to work a half day today because the weather was so crappy!  But I got a lot done today.  I went to Ace, bought some pegboard, spray paint, hooks, and organized my kitchen.  It looks so good!  I'm glad I didn't just sit on my butt all afternoon, like I usually do!
     Today I have one of the winter polishes that Sinful Colors released last month.  This color is called Ice Dream.  I researched Ice Dream a little bit before I wrote this post and I found out that it is a dupe for China Glaze Lorelei's Tiara, and Sally Hansen Gem Crush in Showgirl Chic.  I don't own either of these polishes so I can't show you, but you can click on the links to see the comparisons.  I didn't want to just wear Ice Dream by itself, so I decided to wear it over black.  Then I remembered this mani for a reverse gradient from A Polish Addict.  I love how this turned out!

Base coat: Sally Hansen Triple Strong Advanced Nail Gel Fortifier
Base coat: Black Creme from Wet N' Wild - 1 coat
Accent nail: Ice Dream from Sinful Colors - 2 coats
The gradient was done with one coat of Ice Dream
Top coat: Sally Hansen Insta-Dri Anti-Chip Top Coat

This was taken outside without the flash


This was taken inside without the flash


This was taken inside without the flash, just in different lighting


And here is a picture of my kitchen!


I hope you like my nails and my kitchen!!


Saturday, December 1, 2012

ABC's of Nail Art Challenge: L is for... Laughter - Sinful Colors Unicorn and Stamping With Mash 31

       Today's post is for the Facebook group, Llama Nails.  Each week we do a manicure that coincides with each letter of the alphabet.  A is for apple, B is for baby, C is for cat, and so on, and so on.  This week we are on the letter L.  I was going to do love, but the mani that I did, didn't turn out at all like I wanted to.  I was going to redo the mani, but we went to a comedy show on Thursday night and it dawned on me, L is for laughter.  I wasn't quite sure how I was going to use the Mash 31 plate, and this became the perfect opportunity.
     Unicorn is a really pretty light yellow that requires three coats.  It is a pretty streaky formula which required the third coat to be a little thicker.  The outdoor pictures show Unicorn a little lighter than it is, and the indoor picture shows it darker than it is.  The accurate color is in between these.

Base coat: Diamond Strength Hardener
Base color: Unicorn from Sinful Colors - 3 coats
Top coat: Seche Vite (I applied this over Unicorn to dry it quickly so I could stamp over it).
Stamping images: Mash plate 31
Stamping color: Stamp Me! Black from Essence
Top coat: Sally Hansen Insa-Dri Anti-Chip Top Coat


Outdoor without flash


Indoor without flash

What do you guys think?  I hope you like it.

You can check out these other L related mani's using the links below.


Tuesday, November 27, 2012

Sinful Colors Athens and Olympia and Stamping With Mash 45

       Happy Tuesday evening everyone.  Or if you are over on the East Coast I'm sure it is much later.  I won't rub in the fact that I am enjoying a nice cup of coffee at the moment.  Mmmmm.  Coffee.  I.  Love.  Coffee.  OK, now onto the more important things in life, my nails!  When I first saw this image on the Mash 45 plate, I was not to keen on it, but after seeing a few people use it, I wanted to try it out.  I will say that I really enjoy how this turned out.  It is a little splotchy in spots, but that is because I wasn't using "real" stamping polishes, but I think these turned out pretty good considering the fact.

Base coat: Sally Hansen Triple Strong Advanced Nail Gel Fortifier
Base colors: Accent nail: Athens from Sinful Colors - 2 coats.
                     Olympia from Sinful Colors - 2 coats
Stamping plate: Mash 45
Stamping colors: Same as the base colors
Top coat: Seche Vite

These were taken inside without the flash.


Have you guys tried this stamp before?  If so, did you like it?  If you haven't tried it yet, would you?  I look forward to hearing from you!  I'm off to enjoy the rest of my coffee and start a new mani!  Have a great night.


Sunday, November 25, 2012

Stamping With Mash 42 Over Sinful Colors Gradient

       Happy Sunday everyone!  I am typing this with one hand because I have a baby on my lap!  But it is OK, because he is the cutest baby on the face of the earth, and my best friends baby.  Although, I'm sure mine will be cuter. ;-)  Today's post is for the Facebook group, Adventures In Stamping.  Each week we vote on a challenge, and this week the challenge is for us to stamp over a blue base.  I decided I wanted to do a blue gradient and it turned out beautifully.
     I also thought today would be a great way to use some of my whites that I haven't tried stamping with, to see how they worked.  We get a lot of questions referring to cheaper polishes to stamp within the group, and I figured my left hand would be a great way to kill two birds with one stone.  As you will see, my cleanup is terrible with my non dominant hand, and I'm also hiding a brutal hangnail.  It is so brutal, I couldn't even apply acetone to it to clean it up.  :-(  Winter is so harsh on my hands!

Base coat: Sally Hansen Triple Strong Advanced Gel Nail Fortifier
Base color: Cinderella from Sinful Colors - 2 coats
Gradient colors: Cinderella, Why Not, and Hot Spot from Sinful Colors
Topcoats: Sally Hansen Insta-Dri Anti-Chip Top Coat and Essence Gel Like Top Coat
Stamping colors: Stamp Me! White from Essence, White On The Spot from Milani, and Superstar! from Pure Ice
Stamping image: Mash 42

This picture was taken outside.  All stamping is done with Stamp Me! White from Essence


This picture was taken inside without flash.  All stamping was done with Stamp Me! White from Essence.


This picture was taken inside without flash.  Stamping was done with White On The Spot from Milani on the pointer and ring finger, and Superstar! from Pure Ice on the middle and pinky finger.


This picture was taken outside and stamping is done as described above the previous picture.


As you can see, the difference is pretty dramatic between the three whites I stamped with.  I will keep using the stamping polish from Essence, unless I can find something better.  I know the last two pictures look fuzzy, but it is actually the stamping that is making them look fuzzy. :-(  Crazy, huh.


Wednesday, November 14, 2012

Llama Nails Presents the ABC's of Nail Art: J is for... Jelly Sandwich

       Happy Wednesday everyone!  How has your week been?  I am feeling so much better after my bout of strep.  This week's letter for the ABC challenge in the Facebook group, Llama Nails, is J.  I decided that I would do a jelly sandwich mani today.  If you aren't sure as to what a jelly sandwich mani is, don't fret.  It is pretty much what it sounds like.  Glitter sandwiched between a jelly finish polish.  A jelly finish polish is a very sheer polish that looks like jelly, for lack of a better term.  This is not to be confused with a sheer finished polish.  If my lame description confuses you and you want a far better one you can check out this blog.
     I have done three or four of these manicures and this is the first one that I have really liked.  The hardest part of this mani was photographing it.  I took almost 200 pictures and think I got some good ones.  I am hoping to be able to purchase a new camera with my Christmas bonus, but I do have to pay my bills first.  Here's hoping they feel sorry for me this year and give me a little extra! :-)

Base coat: Sally Hansen Triple Strong Advanced Gel Nail Fortifier
Base color: Daddy's Girl from Sinful Colors
Glitter: Let Me See Your Peacock from Claire's
Top coat: Sally Hansen Insta-Dri Anti-Chip Top Coat
I did two coats of Daddy's Girl, a layer of the glitter, and one more layer of Daddy's Girl on top of that.


Have you tried a jelly sandwich mani?  Do you like doing them?  What kind of camera do you think I should get?


Thursday, November 8, 2012

Llama Nails Presents the ABC's of Nails : I (And Stamping With Mash 30 Plate)

     Happy Thursday everyone!  How has everyone's week been so far?  Mine has been a little all over the map, hence not posting since Sunday!  What the heck man!  Well I missed the post for last week, which was H, but don't worry, I did it.  I will most likely be posting it tomorrow.  "I" was a tricky letter for me, (aren't they all) but as I was in the shower saying igloo, irritated, irate, intimate, and then icicle I stumbled upon Ireland!  Now that was something I could do on my nails.
     I finally picked up some more Seche Vite Top Coat the other day and I can't believe the difference it makes in dry time on my manicures.  When I have wanted to stamp before I usually have to wait 30 minutes to an hour before I can stamp it. With one coat of Seche on I can stamp after ten minutes, tops.  I don't think I will ever go without.

Base coat: Sally Hansen Advanced Gel Nail Fortifier
Base colors: Pinky, thumb, and ring finger - Superstar from Pure Ice - 2 coats
                     Middle finger: Pretty Edgy from Essie - 2 coats
                     Forefinger: Clementine from Sinful Colors - 2 coats
Stamping colors: Pinky - Heat Flash from Sally Hansen Insta-Dri
                            Middle - Stamp Me White from Essence and Khloe Had a Little Lam-Lam from Nicole by OPI
                            Forefinger - Stamp Me White from Essence
Flage colors: Clementine from Sinful Colors and Pretty Edgy from Essie applied with a striping brust
Image plate: Mash 30
Top coat: Seche Vite

These were taken outside in indirect light


Here are some other "I" inspired manicures!


Tuesday, October 23, 2012

CNT Halloween Nail Art Challenge: Pumpkins

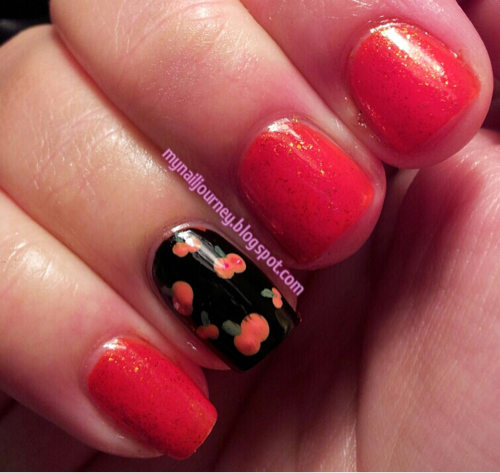
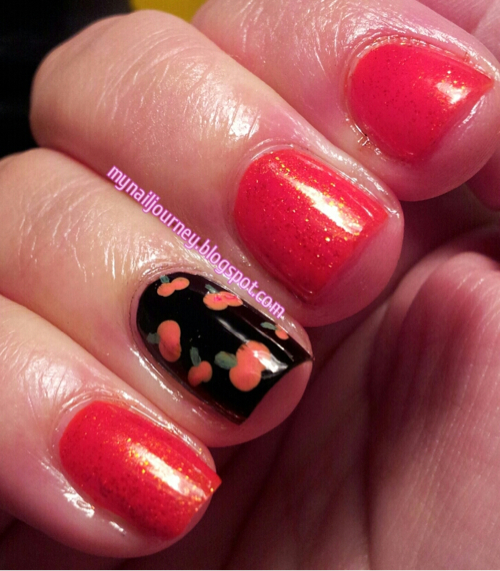
       It is time to post another mani for the Halloween Nail Art Challenge that is being put on by the Facebook group, Crumpet's Nail Tarts.  I threw this mani together at the last minute last night so I don't really have too much to say about it except that I really like the way that it turned out!  I think it is very simple, cute, and different.  All though I haven't looked at everyone else's manis so I could be wrong about the unique look.  I did forget to leave my accent nail blank while painting the orange, so the Black Creme is over a layer of orange, but Wet N Wild's Black Creme is opaque in one coat anyways.  :-)  Napping before mani-ing is dangerous.  ;-)

Base coat: Sally Hansen Triple Strong Advanced Gel Nail Fortifier
Base color: Citrine from Sinful Colors - 1 coat, Black Creme from Wet N Wild - 1 coat
Over Citrine I layered one Layer of Serena and Chloe from Sinful Colors.  I wanted to do both layers in Serena and Chloe but I was afraid it would photograph more red than orange.
Pumpkins:  A mixture of Crimson Red, Lemon Yellow, and Titanium White acrylic paint from Artist's Loft applied with a dotting tool
Stems: A mixture of Viridian acrylic paint from Artist's loft and my franken orange, applied with a small detail brush
Face: Lamp Black acrylic paint from Artist's Loft, applied with a small detail brush
Top coat: Sally Hansen Insta-Dri Anti-Chip Top Coat

Taken inside without flash


Thanks for stopping by and do feel free to leave some comment love, or creative criticism.

Check out the other pumpkin nails below!


Tuesday, October 9, 2012

CNT Halloween Challenge Day 3: Zombies

     Today in Crumpet's Nail Tarts Halloween Challenge we are supposed to do Zombies.  Now, let me start off by saying, I am not a fan of zombies.  Don't like them, don't watch them, don't know what they look like, don't want anything to do with them.  Off to Google I went... (Does this sound familiar?  I love Google).  I searched "cute zombies" and found this image.  It was the cutest one I could find and I figured that I could re-create it.  I think I did a pretty good job.  
     After I painted Ibiza on my ring finger I painted the entire zombie in white acrylic paint so that when I added the color it would pop.  

Base coat: Sally Hansen Diamond Strength Hardener
Base color:
  accent nail: Ibiza from Zoya - 1 coat
  other nails: Night Prowl from Wet N' Wild - 2 coats - How ironic, right!  Perfect name.
Zombie attire:
  face and hand: San Tan-Tonio from O.P.I.
  brain: The One That Got Away from O.P.I. mixed with white acrylic paint
  shirt: I Need A Refresh-Mint from Wet N' Wild
  pants: Why Not from Sinful Colors
  heart: The One That Got Away from O.P.I.
  outline: Lamp Black from Artist's Loft acrylic paint
Top coat: Sally Hansen Insta-Dri Anti-Chip Top Coat      


AND a close up of my cute little zombie...

I hope you guys like my take on the zombie mani.  If you are interested in more gorey zombies, check out the other manis from this challenge.


Saturday, October 6, 2012

Sat-ART-day Challenge: Tarts

     Hey everyone!  Today marks the start of a new art challenge!  Debbie Crumpet, owner of the Facebook group, Crumpet's Nail Tarts, decided to start a new challenge since our summer one ended.  I only participated in a few days of the summer challenge because I joined about half way through.  I also didn't know how fun they were!  The thing I love about a group challenge is seeing the variety of nails people can come up with for one theme.
     Today's theme was... tarts.  I know, I know, right?!  What the hell!  Debbie posted this in the beginning of September, ( I think) and I brainstormed the entire month!  I almost didn't participate but I figured, what the hell, it is a challenge for a reason!  Off to google I went.  Turns out there are two definitions for a tart.  One, "a small pie containing fruit or the like,"  and two, a "prostitute or promiscuous woman. " Both definitions come from the dictionary.  So, if you're anything like me, your jaw just dropped.  You know it did.  How the hell am I supposed to draw a pastry on my nails!  I sure as hell wasn't going to put prostitutes on my nails!  Welp, I believe I solved the problem.  As soon as I was done with these, I asked my hubs what was on my nails and he guessed on the first try, so I figure they can't be that bad, right?  Hopefully you can guess as well.


If you guess strawberries, you're wrong!  They're blueberries!  I am very pleased with how this turned out and I hope that you were able to guess what they were.

Base coat: Sally Hansen Diamond Strength Hardener
Base color: Audrey from Zoya - 2 coats
French tip color: Superstar from Pure Ice
Blueberries:
 light blue - Vintage Blue from Avon
 dark blue - Why Not from Sinful Colors (both applied with a dotting tool)
  stems - Scream from Pure Ice (applied with a small brush)
Top coat: Sally Hansen Insta-Dri Anti-Chip Top Coat

If you're curious as to how others approached this tart challenge, check out these other blogs!

Thanks for stopping by and feel free to comment! :-)


Friday, October 5, 2012

Sassy Nails Nailaween Challenge: Day 2 - Matte Doticure

     It is time for me to post day 2's post for the Nailaween Nail Art Challenge.  There are 10 topic in this challenge and the one thing that I love about this is that it is self pace.  We have until October 31 to post all of our manicures.  This works great seeing as how I am in like a gazillion challenges this month...  Not to sure why I did this, but oh well.  It is keeping me busy and I like it.
     The second day of this challenge is to produce a matte doticure.  I was really excited for this one because I have wanted to do a doticure like the one I am showing you for quite some time.  I am so let down with how this turned out.  I had such high hopes and it wasn't what I wanted.  It would have worked if I had a more opaqe orange, but this one would barely show up on the black so I ended up having to use a white base, only for the dots that are overlapping the black, and you can tell that it isn't right.
     I applied the black over the orange using the tape method. After the black dried I went in and added the dots with a dotting tool to give it the interlocking look.

Base coat: Sally Hansen Diamond Strength Hardener
Base color: Citrine from Sinful Colors - 2 coats
Black: Black Creme from Wet N' Wild
Top coat: Essence Nail Art Special Effect! Topper


Taken inside with flash


Taken inside without flash


Well I hope that you like this even though I don't. :)

Feel free to check out these other ladies blogs who are partcipating in this challenge.

Check out all of the NailAween Nail Art Artists!

datyorkLOVES


Wednesday, October 3, 2012

D is for... Daddy's Girl

     It's Wednesday again and that means it is time for another installment in the ABC's of Nails Challenge, hosted by Llama Nails on Facebook.  Today's letter is D.  I have been baffled all week as to what to do for this mani and then I remembered that I had this polish in my "untried" stash for a long time.  When I say untried, I mean that I haven't shown it on my blog.  I have worn it a few times and I love it!
     Other then the name, I love everything about this polish.  Daddy's Girl is a beautiful purple jelly with pink/purple micro glitters that turn this into a shimmery finish.  Thank God, because I am not a fan of jelly finishes.  Because of the jelly finish I needed to do three coats.  I decided that I couldn't just wear the polish alone so I added a simple shooting star stamp to each nail.

Base coat: Sally Hansen Diamond Strength Hardener
Base color: Daddy's Girl from Sinful Colors - 3 coats
Top coat: Sally Hansen Insta-Dri Anti-Chip Top Coat
Stamping color: Silver Sweep from Sally Hansen Insta-Dri Fast Dry Nail Color
Stamping plate: Mash 33


Here is the finished product.  Taken inside without the flash.


Taken inside without flash


Taken outside in indirect light.


Taken upclose.  So pretty.

Please check out the other "D" mani's with the links below.

Are you a fan of jelly polishes?


Tuesday, October 2, 2012

Sassy Nails Nailaween Art Challenge: Day 1 - Water Marble

     Today marks day one of my second Halloween nail challenge.  I am involved in two Halloween challenges, Adventures In Stamping on Sunday's, MSMD Monday's, and also in an ABC's of nails on Wednesdays.  I have my work cut out for me this month.  If all goes as planned I should have a new post for you every single day this month.  *Not really sure how I got myself into this* :-)
Here are the rules for this challenge taken directly from Sassy Nail's Facebook page:

Nail-Aween Nail Art Challenge will be from October 1-31st. 

Rules of this challenge:
-Complete it during the month of October, so you have 31 days to do all 10 challenges.

-Add list of Nail-Aween Nail Artists so we can all be linked up. There will be a post with additional information on Sep 30th. Link will be shared here, so dont worry. 
***This is at the bottom of my post***
Disclosure: This is a self paced challenge. You will set up your own schedule at your own pace. 

WooHoo and Happy Halloween!

*Update. I am taking blogs and FB pages until October 10th.


     I cringed when i saw that today's mani was a water marble.  They are so stinking messy and I hate having stuff on my hands.  I know, I'm weird.  I have this thing about anything, (water, lotion, food, anything) being on my hands.  *Hangs head in shame***  I think that I was high from all the fumes by the time that I was done with this.  I think it turned out OK.  My favorite nail has to be my pointer finger.

Base coat: Sally Hansen Diamond Strength Hardener
Base color: Sunrise, Sunset from Sally Hansen Diamond Strength - 1 coat
Water marble colors: Clementine from Sinful Colors and Black Creme from Wet N' Wild 
Top coat: Sally Hansen Insta-Dri Anti-Chip Top Coat


Monday, October 1, 2012

CNT Halloween Nail Challenge Day 1: Trick or Treat Nails

     It's Monday again and that means two things.  It is MSMD Monday and day one of our Halloween challenge in the facebook group, Crumpet's Nail Tarts.  MSMD, for those of you that are not familiar stands for Monkey See, Monkey Do. We recreate mani's from other bloggers that we like and pay some long due respect to the creators of our inspiration.  I didn't have time to do two manicures so I figured that this would be the perfect opportunity to do a post that killed two birds with one stone.  Today's inspiration came from D'Anna at Not Another Nail Blog.
     I tried out one of the new Fantasy Makers from Wet N' Wild in this mani and I have to say that I am not impressed.  I bought this color because it is a black base with pink and blue micro glitters in it.  Well, they are micro for sure.  I could barely see any of the cute colors shinning through in this polish.  :-(  I had such high expectations.  Oh well.  What can ya do.

Base coat: Sally Hansen Diamond Strength Hardener
Orange base color: Clementine from Sinful Colors - 2 coats
Black base on ring finger: Black Creme from Wet N' Wild - 1 thick coat
Black base on other nails: Nail in the Coffin from Fantasy Makers by Wet N' Wild - 3 coats
Top coat:  Sally Hansen Insta-Dri Anti-Chip Top Coat
Lettering and pumpkin face: White - Titanium White acrylic paint from Artist's Loft
                                               Black- Titanium Black acrylic paint from Artist's Loft


Taken outside without flash


Here is a close up of Nail in the Coffin in direct sunlight


You can see the other Trick or Treat manicures by using the links below!

Have you guys tried any of the Fantasy Makers polishes yet?  Were you impressed?


Monday, September 24, 2012

MSMD Monday: Essie Pretty Edgy andO.P.I I Think In Pink

     It is Monday again and that means that it is Monkey See, Monkey Do Mani Day.  In the Facebook group, Crumpet's Nail Tarts. we utilize Monday's to recreate mani's we have seen around the web that we would like to do.  We pay respect to the rightful creator, and pray that our recreations come close to matcing up.  Today's mani comes from Katrina over at Katrina's Nail Blog.  Please click on the link to be directly taken to her blog post for her mani.  Welp, not much else to say so here goes.

Base coat: Sally Hansen Diamond Strength Hardener
Base colors: Pretty Edgy from Essie - 2 coats
                     I Think In Pink from O.P.I. - 3 coats
Green stripes: Mint Sorbet from Sally Hansen Hard A Nails Xtreme Wear
Heart: Let's Talk from Sinful Colors
Top coat: Sally Hansen Insta-Dri Anti-Chip Top Coat


Taken inside without flash


I couldn't figure out what my middle finger kept reminding me of.  Well, I figured it out.  Has anyone watched the most annoying children's show called Yo Gabba Gabba?  I don't even have children and this show drives me nuts.  I baby sit, ALOT.  Well, my middle nail is the same color scheme as a character on the show.  

Please check out these other MSMD mani's if you have a few minutes to spare!


Wednesday, September 12, 2012

ABC Nail Challenge: Anchor Stamping

     Today marks the start of a new challenge.  Our summer challenge has come to an end, (all though I was a TERRIBLE participant) and a new one is beggining.  It is called the ABC's Challenge.  I am excited to do this!  Each Wednesday we will be working on one letter of the alphabet and doing a mani that starts with that letter.  Example: A is for Avon, and using an Avon polish, or B is for Bee and stamping with a Bee, etc, etc.  Hopefully you get the picture because I am terrible at explaining stuff like this.
     I had my whole A mani planned out, even consulted with the hubs about it, and as I was searcing through my plates I found one from Essence with an anchor on it.  The light bulb went off.  A is for anchor!!  So off I went to do an anchor mani.  I REALLY need to work on my patience when it comes to stamping.  I also need to remember that my Sally Hansen top coat is not Seche Vite, and if it is applied in the same manner it WILL bubble!  Ugh.  Oh well.  As much as I want to be perfect, no one is.  Except Chalkboard Nails...


Base coat:Sally Hansen Diamond Strength Nail Hardener

Base colors: White - French White Tip from N.Y.C. - 3 coats

                     Blue - Smooth Sailing from Essie - 2 coats

                     Red - Ruby Slipper from Avon (also used for the half moons)

Stamping colors: Stamp Me! White from Essence

                            Blue - Why Not from Sinful Colors

Stamping plate: not numbered from Essence

Top coat:  Sally Hansen Insta-Dri Anti-Chip Top Coat


Taken inside without the flash


Well, what do you think?  If you have some time you should check out these other A mani's...


(Submissions close in 175d 7h 45m)
Link tool by inlinkz.com