Showing posts with label Halloween. Show all posts

Wednesday, October 31, 2012

SassyNails Nail-Aween Nail Art Challenge: Day 10 - Any Halloween Inspired Mani

       HAPPY HALLOWEEN!!!  So, I am not going out with my friends' to take their children trick-or-treating, but we are going over there for dinner.  I tried to take a nap before doing this, but couldn't fall asleep and I wanted to make sure this got posted today.  I would hate to have worked all month long on this challenge and be removed from the list of participants for not finishing in time. :-)  Today's mani is inspired from the lovely Sarah over at Chalkboard Nails.  This is one of my favorite blogs and if you have no idea why, just go, go check her out, you will not be disappointed.  We are not allowed to dress up for work so I knew this would be perfect for the challenge and my "costume."  I really need to get better at doing straight lines.  :-(

Base coat:  Sally Hansen Triple Strong Advanced Gel Nail Fortifier
Base color: Superstar from Pure Ice - 2 coats
                   Ruby Slipper from Avon - 2 coats
Top coat: Sally Hansen Insta-Dri Anti-Chip Top Coat
Stripes: Cobalt Blue from Artist's Loft acrylic paint
Dots: Ultramarine Blue from Artist's Loft acrylic paint

All photos were taken inside without flash


Here is a list of  all the manicures that we did for the challenge.

Tuesday, October 30, 2012

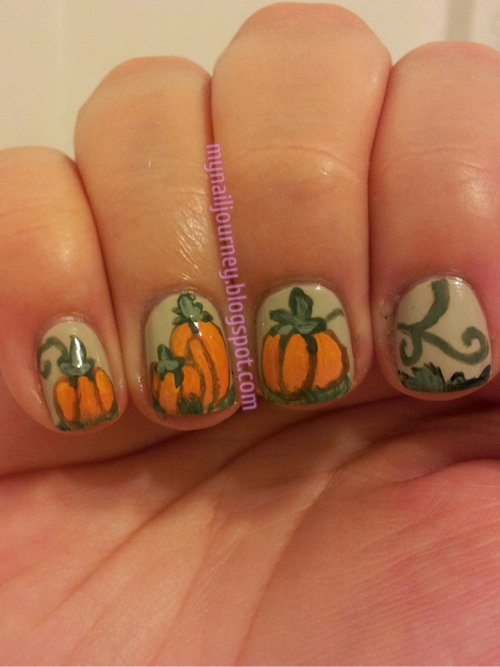
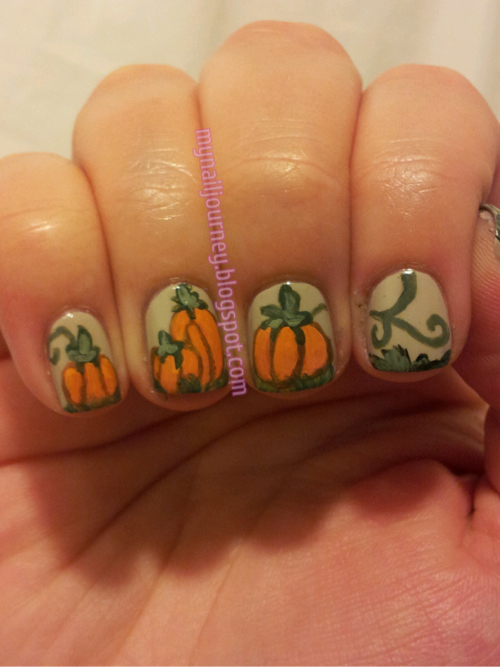
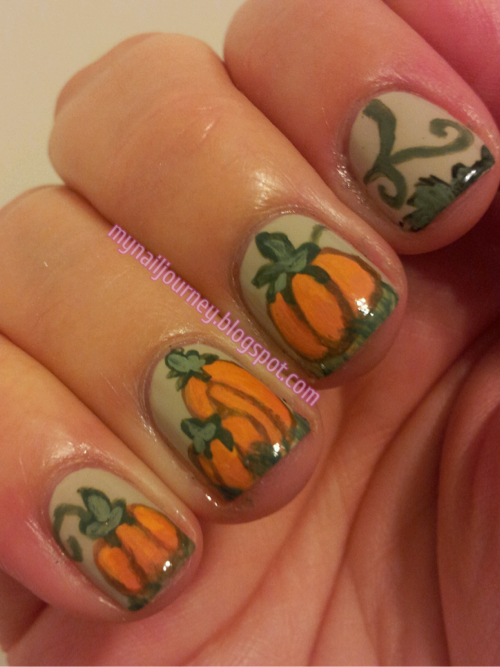
SassyNails Nail-Aween Nail Art Challenge: Day 9- Pumpkins

       It is almost Halloween and for some of you it may even be Halloween.  Do you have any big plans?  I am going to go Trick-Or-Treating with my friends and their kids.  I love seeing how excited kids get around this time of the year!  Today's challenge in the self paced nail art challenge being put on by SassyNails is pumpkins.  I suffered the same dilemma as I did with the last challenge in that I had already done this pumpkin mani for the Crumpet's Nail Tarts Halloween Challenge and my creativity was as a standstill.  Can you guess where I looked for inspiration?  If you guessed Robin Moses, you would be correct.  I know I say this every time, but I love that she teaches us how to do what looks impossible!  If you are looking to learn how to work with acrylic paints on your nails, I recommend no other than her.  Here is the link to her video that I used for this mani.
     I mixed all of my own colors for this mani with Artist's Loft acrylic paints.  For the darkest orange, almost a brown, I mixed Crimson Red, Lemon Yellow and a dab of Lamp Black.  For the pumpkin color I used the same mixture as the dark orange, minus the black.  For the yellowish highlights I used the same orange base plus a little bit of Titanium White to lighten it up a little.  For the dark green that is on the stem and leaves I used Lemon Yellow and Ultramarine Blue and for the lighter green I just used some of the Titanium White to lighten it a little.  For the grass that I did on the bottom I would dab my brush in black on one side and then the dark green on the other to give it that mixed texture look.  I am super happy with how these turned out.

Base coat: Sally Hansen Triple Strong Advanced Gel Nail Fortifier
Base color: Skulls and Glossbones from OPI - 2 coats
Top coat: Sally Hansen Insta-Dri Anti-Chip Top coat

All were taken inside without the flash


I added this one because you can see the highlighting towards the top of each pumpkin.


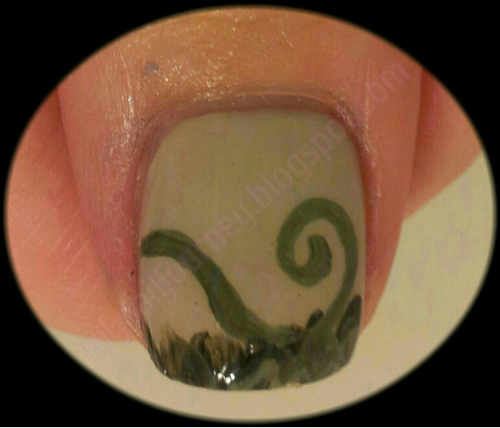
I just really like how the grass and the curly-q turned out on my thumb so I thought I would add it.


I hope you guys like this!  Who do you go to when you are running short on ideas and need some inspiration?


Monday, October 29, 2012

SassyNails Nail-Aween Nail Art Challenge: Day 8 - Witches

     Good afternoon everyone.  I hope that everyone is having a great day.  And to everyone living on the east coast, I am praying for your safety.  I can not believe that Atlantic City is underground.  That is so scary to me!  Today is day eight of the SassyNails Nail-Aween Nail Art Challenge and the topic for today's mani is witches.  I was a little stumped on what to do as I had already used all my creative witch inspiration on this mani I did a few weeks ago, so off to YouTube I went.
    Inspiration for this mani came from this YouTube video by IHaveACupcake.  I just discovered her last week and this is the second one of her tutorials I have followed.  I am not too sure how I feel about the outcome of this one.  I tried to do Hello Kitty four times before finally leaving her the way she is and the bat on my pointer finger looks more like a sting ray.  I am so jealous of how easily she can use her dotting tools.  I always try to use them like she does and end up resorting to a brush.  One of the reasons the bat on my pointer finger looks more like a sting ray is because I first painted it grey and it was too dark.  So I painted white over it, lightened the grey and then applied it again and it was still to dark.  Lightening it one more time allowed me to finally see it.  I tried to clean it up a little but the wings came out pointy instead of round and by the time I got to this point I was ready to be done.  I didn't really even clean up around my cuticles.

Base coat: Sally Hansen Triple Strong Advanced Gel Nail Fortifier
Base color: Smooth Sailing from Essie - 2 coats
Top coat: Sally Hansen Insta-Dri Anti-Chip Top Coat

All artwork was done with Artist's Loft acrylic paint
White: Titanium White
Yellow: Lemon Yellow and Titanium White
Red: Crimson Red
Black: Lamp Black
Grey: Lamp Black and Titanium White

Taken inside without flash


Well, I hope that you like my attempt at this mani.  Please feel free to comment below.  Comments make us bloggers feel the love.  :-)


Sunday, October 28, 2012

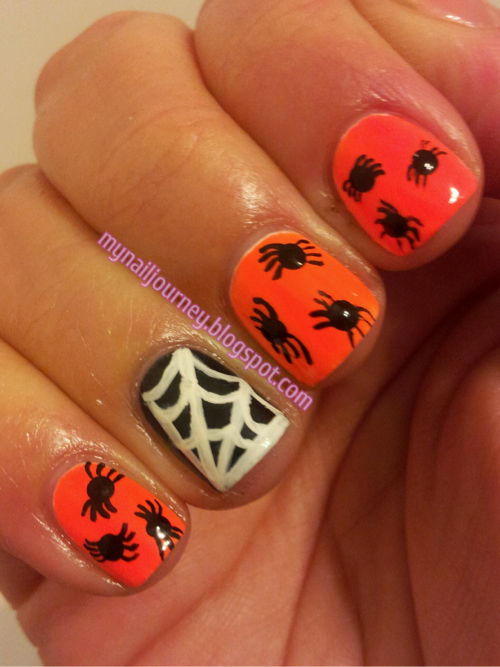
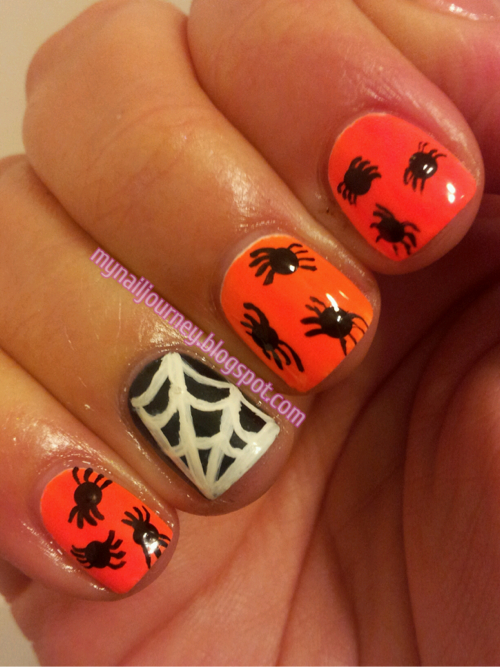
SassyNails Nail-Aween Nail Art Challenge: Day 7 - Spiders

       Well, if you have been reading my blog for the last month you will know that I started out this month by doing two Halloween challenges.  This one, which is a self paced one, and another one for the Facebook group, Crumpet's Nail Tarts.  I can't express how crazy it has been to be doing nail art every single day.  It is hard to get everything done.  Much respect to those who can do it.  I decided yesterday that I am not going to finish the one for Crumpet's Nail Tarts.  The main reason is because the next challenge I had to do was inspired by a scary movie.  I DO NOT watch scary movies and I don't really want to spend 3 hours doing intense nail art and then take it right back off.  Blood, guts, and creepy movies are not my thing.  
     On to today's mani, spiders.  I really don't like spiders, but this mani turned out pretty cute.  I received some Sally Girl mini polishes in a swap last week and they were perfect for this one.  As with most neons, I layered Amped over a white base to make the neon color really pop.  Unfortunately this resulted in easy chipping.  I didn't even do anything except sweep and mop last night and it was chipped.  :-(  I applied the spider webs and legs of the spiders with a small nail art brush and the bodies of the spiders with a dotting tool.  I hope you like these.

Base coat: Sally Hansen Triple Strong Advanced Gel Nail Fortifier
Base color: Orange - Amped (812161) from Sally Girl - 2 coats over 2 coats of Superstar! from Pure Ice
                   Black -  Poser (812051) from Sally Girl - 2 coats
Nail Art is done with Artist's Loft Acrylic paint in Titanium White and Lamp Black
Top Coat: Sally Hansen Insta-Dri Anti-Chip Top Coat

Taken inside without the flash


Tuesday, October 23, 2012

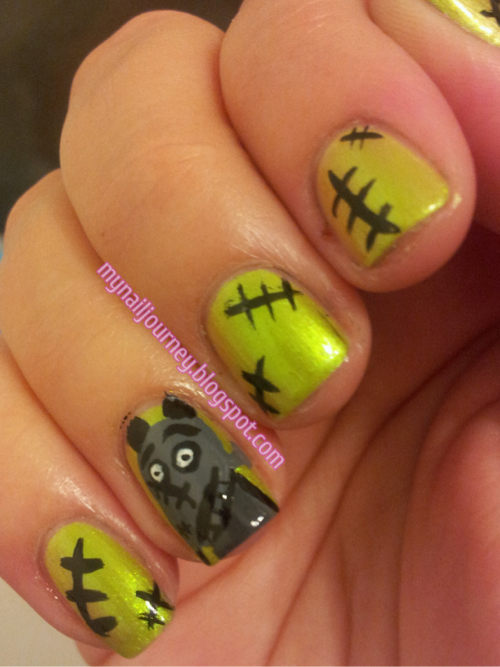
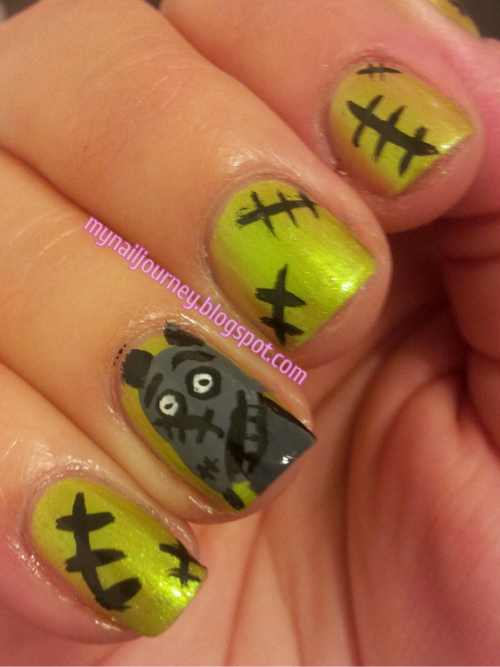
SassyNails Nail-Aween Nail Art Challenge: Day 6 - Frankenstein

       On Facebook SassyNails is hosting a self paced Nail-Aween Nail Art Challenge.  Today I have the sixth day of that challenge for you.  Our topic was Frankenstein.  I really wanted to do something than just a Frankenstein face and my mind wandered off to a new movie entitled, Frankenweenie.  In my opinion the Tim Burton movies are a little to creepy for me, so I won't be seeing this one, but I didn't mind doing this on my nails.  I think he looks more like a rat on my nails, but oh well.  At least I tried, right?!

Base coat: Sally Hansen Triple Strong Advanced Gel Nail Fortifier
Base coat: Tangy from Zoya - 2 coats

*All the artwork was done with Lamp Black and Titanium White acrylic paint from Artist's Loft.  Frankenweenie's body is a franken, lol, of the black and white.  I know, cheesy, but I had to.

These were taken inside without flash.


Here is the movie poster so you can see how I compare. 

This image is from Wikipedia.

So, what do you guys think, does he at least look some what close to the original?


CNT Halloween Nail Art Challenge: Pumpkins

       It is time to post another mani for the Halloween Nail Art Challenge that is being put on by the Facebook group, Crumpet's Nail Tarts.  I threw this mani together at the last minute last night so I don't really have too much to say about it except that I really like the way that it turned out!  I think it is very simple, cute, and different.  All though I haven't looked at everyone else's manis so I could be wrong about the unique look.  I did forget to leave my accent nail blank while painting the orange, so the Black Creme is over a layer of orange, but Wet N Wild's Black Creme is opaque in one coat anyways.  :-)  Napping before mani-ing is dangerous.  ;-)

Base coat: Sally Hansen Triple Strong Advanced Gel Nail Fortifier
Base color: Citrine from Sinful Colors - 1 coat, Black Creme from Wet N Wild - 1 coat
Over Citrine I layered one Layer of Serena and Chloe from Sinful Colors.  I wanted to do both layers in Serena and Chloe but I was afraid it would photograph more red than orange.
Pumpkins:  A mixture of Crimson Red, Lemon Yellow, and Titanium White acrylic paint from Artist's Loft applied with a dotting tool
Stems: A mixture of Viridian acrylic paint from Artist's loft and my franken orange, applied with a small detail brush
Face: Lamp Black acrylic paint from Artist's Loft, applied with a small detail brush
Top coat: Sally Hansen Insta-Dri Anti-Chip Top Coat

Taken inside without flash


Thanks for stopping by and do feel free to leave some comment love, or creative criticism.

Check out the other pumpkin nails below!


Sunday, October 21, 2012

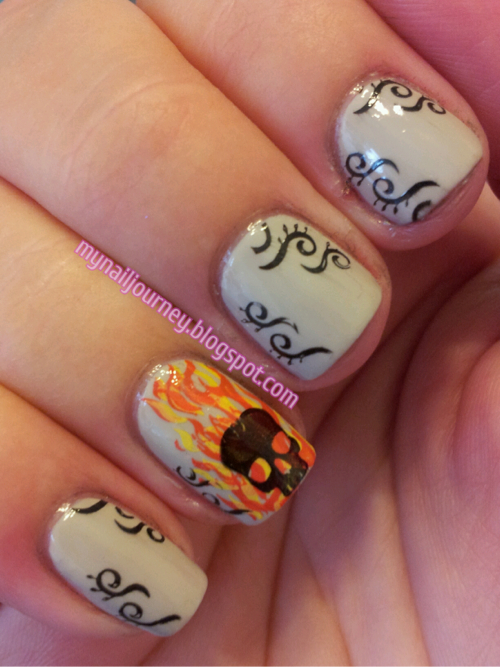
AIS: Halloween - Stamping With Mash Plates 48 and 29 Over OPI Skull and Glossbones

       It is Sunday and that means it is time for another stamping challenge in Adventures In Stamping, a group that I am in on Facebook.  Today's voted on theme was Halloween.  I am getting a little Halloween'd out with all of these other challenges I am involved with and wasn't going to participate until I remembered that I had a skull stamp in my collection that would never be used otherwise.  You see, I am not a skull person.  I don't understand why they are on everything right now, like the mustache.  But, to each their own.  I wasn't even sure how to use the skull in a mani when my husband grabbed the three plates I playing around with and told me what I should do.  The accent nail was his idea, except for the multiple stamping of the flames, and the little squirly q's were my idea.
     I just picked up Skull and Glossbones at T.J. Maxx for $3.99 yesterday and thought it would be perfect for a mani with a skull on it.  Upon further google searches, I am not even close to the only one who thought this was a good idea.  :-)  As described by Scrangie, Skull and Glossbones is a "ghostly light grey cream."  I thought this was going to be a three coater but after the second coat it has reached full opacity.  OPI is my favorite brand of polish and I really liked this more than I thought I would.  The half price price tag helped a lot, too.

Base coat: Sally Hansen Triple Strong Advanced Gel Nail Fortifier
Base coat: Skull and Glossbone from OPI - 2 coats
Top coat: Sally Hansen Insta-Dri Anti-Chip Top coat
Stamping plates: Mash 29 & 48
Stamping colors: Lightning and Heat Flash from Sally Hansen Insta-Dri and Stamp me! Black from Essence
Top coat: L.A. Colors Rapid Dry Top Coat

Taken inside without flash


This is how I came up with the little curls on the sides of each nail


I hope you guys enoy this!  Feel free to comment, I read each and every one of them.  They make me  happy!

SassyNails Nail-Aween Nail Art Challenge: Day 5 - Ghosts and Goblins

     Hey everyone.  It has been a few days since I have posted anything, but for good reason.  On Friday my friends and I took their kids out to a pumpkin patch close by and they do this corn maze every year.  This is one of the things I really look forward to every fall.  Escpecially since this year they did a Pac Man maze!  I love Pac Man!  Whenever I go to our local bowling alley I play Pac Man and Centipede for ever.  But really, who can resist those awesome, classic arcade games?!   
     The inspiration for these ghosts came from another YouTube video from IHaveACupcake.  Here is a link to the video.  I just thought these were so cute and I knew there was no way I would be able to do a goblin so I went with these.
     Unfortunately, I went a little to thick on my base color and never let it fully dry before applying the glow in the dark layers an it chipped off rather quick at work the next day.  :-(  Oh well. 

Base coat: Sally Hansen Diamond Strength Hardener
Base color: Ibiza from Zoya - 1 thick coat followed by Go With The Glow from Wet N' Wild Fantasy Makers - 3 coats
Ghosts: Titanium White acrylic paint from Artist's Loft and Lamp Black (eyes)
Top coat: Sally Hansen Insta-Dri Anti-Chip Top Coat

Taken inside without flash


Taken inside with flash


I tried so hard to get a picute of these glowing in the dark but my camera is part of my phone and the light from the screen would cancel out the glow in the dark and only take black pictures.  :-(  Just know that it was really cute.

This challenge is being put on by SassyNails and it is a self paced challenge.  We have until the end of October to create our ten manicures.

Check out all of the NailAween Nail Art Artists!

datyorkLOVES

Thursday, October 18, 2012

CNT Halloween Nail Art Challenge: Things That Go Bump In The Night

     If you're confused with the topic for today's challenge, don't worry, I was too.  Off to the side it said monsters and my brain isn't very creative so I was set on doing something with monsters.  I really wanted to do Monsters, Inc. Sulley and Mike, but as I watching a YouTube tutorial on One Stroke Petals another tutorial cought my eye.Play 
I am now in love with IHaveACupcake's YouTube channel.  If you are ever low on inspiration, please check her channel out!
     This mani was so easy to re-create and I am so happy with how it turned out.  I hope that you guys like it as well.
*All acrylic paint is from Artist's Loft*
*All black, unless otherwise specified, is Lamp Black acrylic paint*
*All white, unless otherwise specified, is Platinum White acrylic paint*
Base coat: Sally Hansen Diamond Strength Hardener
Top coat: Sally Hansen Insta-Dri Anti-Chip Top Coat
Pinky: face - Black Cream from Wet N' Wild - 1 coat
            yellow: Lemon Yellow acrylic paint
            pink: My own creation using Platinum White and Crimson Red acrylic paint
Ring finger: French White Tip from NYC - 3 coats
                     bow: same mixture as used for the cat nose
Middle finger: Black Creme from Wet N' Wild - 2 coats
                        green: a mixture of Viridian, Platinum White, and Lemon Yellow acrylic paint
Pointer finger: Sassy from Revlong - 2 coats
                        eyeball: Cobalt Blue acrylic paint
Thumb: Wet Cement from Wet N' Wild - 3 coats
Taken inside with flash
If you would like to see what the other ladies in this group are doing, please check out their blogs using the thumbnails below.
Thanks for stopping by and please feel free to comment.  I love hearing from you gals and guys.
 

Monday, October 15, 2012

SassyNail Nail-Aween Nail Art Challenge: Day 4 Mummy Nails FAIL!!!

     I decided to skip MSMD (Monkey See, Monkey Do) Monday's again this week so that I could get past my mummy nail challenge hurdle.  I have been putting this off for far to long and I knew that since the month was half way over today I just needed to buck up and do this.  See, my problem is that I don't like to do the same type of thing as everyone else.  I like to be a little different.  (Funny because I spent my entire childhood trying to be like everyone else, but that is an entirely different issue :-))  Everyone in the challenge came up with awesome mummy mani's and I thought mine would be just as creative, but alas, it is not.  My husband thought it was a gingerbread man!!!  See, fail!  Lol.  I don't even want to show you guys this but I promised myself when I started my blog that I would post the good, the bad, and the ugly.  I don't think I knew what I was getting myself into.
     There is a silver lining to this mani though, well actually, two.  I did NO cleanup and I got to use my first ever China Glaze polish!!!  I just bought it the other day when I was shopping for my nail polish buddy and got uber jealous of the beauties I was purchasing for her!  I'm Not Lion was just released as part of China Glaze's On Safari collection.  I only wanted two of the polishes from the collection, and this was one of them!

Base coat: Sally Hansen Diamond Strength Hardener
Base color: I'm Not Lion from China Glaze - 3 coats
White base color: White On The Spot from Milani - 1 thick coat
Mummy/gingerbread man ;-): Black acrylic paint from Artist's Loft
Top coat: Sally Hansen Insta-Dri Anti-Chip Top Coat

Taken inside my truck with the flash because I don't care how the picture turned out!


You can check out the original image here.  Trust me, it's much better looking than mine.  

This challenge is being put on by SassyNails over on Facebook.  If you're not a Facebook person you can check out her blog here.

If you want to see some much better mummy manicure's please check out these other lovely ladies blogs!


Thursday, October 11, 2012

CNT Halloween Nail Challenge: Witches

     Today in the Facebook group, Crumpet's Nail Tarts, our challenge is witches.  As with all these challenge post's I never have any idea what the heck I am going to do.  All I knew is that I wanted to use Scandalous from Revlon as the base.  Scandalous is a black base with purple hex and micro glitter.  This formula dried very fast on me and is opaque in two coats.  I am a sucker for a dark color and this seemed perfect for a Halloween mani.  I was going to use a dark purple creme for my accent nail but then figured my witch design wouldn't show well against a dark base.  Then I saw Essie's Pretty Edgy and knew that this was the perfect accent color.  A beautiful green that would be perfect for a witches face.  And the rest is history from there!

Base coat: Sally Hansen Diamond Strength Hardener
Base color: Scandalous from Revlon -2 coats
Accent color: Pretty Edgy from Essie - 2 coats
Witch colors: Lamp Black and Lemon Yellow from Artist's Loft acrylic paint
Top coat: Sally Hansen Insta-Dri Anti-Chip Top Coat


I hope you enjoy my witch!  If you want to check out some crazy, awesome witch manis check out these ladies blogs who are also doing this challenge.


Tuesday, October 9, 2012

CNT Halloween Challenge Day 3: Zombies

     Today in Crumpet's Nail Tarts Halloween Challenge we are supposed to do Zombies.  Now, let me start off by saying, I am not a fan of zombies.  Don't like them, don't watch them, don't know what they look like, don't want anything to do with them.  Off to Google I went... (Does this sound familiar?  I love Google).  I searched "cute zombies" and found this image.  It was the cutest one I could find and I figured that I could re-create it.  I think I did a pretty good job.  
     After I painted Ibiza on my ring finger I painted the entire zombie in white acrylic paint so that when I added the color it would pop.  

Base coat: Sally Hansen Diamond Strength Hardener
Base color:
  accent nail: Ibiza from Zoya - 1 coat
  other nails: Night Prowl from Wet N' Wild - 2 coats - How ironic, right!  Perfect name.
Zombie attire:
  face and hand: San Tan-Tonio from O.P.I.
  brain: The One That Got Away from O.P.I. mixed with white acrylic paint
  shirt: I Need A Refresh-Mint from Wet N' Wild
  pants: Why Not from Sinful Colors
  heart: The One That Got Away from O.P.I.
  outline: Lamp Black from Artist's Loft acrylic paint
Top coat: Sally Hansen Insta-Dri Anti-Chip Top Coat      


AND a close up of my cute little zombie...

I hope you guys like my take on the zombie mani.  If you are interested in more gorey zombies, check out the other manis from this challenge.


Monday, October 8, 2012

SassyNails NailAween Nail Art Challenge: Day 3 - Bloody Nails

     Hey everyone!  Today I am skipping MSMD Monday to get along with one of my nail art challenges.  This one is hosted by SassyNails on Facebook.  I am on day three and today's challenge was bloody nails.  Now, I'm sure you all have seen  bloody nails around, especially around this time of year, and they all seem to be the same to me.  Now this is ok but I really wanted to do something different, so I came up with this idea.
     After I painted a white base on my nails and it dried, I painted on some red acrylic paint, waited about 30 seconds for it to dry a little and then rolled my finger through it to create a bloody finger print effect.  I think that this turned out pretty cool.  I went to clean up the mani but decided it looked much bloodier if I didn't.  What do you guys think?

Base coat: Sally Hansen Diamond Strength Hardener
Base color: Superstar from Pure Ice - 2 coats
Acrylic paint: Crimson Red from Artist's Loft
Top coat: Sally Hansen Insta-Dri Anti-Chip Top Coat

These were taken with the flash because it picked up the red the best


I hope you like these!

For more NailAween Nail Art mani's feel free to look at these other blogs!

Check out all of the NailAween Nail Art Artists!

datyorkLOVES


Friday, October 5, 2012

Sassy Nails Nailaween Challenge: Day 2 - Matte Doticure

     It is time for me to post day 2's post for the Nailaween Nail Art Challenge.  There are 10 topic in this challenge and the one thing that I love about this is that it is self pace.  We have until October 31 to post all of our manicures.  This works great seeing as how I am in like a gazillion challenges this month...  Not to sure why I did this, but oh well.  It is keeping me busy and I like it.
     The second day of this challenge is to produce a matte doticure.  I was really excited for this one because I have wanted to do a doticure like the one I am showing you for quite some time.  I am so let down with how this turned out.  I had such high hopes and it wasn't what I wanted.  It would have worked if I had a more opaqe orange, but this one would barely show up on the black so I ended up having to use a white base, only for the dots that are overlapping the black, and you can tell that it isn't right.
     I applied the black over the orange using the tape method. After the black dried I went in and added the dots with a dotting tool to give it the interlocking look.

Base coat: Sally Hansen Diamond Strength Hardener
Base color: Citrine from Sinful Colors - 2 coats
Black: Black Creme from Wet N' Wild
Top coat: Essence Nail Art Special Effect! Topper


Taken inside with flash


Taken inside without flash


Well I hope that you like this even though I don't. :)

Feel free to check out these other ladies blogs who are partcipating in this challenge.

Check out all of the NailAween Nail Art Artists!

datyorkLOVES


Thursday, October 4, 2012

CNT Halloween Nail Art Challenge Day 2: Black Cats

     Today is day 2 of Crumpet's Nail Tarts Challenge.  Our challenge today is, "black cats".  I wasn't quite sure what to do so I decided to Google Robin Moses + cats and was super excited with what I found.
 

Now of course mine isn't as good as the amazing, spectacular, glorious Robin, but I think it is pretty dang good.  I mean, you can tell my cat is a cat, can't you?!
Base coat: Sally Hansen Diamond Strength Hardener
Base color: Audrey from Zoya - 2 coats
Top coat: Sally Hansen Insta-Dri Anti-Chip Top Coat
Acrylic paints: Lemon Yellow and Lamp Black from Artist's Loft


How did I do?

Please feel free to check out these other "black cat" manis. :-)


Tuesday, October 2, 2012

Sassy Nails Nailaween Art Challenge: Day 1 - Water Marble

     Today marks day one of my second Halloween nail challenge.  I am involved in two Halloween challenges, Adventures In Stamping on Sunday's, MSMD Monday's, and also in an ABC's of nails on Wednesdays.  I have my work cut out for me this month.  If all goes as planned I should have a new post for you every single day this month.  *Not really sure how I got myself into this* :-)
Here are the rules for this challenge taken directly from Sassy Nail's Facebook page:

Nail-Aween Nail Art Challenge will be from October 1-31st. 

Rules of this challenge:
-Complete it during the month of October, so you have 31 days to do all 10 challenges.

-Add list of Nail-Aween Nail Artists so we can all be linked up. There will be a post with additional information on Sep 30th. Link will be shared here, so dont worry. 
***This is at the bottom of my post***
Disclosure: This is a self paced challenge. You will set up your own schedule at your own pace. 

WooHoo and Happy Halloween!

*Update. I am taking blogs and FB pages until October 10th.


     I cringed when i saw that today's mani was a water marble.  They are so stinking messy and I hate having stuff on my hands.  I know, I'm weird.  I have this thing about anything, (water, lotion, food, anything) being on my hands.  *Hangs head in shame***  I think that I was high from all the fumes by the time that I was done with this.  I think it turned out OK.  My favorite nail has to be my pointer finger.

Base coat: Sally Hansen Diamond Strength Hardener
Base color: Sunrise, Sunset from Sally Hansen Diamond Strength - 1 coat
Water marble colors: Clementine from Sinful Colors and Black Creme from Wet N' Wild 
Top coat: Sally Hansen Insta-Dri Anti-Chip Top Coat