Sunday, October 21, 2012

F is for... Finger Paints Flakie Polish

     This post if for the ABC Nail Art Challenge I am participating in with the Facebook Group Llama Nails.  This week's letter is F.   It took me all week and then some to figure out what I was going to do for this mani.  I then remembered that I had received one of my biggest lemmings, Finger Paints Twisted.  I first learned about Twisted from Colette of My Simple Little Pleasures when I first started my obsession with polish.  I had been into nail art for about a month or two and had heard about a water marble.  I had been told to watch her video's on YouTube and started following her, I was hooked.  She posted a video about her going out on Christmas Eve and about how excited she was that she found the Finger Paints Special Effects line that was scheduled to be released in the next week.  I had never heard of a Sally's before and didn't put to much thought into trying to find these because I would surely be able to find them soon enough.  Boy, was I wrong.  These are all very hard to find a few months after the release.  Especially Twisted.  You will see why when I show you the pictures.  I was lucky enough to stumble upon someone selling it in one of the polish exchange groups I am in on Facebook.  When I thought this had arrived at my house my husband stole the package and made me chase him all around the house, and I DO NOT run.  That is how excited I was to get this polish!

Base coat: Sally Hansen Diamond Strength Hardener
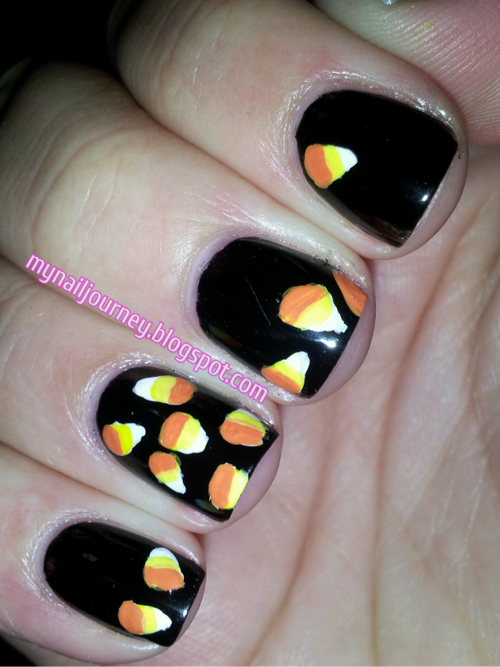
Base color: Black Creme from Wet N Wild - 2 coats
Flakie: Twisted from Finger Paints - 1 coat
Top coat: Sally Hansen Insta-Dri Anti-Chip Top Coat

These were all taken outside in indirect light


I hope you like this post!

You can check out the other F posts using the links below.  Have a great day!


SassyNails Nail-Aween Nail Art Challenge: Day 5 - Ghosts and Goblins

     Hey everyone.  It has been a few days since I have posted anything, but for good reason.  On Friday my friends and I took their kids out to a pumpkin patch close by and they do this corn maze every year.  This is one of the things I really look forward to every fall.  Escpecially since this year they did a Pac Man maze!  I love Pac Man!  Whenever I go to our local bowling alley I play Pac Man and Centipede for ever.  But really, who can resist those awesome, classic arcade games?!   
     The inspiration for these ghosts came from another YouTube video from IHaveACupcake.  Here is a link to the video.  I just thought these were so cute and I knew there was no way I would be able to do a goblin so I went with these.
     Unfortunately, I went a little to thick on my base color and never let it fully dry before applying the glow in the dark layers an it chipped off rather quick at work the next day.  :-(  Oh well. 

Base coat: Sally Hansen Diamond Strength Hardener
Base color: Ibiza from Zoya - 1 thick coat followed by Go With The Glow from Wet N' Wild Fantasy Makers - 3 coats
Ghosts: Titanium White acrylic paint from Artist's Loft and Lamp Black (eyes)
Top coat: Sally Hansen Insta-Dri Anti-Chip Top Coat

Taken inside without flash


Taken inside with flash


I tried so hard to get a picute of these glowing in the dark but my camera is part of my phone and the light from the screen would cancel out the glow in the dark and only take black pictures.  :-(  Just know that it was really cute.

This challenge is being put on by SassyNails and it is a self paced challenge.  We have until the end of October to create our ten manicures.

Check out all of the NailAween Nail Art Artists!

datyorkLOVES

Thursday, October 18, 2012

CNT Halloween Nail Art Challenge: Things That Go Bump In The Night

     If you're confused with the topic for today's challenge, don't worry, I was too.  Off to the side it said monsters and my brain isn't very creative so I was set on doing something with monsters.  I really wanted to do Monsters, Inc. Sulley and Mike, but as I watching a YouTube tutorial on One Stroke Petals another tutorial cought my eye.Play 
I am now in love with IHaveACupcake's YouTube channel.  If you are ever low on inspiration, please check her channel out!
     This mani was so easy to re-create and I am so happy with how it turned out.  I hope that you guys like it as well.
*All acrylic paint is from Artist's Loft*
*All black, unless otherwise specified, is Lamp Black acrylic paint*
*All white, unless otherwise specified, is Platinum White acrylic paint*
Base coat: Sally Hansen Diamond Strength Hardener
Top coat: Sally Hansen Insta-Dri Anti-Chip Top Coat
Pinky: face - Black Cream from Wet N' Wild - 1 coat
            yellow: Lemon Yellow acrylic paint
            pink: My own creation using Platinum White and Crimson Red acrylic paint
Ring finger: French White Tip from NYC - 3 coats
                     bow: same mixture as used for the cat nose
Middle finger: Black Creme from Wet N' Wild - 2 coats
                        green: a mixture of Viridian, Platinum White, and Lemon Yellow acrylic paint
Pointer finger: Sassy from Revlong - 2 coats
                        eyeball: Cobalt Blue acrylic paint
Thumb: Wet Cement from Wet N' Wild - 3 coats
Taken inside with flash
If you would like to see what the other ladies in this group are doing, please check out their blogs using the thumbnails below.
Thanks for stopping by and please feel free to comment.  I love hearing from you gals and guys.
 

Tuesday, October 16, 2012

CNT Halloween Nail Art Challenge: Free Style

     Today in the Facebook group,Crumpet's Nail Tarts, our challenge topic is free style.  I took this to mean we could do whatever we wanted.  I saw this candy corn tutorial over on Nail Wish's blog a few weeks ago and I have been dying to try it out.  I wish mine looked as good as hers!  But as we all know, practice, practice, practice.  It's funny how good you can think something is until you see it next to a master's work! :-)

Base coat: Sally Hansen Diamond Strenght Hardener
Base color: Black Creme - 1 coat
Candy corns: Artist's Loft acrylic paint in Titanium White, Lemon Yellow, and I made the orange out of Lemon Yellow, Crimson Red, and a touch of Titanium White
Top coat: Sally Hansen Insta-Dri Ant-Chip Top Coat

Taken inside with the flash


Check out these other free style manicures that are sure to impress!


Monday, October 15, 2012

SassyNail Nail-Aween Nail Art Challenge: Day 4 Mummy Nails FAIL!!!

     I decided to skip MSMD (Monkey See, Monkey Do) Monday's again this week so that I could get past my mummy nail challenge hurdle.  I have been putting this off for far to long and I knew that since the month was half way over today I just needed to buck up and do this.  See, my problem is that I don't like to do the same type of thing as everyone else.  I like to be a little different.  (Funny because I spent my entire childhood trying to be like everyone else, but that is an entirely different issue :-))  Everyone in the challenge came up with awesome mummy mani's and I thought mine would be just as creative, but alas, it is not.  My husband thought it was a gingerbread man!!!  See, fail!  Lol.  I don't even want to show you guys this but I promised myself when I started my blog that I would post the good, the bad, and the ugly.  I don't think I knew what I was getting myself into.
     There is a silver lining to this mani though, well actually, two.  I did NO cleanup and I got to use my first ever China Glaze polish!!!  I just bought it the other day when I was shopping for my nail polish buddy and got uber jealous of the beauties I was purchasing for her!  I'm Not Lion was just released as part of China Glaze's On Safari collection.  I only wanted two of the polishes from the collection, and this was one of them!

Base coat: Sally Hansen Diamond Strength Hardener
Base color: I'm Not Lion from China Glaze - 3 coats
White base color: White On The Spot from Milani - 1 thick coat
Mummy/gingerbread man ;-): Black acrylic paint from Artist's Loft
Top coat: Sally Hansen Insta-Dri Anti-Chip Top Coat

Taken inside my truck with the flash because I don't care how the picture turned out!


You can check out the original image here.  Trust me, it's much better looking than mine.  

This challenge is being put on by SassyNails over on Facebook.  If you're not a Facebook person you can check out her blog here.

If you want to see some much better mummy manicure's please check out these other lovely ladies blogs!