Showing posts with label Flakie. Show all posts

Sunday, October 21, 2012

F is for... Finger Paints Flakie Polish

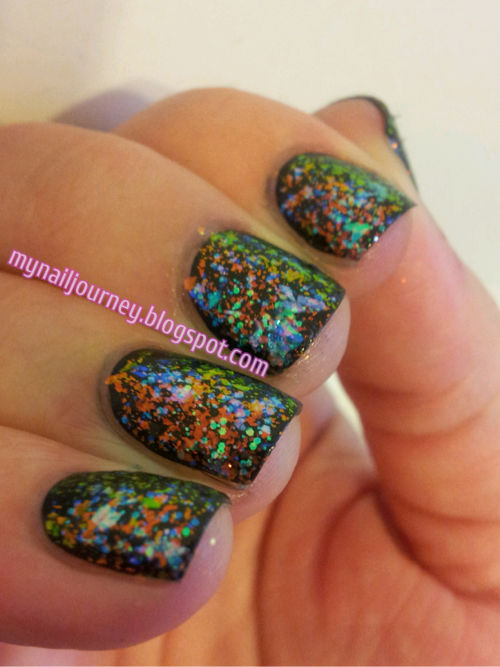
     This post if for the ABC Nail Art Challenge I am participating in with the Facebook Group Llama Nails.  This week's letter is F.   It took me all week and then some to figure out what I was going to do for this mani.  I then remembered that I had received one of my biggest lemmings, Finger Paints Twisted.  I first learned about Twisted from Colette of My Simple Little Pleasures when I first started my obsession with polish.  I had been into nail art for about a month or two and had heard about a water marble.  I had been told to watch her video's on YouTube and started following her, I was hooked.  She posted a video about her going out on Christmas Eve and about how excited she was that she found the Finger Paints Special Effects line that was scheduled to be released in the next week.  I had never heard of a Sally's before and didn't put to much thought into trying to find these because I would surely be able to find them soon enough.  Boy, was I wrong.  These are all very hard to find a few months after the release.  Especially Twisted.  You will see why when I show you the pictures.  I was lucky enough to stumble upon someone selling it in one of the polish exchange groups I am in on Facebook.  When I thought this had arrived at my house my husband stole the package and made me chase him all around the house, and I DO NOT run.  That is how excited I was to get this polish!

Base coat: Sally Hansen Diamond Strength Hardener
Base color: Black Creme from Wet N Wild - 2 coats
Flakie: Twisted from Finger Paints - 1 coat
Top coat: Sally Hansen Insta-Dri Anti-Chip Top Coat

These were all taken outside in indirect light


I hope you like this post!

You can check out the other F posts using the links below.  Have a great day!


Friday, September 7, 2012

Glue Base Coats for Glitter Manicures: How Effective Is It?

     Today's post is my attempt at using Elmer's School Glue as a base for glitter polishes.  If you are thinking, what the hell is this lady talking about, I really think you HAVE to read LabMuffin's blog post.  Did you read it?  Don't lie.  Just do it.  It is fast and easy and you will thank me.
     Ok, now that you have read Lab Muffin's blog post, I feel it is of dire importance that you also check out this blog post from Pretty Purple Polish, where she showed me that I really needed to try this.  She did a 5 day wear test of not only the glue as a peel of base, but also included different base coats and orders of application to show which way worked the best for her.  Now, you may be wondering why, with this wealth of knowledge, I feel the need to share my experience with you.  Let me tell you my story.
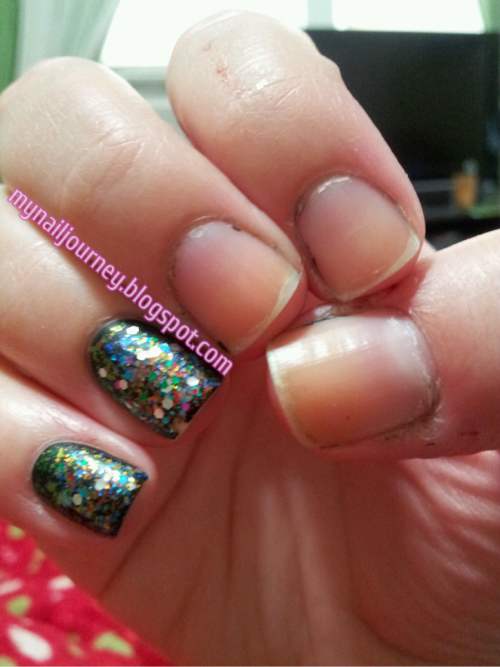
     I wash my hands a lot.  And when I say a lot, I mean probablly somewhere close to 100 times a day.  No, I am not a germaphobe, but I work in food service.  My hands are constantly in and out, in and out, in and out of water.  My hands crack, bleed, chap, and hurt.  But at least you know I won't make you sick!  (It takes a lot for me to have my hands picture ready for you guys).  I knew that I would be a perfect test subject for this new phenomenon.  I honestly didn't think that it would work.  I wish that I could tell you guys that it was great and that I will be doing this all the time, but I can not say that.  :-(  With in four hours my polish was gone from three fingers.  Before my shift was over, it was completely gone.  I am so sad that I can't use this method because it really does just peel right off.  I was uber, uber careful like Lab Muffin said to be.  I made sure there was no glue what so ever touching my skin, but it still didn't help.
     I will however say that I may have gotten a little carried away with the amount of glitter and top coats that I used, which could of had a harsher effect on the outcome of my testing.  I may have to try this again with only one or two layers of glitter and a top coat.  I do, however, plan on using this method when I do swatches.  It will be fantastic to remove the polish within a minute rather than 15.

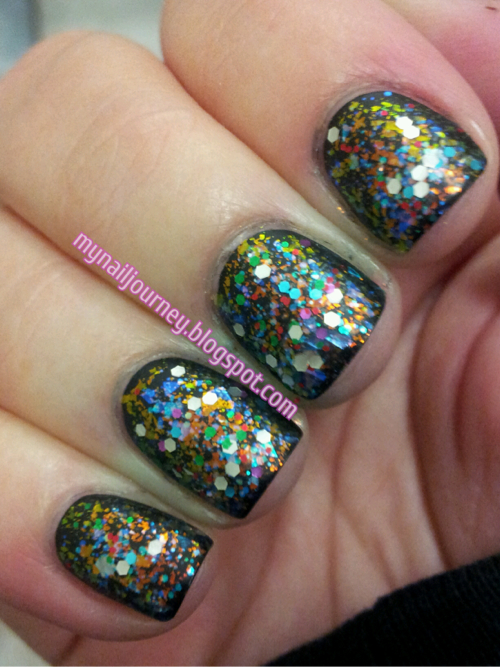
Base coat: Elmer's School Glue
Base color: Black Cream from Wet N Wild - 1 coat
Glitter- in order of application: Green Ocean from Sinful Colors - 1 coat
Shine of the Times from Essie - 1 coat
Party of Five Glitters from Wet N' Wild - 1 coat 
Top coat: Essence Nail Art Special Effect! Topper - 2 coats

As you can read, a lot of layers.

At least I got a beautiful mani out of this experiment.


All of these were taken inside with out the flash.


And here is my nails on my lunch break. :-(  I didn't want to show my thumb but whated you guys to see how it peeled off.  Side note, my cuticles used to all look like my thumb!  I can't believe how much blogging has made me change my terrible cuticle habbits!


So, have you tried using a glue as your base coat?  What about the glittler removal method?  Do you scrub, scrub, scrub it off, or have you just sworn off glitter all together?  I hope you like this post and feel free to comment, comment, comment.  :-)


Monday, September 3, 2012

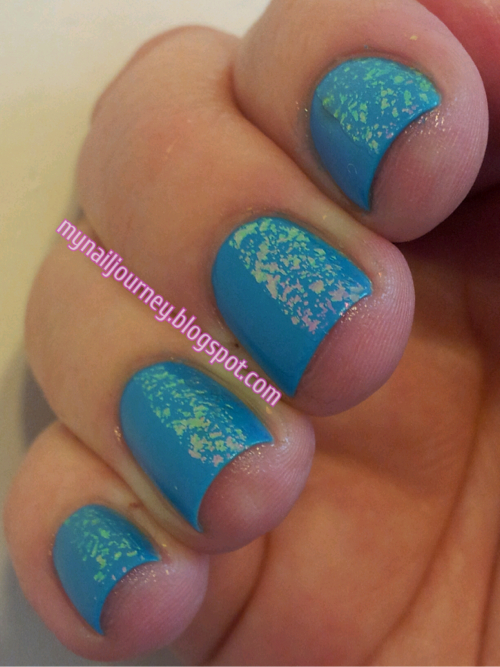
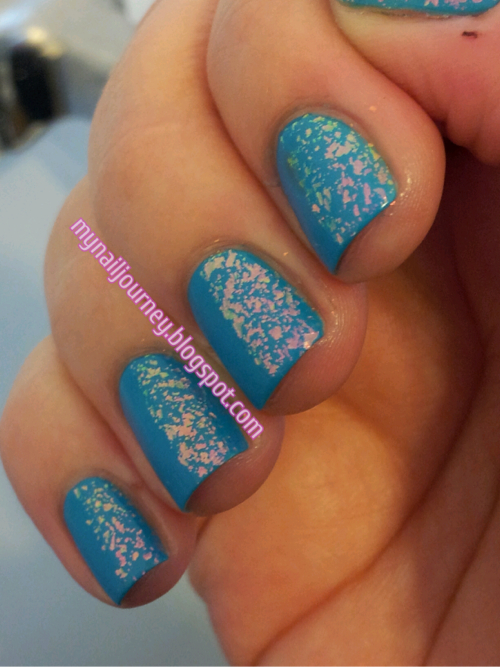
Blue Me Away! by Sally Hansen and Shine of the TImes Tape Mani

     It is time for another installment of Monkey See, Monkey Do.  If your new to my blog and have never heard of this, it is where a group of us, Crumpet's Nail Tarts, recreate mani's we see around the web, (usually from Pinterest or Facebook,) and post them on to our blogs.  I found the inspiration for today's mani on Victoria's Nails Blog.
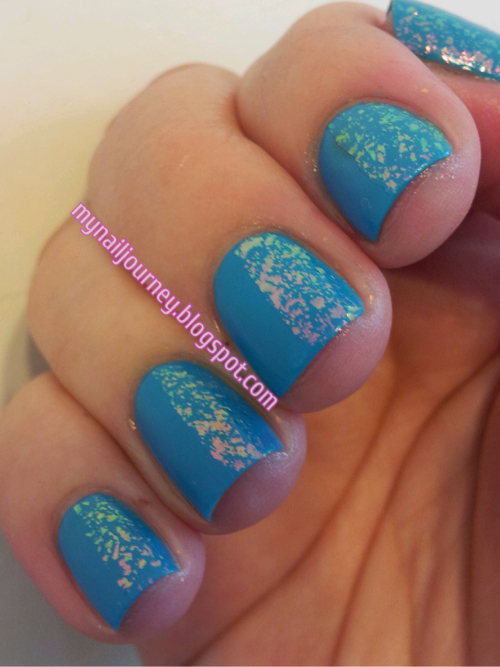
     I kinda did something stupid and used Blue Me  Away! from Sally Hansen, which has a glossy finish, instead of just opting to use Phoebe from Zoya, which is already a matte polish!  Ugh.  I didn't think about this until I had to redo my pointer finger for the THIRD time due to being impatient!  Oh well.  Live and learn, right.  When I applied Shine Of The Times, I used to tape to make sure I got straight lines. :-)  I love me some straight lines.


Base coat: Sally Hansen Diamond Strength Hardener

Base color: Blue Me Away! from Sally Hansen - 2 coats

Flakie: Shine Of The Times from Essie

Top coat: Nail Art Special Effect! Topper from Essence - I did not apply this over Shine Of The Times


All pictures were taken inside with out the flash


Can you tell that I didn't use tape on my pointer finger?  I pretty much gave up.  :-(  What do you guys think of this?  If you want to see some more Monkey See, Monkey Do mani's, check out these other blogs.


(Submissions close in 6d 7h 19m)
Link tool by inlinkz.com