Monday, April 2, 2012

Weekend mani

     This mani was supposed to be for Friday night but I had a heck of a time with it.  I have never been so frustrated with one before.  I painted on three coats of the white and threw my top coat on and then decided to take a nap because I was going to have a late night.  When i woke up to ATTEMPT the stamping portion of this mani I had sheet marks EVERYWHERE.  :(  I didn't have time to fix it before I had to be at my friends so I just left the white as was.  I ended up fixing the four nails that had sheet marks everywhere the next day.  After they dried I tried to use my cherry stamp but it would not pick the image up off of the plate.  The entire reason I bought this plate was for the cherries.  It is an inside joke between my friend who passed away a few years ago and I so anytime I see cherries I buy them.  I was about to throw in the towel when I realized I had just won a dotting set from Jen's Nail Files on facebook and this was the perfect way to try them out.  This turned out to be one of my favorite manicures, (I think I say this in every post) and I have worn it for two days!  I never wear one longer than a day!


Here is the dotting set that I won.  She threw in a few little surprise gifts too!


Three coats.  I LOVE this white


Finished product


Base coat: Avon Smooth Beginnings
Base Color: Bubble Bath by Sinful Colors - 3 coats
Red and green for cherries - acrylic paint
Top Coat: INM Out the door

If you look at my pinky you can see that the cherry close to the top of the nail is a lot bigger than the rest of them.  This was the stamp I tried to do but it would only pick up half of the image.  Trust me.  I tried about 15 times to do this and finally gave up.  I used the biggest dotting tool in the set for the cherries and painted the stems on with a brush.

Have you guys had any major stamping flops?  And what about that white.  I just am in love with it.  It is so pearly and ironically enough, it looks exactly like a bottle of shower gel I just purchased the other day.

Sunday, April 1, 2012

The Liebster Award: My first blogger award!


     I am so excited!  I never thought the day would come that I would receive a blogger award.  I was excited when I had one GFC (Google Friend Connect) follower which meant I wasn't hated by the entire world for my love of polish and nail art!  The name of this award kinda scared me because I have never heard "liebster" and it was not explained in a lot of other blogs I have seen awarded it.  So before I wanted to write this post and embarrass myself if it actually meant "dog crap" or "worlds worst blogger" award, I looked for the definition to liebster.  Turns out it a German word and means darling, beloved, boyfriend, and sweetheart.  Ahhhh, how sweet is that.  It made me smile once I read the definition.  There are only a few rules for the award and they are as follows:
     1. Put the link to who gave you the award.
     2. Put the award on your post.
     3. Choose 5 blogs with under 200 followers to receive the award.
     4.  Let them know you awarded them.

First off, can I just say that I love that someone thought to create an award to help new bloggers feel great about themselves and also help promote other new bloggers in the gigantic blogosphere!?!?!  What a neat idea.

I was given this award by The Varnished Valkyrie.  In her first blog post she writes, "Why the Varnished Valkyrie?  I assume if I were flying out of the sky on my horse, getting ready to choose who dies in battle, my nails would be wicked awesome."  He he.  These girls are funny.  I highly suggest checking them out.


Now time for my tags:
Enchanting Cosmetics
Voir-la-beaute
Adventures of the Nail Friend
Nails By Carol
Peace, Love, Lacquer

Wow, this post took me longer to write than I thought.  :)  But so worth it.  I am off to tell these ladies that they have been tagged for an award.  Hopefully they have as much fun spreading the blog love as I have.

Thursday, March 29, 2012

My first stamping experience

   I was at Fred Meyer the other day about ready to leave with my handful of polish when I saw the Essence rack.  I decided to stare at it and was about to leave again when I looked at the third or fourth shelf from the bottom and in a 2 inch by 2 inch box saw a stamping kit, for 3 dollars!  I was super aprehensive because I thought there was no way this was going to work but I thought, well, if it doesn't work, it is only 3 dollars.  I didn't buy their stamping polish, which they have in black and white for 1.99, and I held off on the other plates until I tried the kit first.  I came home and threw on a quick bright mani and set to stamping.  It was SO EASY!  I didn't watch any videos and figured out how to do it in less than a minute.  I went back the next day and bought 3 of the 4 plates they have.  I didn't buy the one with all the animal prints on it because I am generally a non animal print person.


This is what came in the original kit for $2.99

These are the extra plates that I picked up for $1.99


I was playing with a bunch of different colors to see what would stamp best


The stamp color is O.P.I. Lincoln Park at Midnight
Sorry for the chip in the index finger and the pink paint on my right finger.  I was going to do a different post with this but decided not to.

So, have you guys stamped at all?  Was it easy to pick up or do you not like it?  What colors have you found that stamp well?


Base Coat - Avon Smooth Beginning
Orange - Sun Kissed by Sally Hanson
White tips - acrylic paint
Stamps - assorted colos


Tuesday, March 27, 2012

My going out mani

     Last weekend I went out dancing for the first time in months.  The first time I have gone out since  I started this blog actually, so I wanted to make sure I did my nails cute so that no one could see them in the dark bar.  Lol.  It is the thought that counts, right?  I picked up the Zoya matte sampler the other day and thought what the hay.  Matte polishes are slowly growing on me.  I guess maybe because the matte finish makes them look dull to me?
  If you guys haven't learned that doing art work for your nails with acrylic is possibly the best idea ever, you need to figure it out girlfriends.  I wasn't quite sure why so many people didn't use polish for their art work until I heard that you could do clean up with rubbing alcohol and it wouldn't affect the polish.  What better way to screw up artwork and not have to redo the entire nail again!  I tell you what.  Learning this has saved me hundreds of tears!

finished product

Three coats inside with flash


Three coats outside with no flash


Base Coat-Avon Smooth Beginnings
Base Color-Phoebe by Zoya - 3 coats
White tips and black stripes - acrylic paint
Top Coat - LA Colors - was only place on the ring finger.  I didn't put a top coat on the other nails because I wanted to keep the matte look on the other nails.

What do you guys think of matte finishes?  Yay or Ney?


Monday, March 26, 2012

Black and White Challenge Day 7

Black and White with glitter

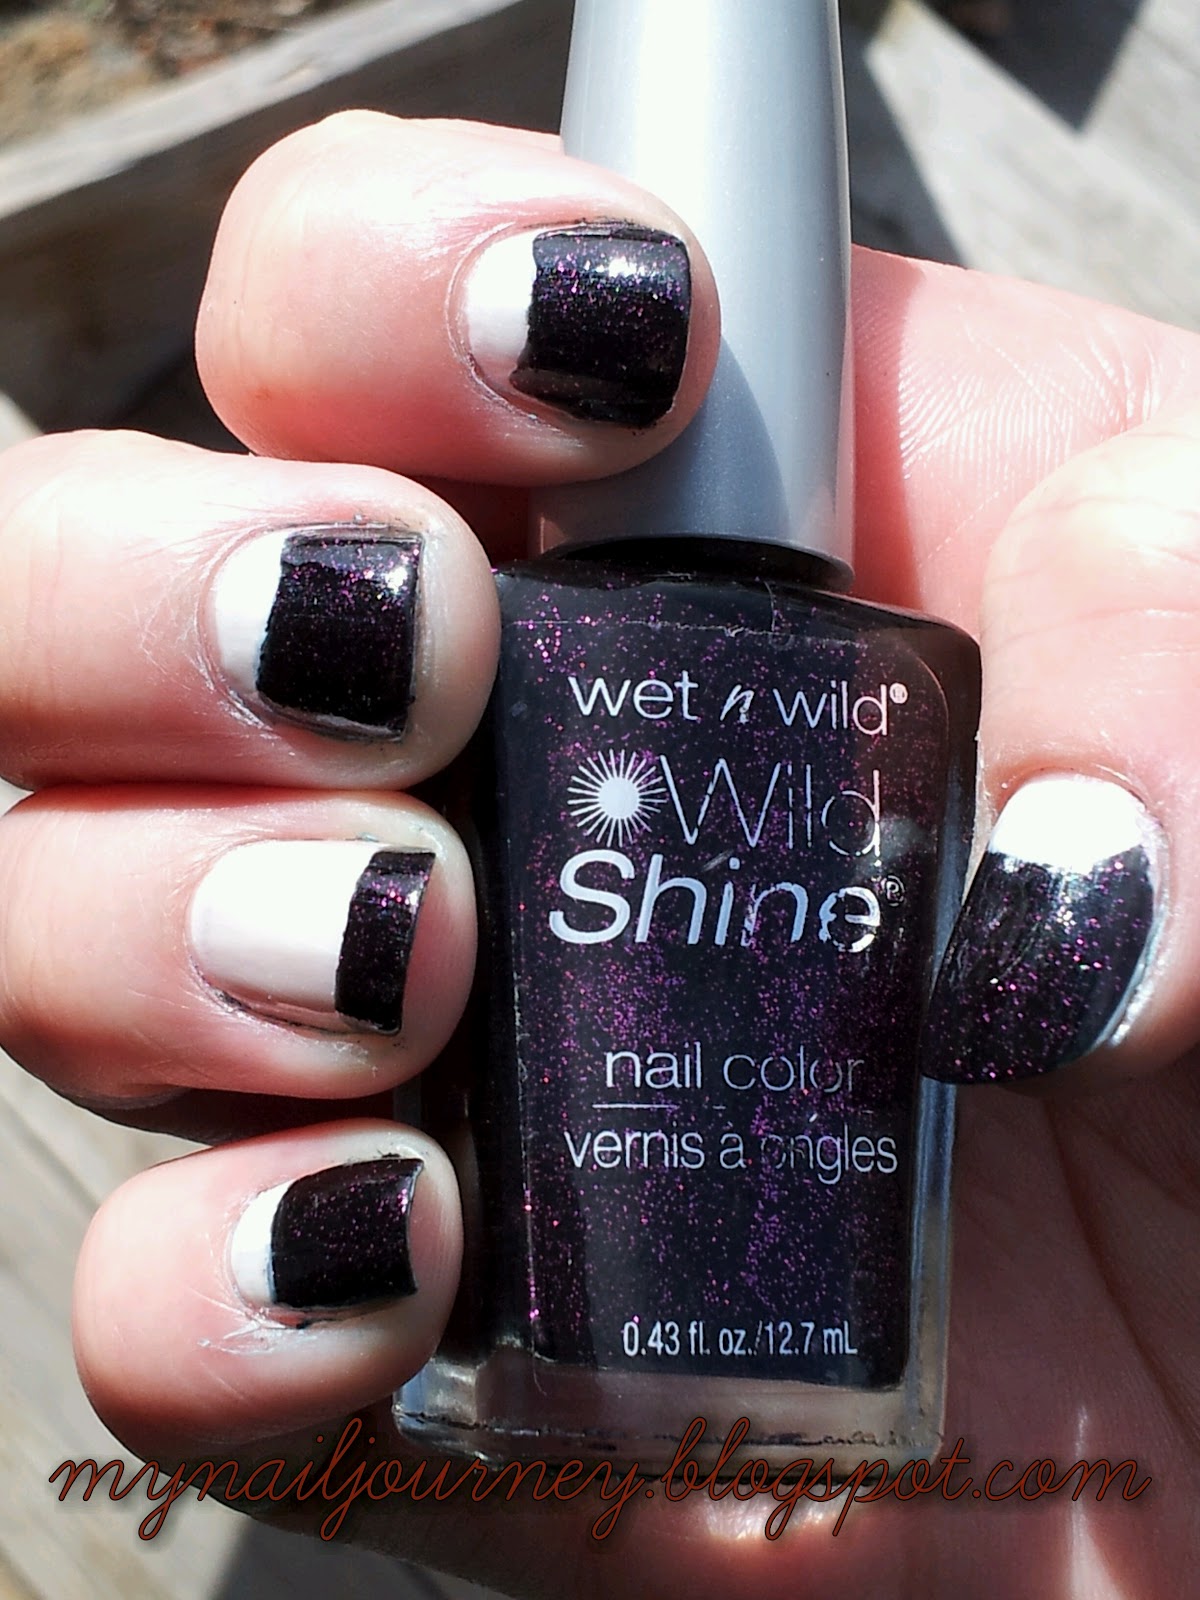
As I have said before, I believe glitter can make any many look better.  I stand by my decision.  I have been wanting to use this color for this challenge ever since I started doing it but kept holding off since there was a specific day for glitter.  I used to not be a big fan of the half moon mani's but I am a recent convert.  I am liking them more and more.  Now I know this post is a few days behind.  That is because the original mani that I did for this day was not well planned out and pretty much looked like poo.  So I decided that I would wait a few more days for some better inspiration and I am much more pleased with the result.  A fairly simple mani, but I still like it.


Bam bam!  What do you think?

Base coat - Avon Smooth Beginnings
Base color - Bubble Bath by Sinful Colors - 2 coats
Tip color - Night Prowl by Wet N' Wild - 2 coats
Top coat - LA Colors