Showing posts with label GLITTER. Show all posts

Sunday, January 6, 2013

31 Day Challenge - Day 6: Your Favorite Color Family

       Happy Sunday!  My post for you today is the 6th post in the 31 day challenge being hosted by Debbie Crumpet of The Crumpet.  Today we are supposed to show our favorite color family.  Mine just so happens to be pink.  Like I said a few days ago when our challenge was pink, pink is my favorite color, but I try not to show it too much here because I would do every post with pink in it.  Lol.  Whelp, I don't really have much else to say.  This mani was pretty simple, but I really like it and I hope you do too.

Base coat:  Pro Fx Fiberized Ridge Filler
Pinky: Princesses Rule! from OPI - 3 coats
Ring: Lolly from Zoya - 2 coats
Middle: Charming Rose Creme from NYC - 2 coats and one coat of Sparked from Wet N' Wild
Pointer: Koala Bear-y from OPI - 2 coats with one coat of Essence Nail Art Special Effect! Topper
Thumb: White on the Spot from Milani - 2 coats with two coats of a no name pink neon from Claire's
Top coat: Seche Vite except for the pointer finger

I'm not sure what is on my pointer finger; I think maybe some snow fell on it as I was taking the pictures.


What is your favorite polish color?


Happy Saturday everyone all though I\'m sure it is Sunday for a lot of you right now.  I was really excited to wear Aurora from Zoya for this mani.  It is a part of the new Ornate Collection that was released last month.  I fell in love with Aurora when I saw the first swatches of it.  I received it in a secret santa swap that I did in one of my Facebook groups and I was pretty much jumping up and down when I got it.
     To achieve this look I painted two coats of  each polish onto each nail then a coat of Seche Vite to help it dry quick.  After it dried I applied striping tape to each nail and then painted each nail with one coat of the opposite color.  

Base coat: Pro FX Fiberized Ridge Filler
Accent color base: Aurora from Zoya - 2 coats
Main base: I\'ve Got Bieber Fever from Nicole by OPI - 2 coats
Top coat: Seche Vite


Tuesday, December 4, 2012

Reverse Gradient With Sinful Colors Ice Dream

       Hi everyone!  I hope you all had a great Tuesday.  I only had to work a half day today because the weather was so crappy!  But I got a lot done today.  I went to Ace, bought some pegboard, spray paint, hooks, and organized my kitchen.  It looks so good!  I'm glad I didn't just sit on my butt all afternoon, like I usually do!
     Today I have one of the winter polishes that Sinful Colors released last month.  This color is called Ice Dream.  I researched Ice Dream a little bit before I wrote this post and I found out that it is a dupe for China Glaze Lorelei's Tiara, and Sally Hansen Gem Crush in Showgirl Chic.  I don't own either of these polishes so I can't show you, but you can click on the links to see the comparisons.  I didn't want to just wear Ice Dream by itself, so I decided to wear it over black.  Then I remembered this mani for a reverse gradient from A Polish Addict.  I love how this turned out!

Base coat: Sally Hansen Triple Strong Advanced Nail Gel Fortifier
Base coat: Black Creme from Wet N' Wild - 1 coat
Accent nail: Ice Dream from Sinful Colors - 2 coats
The gradient was done with one coat of Ice Dream
Top coat: Sally Hansen Insta-Dri Anti-Chip Top Coat

This was taken outside without the flash


This was taken inside without the flash


This was taken inside without the flash, just in different lighting


And here is a picture of my kitchen!


I hope you like my nails and my kitchen!!


Monday, November 19, 2012

Pure Ice Femme Fatale With Treasure Hunt Accent Nail

       Happy Monday!  Today started out crappy, but towards the end of my workday things started looking up.  My husband finally got a job!  He starts tomorrow and I am so freaking excited.  I have been having far too many meltdowns lately, and having a $40.00 food budget for the month is way too hard.  With all the damn rice I have been eating, you would think I would have lost some freaking weight!  Ugh.  Oh well.  One thing at a time.
     Today I have two of the new Pure Ice polishes to show you.  Pure Ice is sold exclusively at WalMart, (as far as I know) and they retail for less than $2.00.  I have been using this brand for years and years and still really like it.  About a month ago I was at WalMart and my mother-in-law walked up to my husband and me.  In an effort to avoid talking to her I started looking at all the pretty nail polish that just happened to be right in front of me.  I grabbed a handful of them and then went to the normal place where the Pure Ice is, logged onto Facebook to see which ones I needed for a stamping project, and lo and behold, I found out that the display I was just looking at was brand new.  They had just released 55 new shades and they were right there in front of me in all of their glory.  If I had $110.00 you bet your ass I would have bought them all, but I had like $20.00 so I got five of them.
     Femme Fatale is from their Velour line of this release.  In my opinion, they are just like the suede polishes that OPI and Avon have come out with.  This is a beautiful dark forest green polish that also has lighter green matte flecks throughout.  I did use a matte top coat over these because I could not tell a difference in the finish with or without it.  I painted half of my nail with the top coat and the other half without and it looked exactly the same.
     Treasure Hunt is part of their Diamond Couture line in this release.  Treasure Hunt is a light green glitter suspended in a clear base with green and purple diamond glitter sprinkled throughout.  This is so much fun, but it reminds me more of spring than anything.

Base coat: Sally Hansen Triple Strong Advanced Gel Nail Fortifier
Base color: Femme Fatale from Pure Ice - 2 coats
Accent nail: Treasure Hunt from Pure Ice - 2 coat
Top coat: ***Not on accent nail*** Essence Nail Art Special Effect! Topper
               On accent nail - Sally Hansen Insta-Dri Anti-Chip Top Coat


This next picture is in a different light.  I really want you to see the lighter green flecks in Femme Fatale.


Have you been able to try any of these new polishes from Pure Ice?  If yes, what are your thoughts on them?


Wednesday, November 14, 2012

Llama Nails Presents the ABC's of Nail Art: J is for... Jelly Sandwich

       Happy Wednesday everyone!  How has your week been?  I am feeling so much better after my bout of strep.  This week's letter for the ABC challenge in the Facebook group, Llama Nails, is J.  I decided that I would do a jelly sandwich mani today.  If you aren't sure as to what a jelly sandwich mani is, don't fret.  It is pretty much what it sounds like.  Glitter sandwiched between a jelly finish polish.  A jelly finish polish is a very sheer polish that looks like jelly, for lack of a better term.  This is not to be confused with a sheer finished polish.  If my lame description confuses you and you want a far better one you can check out this blog.
     I have done three or four of these manicures and this is the first one that I have really liked.  The hardest part of this mani was photographing it.  I took almost 200 pictures and think I got some good ones.  I am hoping to be able to purchase a new camera with my Christmas bonus, but I do have to pay my bills first.  Here's hoping they feel sorry for me this year and give me a little extra! :-)

Base coat: Sally Hansen Triple Strong Advanced Gel Nail Fortifier
Base color: Daddy's Girl from Sinful Colors
Glitter: Let Me See Your Peacock from Claire's
Top coat: Sally Hansen Insta-Dri Anti-Chip Top Coat
I did two coats of Daddy's Girl, a layer of the glitter, and one more layer of Daddy's Girl on top of that.


Have you tried a jelly sandwich mani?  Do you like doing them?  What kind of camera do you think I should get?


Sunday, November 4, 2012

AIS: Stamping With Mash Plate 41

       Happy Sunday all.  I hope that you are all enjoying your extra hour of sleep.  I haven't participated in one of Sunday's Stamping Challenges in the Facebook group Adventures In Stamping in a few weeks now.  Today's challenge was for us to stamp over glitter.  When I was playing with some of my new polishes last night I came up with this color combination and was very excited to try it out.  It turned out a lot better in my head, but I still really like it.  I hope you do as well.

Base coat: PVA Glue - If you're not sure what I am referring to, you can check out my blog post about it here.
Base color: Skull and Glossbones from OPI - 2 coats
Accent color: Luxe Lavender from Avon - 2 coats
Glitter: Cheatin from Pure Ice - 1 coat
Top coat: Sally Hansen Insta-Dri Anti-Chip Top Coat
Stamping plate: Mash 41
Stamping color: Stamp Me! White and Stamp Me! Black from Essence


This photo was taken inside with the flash


This was taken outside without the flash


Skull and Glossbones is slowly becoming one of my favorite polishes!  I really like the white over the purple.  I think next time I will use all white instead of the black over the glitter and Skull and Glossbones.

Monday, October 15, 2012

SassyNail Nail-Aween Nail Art Challenge: Day 4 Mummy Nails FAIL!!!

     I decided to skip MSMD (Monkey See, Monkey Do) Monday's again this week so that I could get past my mummy nail challenge hurdle.  I have been putting this off for far to long and I knew that since the month was half way over today I just needed to buck up and do this.  See, my problem is that I don't like to do the same type of thing as everyone else.  I like to be a little different.  (Funny because I spent my entire childhood trying to be like everyone else, but that is an entirely different issue :-))  Everyone in the challenge came up with awesome mummy mani's and I thought mine would be just as creative, but alas, it is not.  My husband thought it was a gingerbread man!!!  See, fail!  Lol.  I don't even want to show you guys this but I promised myself when I started my blog that I would post the good, the bad, and the ugly.  I don't think I knew what I was getting myself into.
     There is a silver lining to this mani though, well actually, two.  I did NO cleanup and I got to use my first ever China Glaze polish!!!  I just bought it the other day when I was shopping for my nail polish buddy and got uber jealous of the beauties I was purchasing for her!  I'm Not Lion was just released as part of China Glaze's On Safari collection.  I only wanted two of the polishes from the collection, and this was one of them!

Base coat: Sally Hansen Diamond Strength Hardener
Base color: I'm Not Lion from China Glaze - 3 coats
White base color: White On The Spot from Milani - 1 thick coat
Mummy/gingerbread man ;-): Black acrylic paint from Artist's Loft
Top coat: Sally Hansen Insta-Dri Anti-Chip Top Coat

Taken inside my truck with the flash because I don't care how the picture turned out!


You can check out the original image here.  Trust me, it's much better looking than mine.  

This challenge is being put on by SassyNails over on Facebook.  If you're not a Facebook person you can check out her blog here.

If you want to see some much better mummy manicure's please check out these other lovely ladies blogs!


Thursday, October 11, 2012

CNT Halloween Nail Challenge: Witches

     Today in the Facebook group, Crumpet's Nail Tarts, our challenge is witches.  As with all these challenge post's I never have any idea what the heck I am going to do.  All I knew is that I wanted to use Scandalous from Revlon as the base.  Scandalous is a black base with purple hex and micro glitter.  This formula dried very fast on me and is opaque in two coats.  I am a sucker for a dark color and this seemed perfect for a Halloween mani.  I was going to use a dark purple creme for my accent nail but then figured my witch design wouldn't show well against a dark base.  Then I saw Essie's Pretty Edgy and knew that this was the perfect accent color.  A beautiful green that would be perfect for a witches face.  And the rest is history from there!

Base coat: Sally Hansen Diamond Strength Hardener
Base color: Scandalous from Revlon -2 coats
Accent color: Pretty Edgy from Essie - 2 coats
Witch colors: Lamp Black and Lemon Yellow from Artist's Loft acrylic paint
Top coat: Sally Hansen Insta-Dri Anti-Chip Top Coat


I hope you enjoy my witch!  If you want to check out some crazy, awesome witch manis check out these ladies blogs who are also doing this challenge.


Friday, September 7, 2012

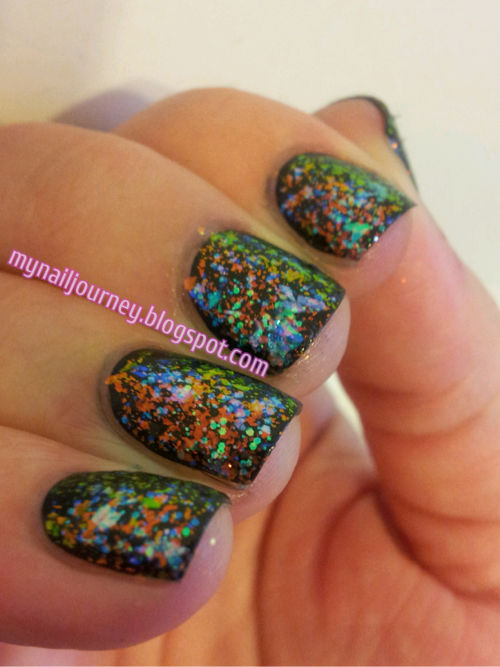
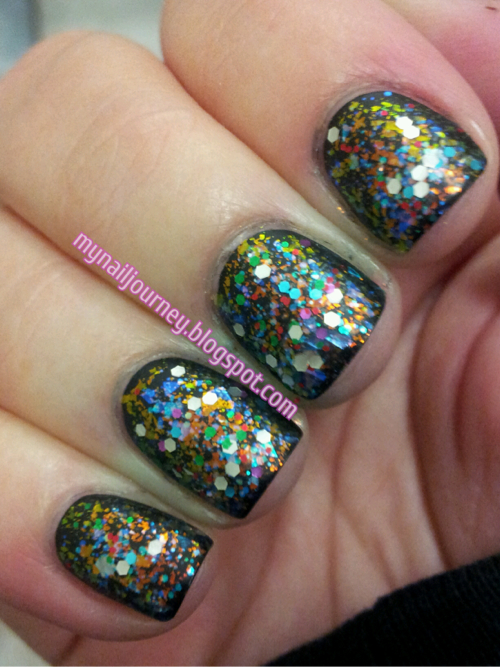
Glue Base Coats for Glitter Manicures: How Effective Is It?

     Today's post is my attempt at using Elmer's School Glue as a base for glitter polishes.  If you are thinking, what the hell is this lady talking about, I really think you HAVE to read LabMuffin's blog post.  Did you read it?  Don't lie.  Just do it.  It is fast and easy and you will thank me.
     Ok, now that you have read Lab Muffin's blog post, I feel it is of dire importance that you also check out this blog post from Pretty Purple Polish, where she showed me that I really needed to try this.  She did a 5 day wear test of not only the glue as a peel of base, but also included different base coats and orders of application to show which way worked the best for her.  Now, you may be wondering why, with this wealth of knowledge, I feel the need to share my experience with you.  Let me tell you my story.
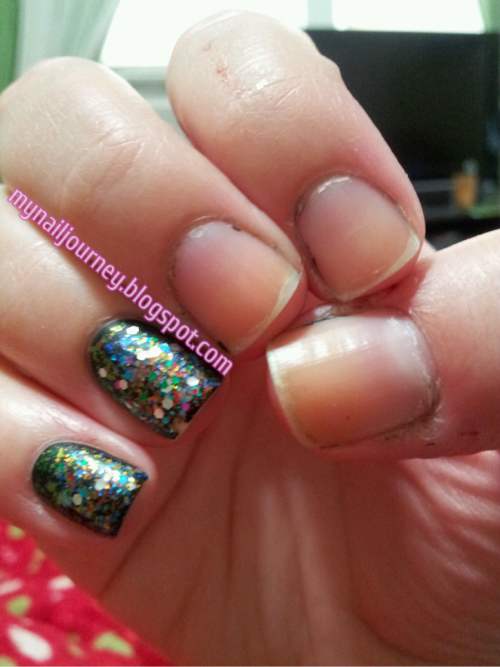
     I wash my hands a lot.  And when I say a lot, I mean probablly somewhere close to 100 times a day.  No, I am not a germaphobe, but I work in food service.  My hands are constantly in and out, in and out, in and out of water.  My hands crack, bleed, chap, and hurt.  But at least you know I won't make you sick!  (It takes a lot for me to have my hands picture ready for you guys).  I knew that I would be a perfect test subject for this new phenomenon.  I honestly didn't think that it would work.  I wish that I could tell you guys that it was great and that I will be doing this all the time, but I can not say that.  :-(  With in four hours my polish was gone from three fingers.  Before my shift was over, it was completely gone.  I am so sad that I can't use this method because it really does just peel right off.  I was uber, uber careful like Lab Muffin said to be.  I made sure there was no glue what so ever touching my skin, but it still didn't help.
     I will however say that I may have gotten a little carried away with the amount of glitter and top coats that I used, which could of had a harsher effect on the outcome of my testing.  I may have to try this again with only one or two layers of glitter and a top coat.  I do, however, plan on using this method when I do swatches.  It will be fantastic to remove the polish within a minute rather than 15.

Base coat: Elmer's School Glue
Base color: Black Cream from Wet N Wild - 1 coat
Glitter- in order of application: Green Ocean from Sinful Colors - 1 coat
Shine of the Times from Essie - 1 coat
Party of Five Glitters from Wet N' Wild - 1 coat 
Top coat: Essence Nail Art Special Effect! Topper - 2 coats

As you can read, a lot of layers.

At least I got a beautiful mani out of this experiment.


All of these were taken inside with out the flash.


And here is my nails on my lunch break. :-(  I didn't want to show my thumb but whated you guys to see how it peeled off.  Side note, my cuticles used to all look like my thumb!  I can't believe how much blogging has made me change my terrible cuticle habbits!


So, have you tried using a glue as your base coat?  What about the glittler removal method?  Do you scrub, scrub, scrub it off, or have you just sworn off glitter all together?  I hope you like this post and feel free to comment, comment, comment.  :-)


Friday, August 10, 2012

Nicole By Opi Studio Mama Swatches and Sally Hansen Big Money Accent Nail

     As I mentioned in my previous post, I had gone to TJ Maxx and found those Sally Hansen nail wraps.  Well, I also found some Nicole by OPI duo packs and some Essie polishes.  I picked up a duo pack containing Studio Mama and I've Got Bieber Fever.  Both of these colors were relaease as part of the One Less Lonely Girls Collection, which if you haven't figured it out yet, was inspired by Justin Bieber.  The best part of these polishes, it was 7.99 for the both of them.
     I am not hugely drawn to light shades of polish I decided to try wearing it with an accent nail.  Which I am shocked I have never done before.   I wish I could have captured some better pictures but the Gem Crushes don't photograph well.  To much grazy glam!  Bam!  I love it.

Base coat: Sally Hansen Hard As Nails Hardener
Main color: Studio Mama by Nicole by Opi - 3 coats
Accent nail: Big Money by Salley Hansen Gem Crush
Top coat: Sally Hansen Insta-Dri Anti-Chip Top Coat


Outside in direct light


Inside with no flash


Outside in indirect light


I applied the three layers very thin so they dried rather quickly.  I wish this was a little more pink looking but overall like it.  Do you have any of the colors from the One Less Lonely Girl Collection or did you stay away from them?


Sunday, July 8, 2012

Adventures In Stampinig Sunday Challenge, Sally Hansen Insta Dri Lightning Swatches and Review, and Stamping With Mash Plate 43

  Sorry for the crazy long title but I like to make sure I'm thorough.  Our challenge in the facebook group, Adventrures In Stamping, was to do something we loved.  It could of been a polish, a stamp, a method, anything we loved.  I was at a standstill.  There are so many things I love.  I tried something with OPI's Russian Navy, but then I decided how much I loved Revlon's Whimsical.  I was going to do it over Sally Hansen's Mellow Yellow like I have posted before, but decided I would try the new Sally Hansen Insta Dri in Lightning that I picked up yesterday.
  I had a TERRIBLE nail day yesterday.  I have never wanted to throw all my polishes out the window so badly before.  I am not sure what it was but I really disliked the Insta Dri formula and brush.  I hate saying this because generally I LOVE everything Sally Hansen.  But this is the second product I am not pleased with.  The first would have been the Acrylic Top Coat, but that is an entirely different story.  The brushes in this polish have never bugged me before in other polishes but I don't know why I detested them all of the sudden.  I think it had to do with the thickness of the polish and me being exhausted.  The heat really takes all of my enerygy.  I feel bad complaining about the heat because we have been so lucky compared to the rest of the States.  It has only been over 90 a few days here.  I know, I know, pathetic, but I can't help it.   
  The formula was thick and clumpy.  I tried to do one coat like the bottle suggested but it was so thick that it bubbled.  I removed it all and tried to do two thin coats, and it still bubbled and clumped up.  I also tried to switch the basecoats I used thinking the Avon Smooth Beginnings I always use is almost empty and thought it may have been to thick.  The only reason I am not throwing the two Insta Dri polishes I own is because they are great for stamping, ironically enough, due to their thick formula.  Oy vey.  lol.
  Warning, thiese pictures are terrible.  My cuticles are a disaster, I jammed my pointer finger into something and had to cut my entire nail down, I didn't get very good pictures, I was just done by the time I finished this mani.  

Base coat: Sally Hansen Hard As as Nails Hardener
Base color: Lightning from Sally Hansen Insta Dri - 2 coats
Stamp: Mash 43
Stamping colors: pinky - Heat Flash from Sally Hansen Insta Dri
                            ring finger - Clementine from Sinful Colors
                            middle finger - Why Not from Sinful Colors
                            pointer finger - Let's Talk from Sinful Colors
Top coat: Sally Hansen Insta Dri Anti Chip Top Coat

Finished mani outside in indirect light


Taken inside without flash


One coat of Revlon Whimsical over Lightning in indirect light


Outside in direct sunlight.  Can you see it bubbling on the middle and pointer finger?


Look at how lumpy the formula is on my middle finger!


Outside in indirect light


Taken inside without flash


Inside with flash


I really hope I have a better nail day today.


Friday, June 29, 2012

Sally Hansen Complete Salon Manicure Black Platinum Review and Swatches with Spoiled I Got A Confection To Make

  Sorry for the crazy long title, I just like to be a little thorough. :-)  As I mentioned yesterday, I had been very busy at the beginning of the week helping my friend with her two little children as she is recovering from surgery.  I didn't have any time on Monday but I had about an hour and a half between work and heading over to help her on Tuesday.  Instead of sleep I decided to try the Complete Salon Manicure polish I received from Jennifer last week.  Jennifer was my "adopt a friend" for the month of June.  If you would like to learn more about that you can read yesterdays post here.
  I was not quite sure what the Complete Manicure Salon included so I headed over to the Sally Hansen website and was shocked with what I found out.  The formula in the Complete Manicure Salon has your base polish, nail strengthing formula, growth treatment, color, and top coat!  I thought it only had the base coat, color, and top coat.  Five steps in one and I was short on time, I couldn't beat that.  The dry time was impeccable!  The first layer dried so quickly.  The second and third coat took a little more time, I would say about five minutes but that was quite all right with me as I have waited up to fifteen minutes for colors to dry.  The only thing I did not like about the polish was how sheer it was.  I did however receive full opacity at three coats so it was a minor set back.  
 While I was at my friends house helping her later that night, I noticed she had two polishes from the line sitting on her counter.  I opened them to check the formula and they were a rich, creamy color.  I was glad to find out that it was just the color that I got, and not the entire line.  The brush could easily cover the entire nail in one swipe, but I prefer to do smaller stokes since I feel I have more control of how the color is applied.  I am pretty sure they are going for speed with this line of polish, so a one swipe brush fits perfectly with that concept.
  I also received I Gotta Confection To Make from Jennifer in the same Adopt A Friend swap and since my mani dried so fast I decided to add some sparkle to it.  I freaking love this glitter.  I thought it was just silver glitter suspended in a pink base, but I was wrong!  (I seem to have issues with glitters.  You can see I made the same mistake with UFO.)  It is packed full of multi colored glitter and it made me so, so, so happy.
  The next morning I decided I wanted to do even more to this and I thought, what better way to try out my matte top coat.  I applied it and I fell in love!  Now, I really am not one for mattes, but every now and then I like them.  I think I liked it on this one because it brought out the glitter that much more.  Ok, enough blabbing, here you go!

Base coat, color, Top coat of swatches:  Black Platinum by Sally Hansen - 3 coats
Glitter: I Gotta Confection To Make by Spoiled - 1 coat
Top coat: Out the Door
Matte top coat: Nail Art Special Effect! Topper by Essence


Here it is matteified


Here it is with the glossy top coat over it


And now for the swatches
Taken outside in direct sunlight


Upclose in direct sunlight. I am including this to show the micro
shimmers that appear in the Black Platinum.  I didn't even notice
them until after I took this picture. 


Outside in indirect light


Inside with flash


Inside without flash


  Oh, and one last thing.  This lasted me two days without chips.  In my industry that is a freaking miracle.  I usually can't make it half way through my shift before my mani chips!
  So, have you tried any of the Complete Salon Manicure Line?  What did you think?


Tuesday, June 19, 2012

Rainbow Bright over NYC French Tip White and Swatches

  Boy have I got a treat for you guys.  I am so excited to share this polish with you.  It is called Rainbow Bright by Tina from Polish + Plus!  I first met Tina on facebook because we were both interested in doing a swap.  We quickly became friends and Tina decided she wanted to adventure into making her own polishes.  She is the one who made the first and the second indie polishes that I own.  I am in love with her stuff!  Not to mention her reasonable prices.  I paid $8 for a full size Rainbow Bright and that included shipping.  
  Rainbow Bright contains blue, pink, green, orange and yellow bar glitter, blue, pink, green, orange and yellow glitter, and the same colors in stars, and is suspended in a sheer pink base.  Here is the cool part about this polish, not every bottle will be the exact same as mine.  It will definitly be super close but someone who has the same polish as me may have more purple and green stars than I do.  I mean, you don't really expect her to count every single piece of glitter and star in each color that she puts into the bottle, do you?  ;-)  But I see it as a one of a kind polish and that makes me feel special!  Tina recommended that I try it over a white base so as not to wash out any of the colors in this beautiful mixture.  I am so glad that I took her advise.  All of the pictures I took were of one coat of Rainbow Bright over three coats of NYC French Tip White.  The formula was a little on the runny side but it really was not that bad.  I didn't have to fish any of the stars out, but I did have to place them, so to speak, on the nail.  I know that there are a lot of pictures but I really wanted you guys to see the amazingness that is this beautiful indie polish.  It is unlike any that I have ever seen.
  All of the pictures that have Rainbow Bright in them, minus the bottle shots, have one coat of Out the Door Top Coat on it.  If you don't like to feel your glitter on your nail after you are all done I suggest you do two coats of top coat.  It really wasn't that bad but it wasn't 100% smooth and I know some people are very adament about having smooth nails.

Base coat: Chip Skip from OPI and Smooth Beginnings from Avon
Base color: French Tip White from NYC - 3 coats
Glitter: Rainbow Bright from Polish + Plus - 1 coat
Top coat: Out the Door

You can view Polish + Plus facebook page here.  If you go to her "for sale" album you can see all of her polishes and nail stickers that she makes and has for sale.

These first three pictures are all taken outside in direct sunlight


Bam!!!  Look at that!


And that!!!!!!


Here it is inside without flash


and upclose without flash inside


Here is a closeup of the bottle


And a full size.  Mine did come in an old Orly bottle but that is because Tina loves me and she was planning on keeping this one for her self.


And now for the French Tip White swatches, which aren't as exciting as the Rainbow Bright.  Lol.  And no, it didn't bubble on my pointer finger, my finger nail is peeling bad and that is where it quits peeling.  :-(
Outside in direct sun


Outside in indirect light


Inside without flash


Inside with flash


All right, so, what do you guys think of Rainbow Bright?  Do you like it, love it, or can you live without it?