Showing posts with label flowers. Show all posts

Sunday, November 25, 2012

Stamping With Mash 42 Over Sinful Colors Gradient

       Happy Sunday everyone!  I am typing this with one hand because I have a baby on my lap!  But it is OK, because he is the cutest baby on the face of the earth, and my best friends baby.  Although, I'm sure mine will be cuter. ;-)  Today's post is for the Facebook group, Adventures In Stamping.  Each week we vote on a challenge, and this week the challenge is for us to stamp over a blue base.  I decided I wanted to do a blue gradient and it turned out beautifully.
     I also thought today would be a great way to use some of my whites that I haven't tried stamping with, to see how they worked.  We get a lot of questions referring to cheaper polishes to stamp within the group, and I figured my left hand would be a great way to kill two birds with one stone.  As you will see, my cleanup is terrible with my non dominant hand, and I'm also hiding a brutal hangnail.  It is so brutal, I couldn't even apply acetone to it to clean it up.  :-(  Winter is so harsh on my hands!

Base coat: Sally Hansen Triple Strong Advanced Gel Nail Fortifier
Base color: Cinderella from Sinful Colors - 2 coats
Gradient colors: Cinderella, Why Not, and Hot Spot from Sinful Colors
Topcoats: Sally Hansen Insta-Dri Anti-Chip Top Coat and Essence Gel Like Top Coat
Stamping colors: Stamp Me! White from Essence, White On The Spot from Milani, and Superstar! from Pure Ice
Stamping image: Mash 42

This picture was taken outside.  All stamping is done with Stamp Me! White from Essence


This picture was taken inside without flash.  All stamping was done with Stamp Me! White from Essence.


This picture was taken inside without flash.  Stamping was done with White On The Spot from Milani on the pointer and ring finger, and Superstar! from Pure Ice on the middle and pinky finger.


This picture was taken outside and stamping is done as described above the previous picture.


As you can see, the difference is pretty dramatic between the three whites I stamped with.  I will keep using the stamping polish from Essence, unless I can find something better.  I know the last two pictures look fuzzy, but it is actually the stamping that is making them look fuzzy. :-(  Crazy, huh.


Tuesday, August 28, 2012

Flip Flop Mani

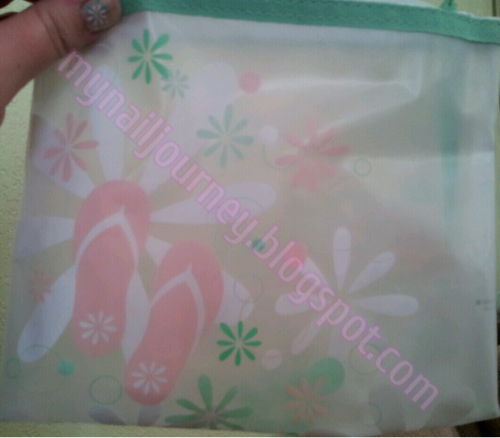
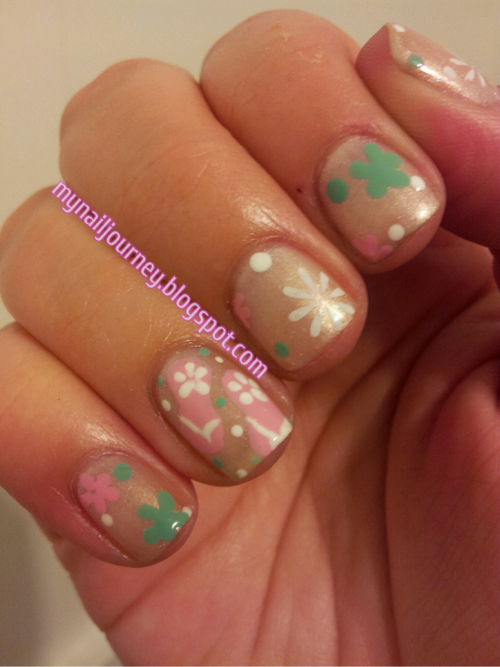
     Today's challenge mani topic was flip flops.  I was a little sad when I read this because I don't have the cute stamp that everyone has with the flip flops on it and I wasn't very inspired because I only have flip flops with a straight color, not a cute design on them.  I was just going to do a skittle mani with all of the colors of flip flops I own, but then I remembered how I wanted to paint the designs from my pedi bag onto my nails.  It was the perfect idea!

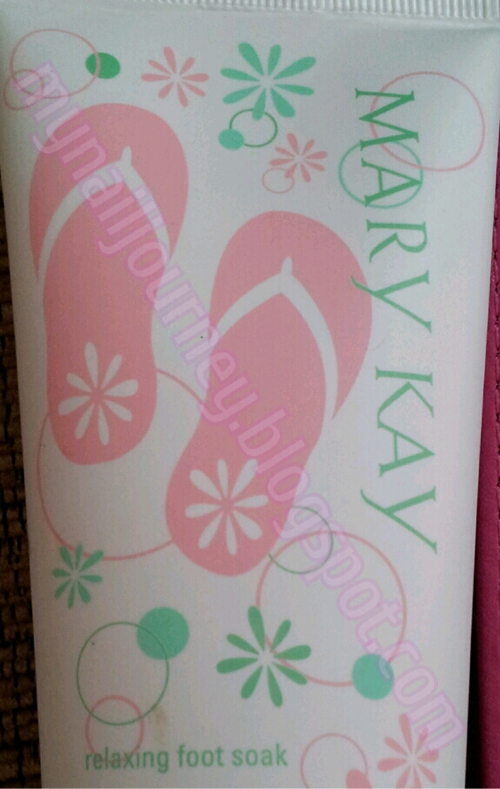
See, flip flops!  The bag is very sheer so here is a picture of one of the bottles of products that comes in this uber cute bag.


Base coat: Sally Hansen Diamond Strength Hardener
Base color: Glazed Pearl from SXY by Unforgettable Moments - 2 coats
Pink: Pink Friday from OPI
Green: I Need a Refresh-Mint from Wet N' Wild
White:
     Straps on flip flops: White from Kiss Brush On Nail Art Paint
     Flowers on flip flops and dots: French White Tip from NYC
     Stamped flowers: Stamp Me! White from Essence
Stamping plate: Mash plate 35

As I am sure you will be able to tell, the green and pink flowers were done by hand.  I used a dotting tool to do these and the random dots that are all over.  The white flower on my middle finger was the only one that was stamped on to my nail.

Taken inside without flash


So, what do you think of my recreation?


Sunday, July 22, 2012

OPI Black Cherry Chutney Swatches and Stamping With Mash Plate 42

  Today's challenge in the Adventures In Stamping group on Facebook was for us to stamp with our favorite stamp.
I only have about thirty stamping plates so I don't really have a "favorite."  I have stamped with the Mash 42 plate before and really liked the outcome of it, so I decided to use it again.  I think that I like this stamp on the mani that I have linked to rather than on top of Black Cherry Chutney.
 Earlier last week someone had mentioned that they had an OPI Elephantasic Pink up for swap so I decided to look up the swatches for it.  I stumbled across Scrangie's blog post for the 2008 India Collection and instantly fell in love with Black Cherry Chutney, Royal Rajah Ruby, and Yoga-ta Get This Blue!  These colors are so beautiful and I instantly put them on my wish list.  On Friday after work I went to check out my local beauty supplies OPI sale and what do you know, I found Black Cherry Chutney.  My husband didn't seem as excited as I was though.  :-(  I decided to wear it right away because I was catering a wedding yesterday and I love dark colors on my nails, so I figured this would be perfect, and I was right.
I loved this color so much that after it got all screwed up from catering, I painted it on again and that is when I realized that it was time for me to do my Sunday stamping challenge.

Base coat: Nail Envy by OPI and Hard as Nails Nail Hardener from Sally Hansen
Base color: Black Cherry Chutney from OPI - 2 coats
Stamping color: Stamp Me! White from Essence
Stamping plate: Mash 42
Top coat: Sally Hansen Insta-Dri Anti-Chip Top Coat

Finished product


In direct sunlight.  Look at this BEAUTIFUL color!


Another direct sunlight picture, it is just so pretty!


Outside in indirect light


Inside without flash
 

Inside with flash


Sorry for the copius amounts of pictures, but I am in love and I don't care who knows it!!  What do you think about Black Cherry Chutney?  Do you like dark, vampy colors as well, or do you prefer lighter ones?


Wednesday, July 18, 2012

Buttercup Nails and Stamping With Mash Plate 37

  Todays challenge in the Purple Crumpet Fairy Challenge on Facebook is buttercups.  This is going to be a short and sweet post, even though, it took me a few hours to do this.  :-)  I really hope that you like it because I am pretty pleased with this mani.

Base coat: Nail Envy from OPI and Sally Hansen Hard As Nails Hardener
Base color: Athens from Sinful Colors - 2 coats
Accent nail: Evvie from Zoya - 2 coats
Buttercups: Acrylic paint
Stamping plate: Mash 37
Stamping color: Olympia from Sinful Colors
Top coat: Sally Hansen Insta-Dri Anti-Chip Top Coat

Here is an image of a Buttercup that I got from google images.


And here are my nails.  These next two pictures were taken outside in indirect sunlight


And these two were taken outside with out flash


So, what do you think of me recreation of the buttercup?  I hope that you like it.


http://www.inlinkz.com/script.php?id=168998&nojump=1&key=ILDP/O092G6Q

Sunday, July 8, 2012

Adventures In Stampinig Sunday Challenge, Sally Hansen Insta Dri Lightning Swatches and Review, and Stamping With Mash Plate 43

  Sorry for the crazy long title but I like to make sure I'm thorough.  Our challenge in the facebook group, Adventrures In Stamping, was to do something we loved.  It could of been a polish, a stamp, a method, anything we loved.  I was at a standstill.  There are so many things I love.  I tried something with OPI's Russian Navy, but then I decided how much I loved Revlon's Whimsical.  I was going to do it over Sally Hansen's Mellow Yellow like I have posted before, but decided I would try the new Sally Hansen Insta Dri in Lightning that I picked up yesterday.
  I had a TERRIBLE nail day yesterday.  I have never wanted to throw all my polishes out the window so badly before.  I am not sure what it was but I really disliked the Insta Dri formula and brush.  I hate saying this because generally I LOVE everything Sally Hansen.  But this is the second product I am not pleased with.  The first would have been the Acrylic Top Coat, but that is an entirely different story.  The brushes in this polish have never bugged me before in other polishes but I don't know why I detested them all of the sudden.  I think it had to do with the thickness of the polish and me being exhausted.  The heat really takes all of my enerygy.  I feel bad complaining about the heat because we have been so lucky compared to the rest of the States.  It has only been over 90 a few days here.  I know, I know, pathetic, but I can't help it.   
  The formula was thick and clumpy.  I tried to do one coat like the bottle suggested but it was so thick that it bubbled.  I removed it all and tried to do two thin coats, and it still bubbled and clumped up.  I also tried to switch the basecoats I used thinking the Avon Smooth Beginnings I always use is almost empty and thought it may have been to thick.  The only reason I am not throwing the two Insta Dri polishes I own is because they are great for stamping, ironically enough, due to their thick formula.  Oy vey.  lol.
  Warning, thiese pictures are terrible.  My cuticles are a disaster, I jammed my pointer finger into something and had to cut my entire nail down, I didn't get very good pictures, I was just done by the time I finished this mani.  

Base coat: Sally Hansen Hard As as Nails Hardener
Base color: Lightning from Sally Hansen Insta Dri - 2 coats
Stamp: Mash 43
Stamping colors: pinky - Heat Flash from Sally Hansen Insta Dri
                            ring finger - Clementine from Sinful Colors
                            middle finger - Why Not from Sinful Colors
                            pointer finger - Let's Talk from Sinful Colors
Top coat: Sally Hansen Insta Dri Anti Chip Top Coat

Finished mani outside in indirect light


Taken inside without flash


One coat of Revlon Whimsical over Lightning in indirect light


Outside in direct sunlight.  Can you see it bubbling on the middle and pointer finger?


Look at how lumpy the formula is on my middle finger!


Outside in indirect light


Taken inside without flash


Inside with flash


I really hope I have a better nail day today.


Sunday, April 22, 2012

Stamping Sunday

     Wow.  What a CRAZY week.  I haven't been able to post since Tuesday and I have felt so bad, like I have been neglecting you guys.  Yesterday was my birthday and I have five days off of work!  Woot woot.  To me this is a huge deal because I work six tens a week.  I spent ALL day yesterday working on swatches and blog posts!  Yay for you and me.  I am working on swatching my ENTIRE collection and going to set up a different tab on my homepage so if anyone wants to see a swatch they can click on that page and each color will be linked to the specific blog post.  It will be a lot of work but I think it will be so worth it.
     Sundays are for stamping!  I am glad that I am finally getting the hang of it because I was seriously frustrated with it for the longest time.  I am still going to invest in the special polishes for stamping but I have found a FEW in my collection that will work for this process.


Inside with flash


 Inside with out flash


Outside in the SUN!!!  I am SO excited that it is out! 

Base coat: Yello-Out
Base color: Real Simple by Essie - 3 coats
Stamping color: Midnight Plum by Avon
No top coat
The stamping plates from Essence are not numbered but it is the plate that came with the original kit that can be viewed here.

Do you like stamping?  What are your tips and tricks for stamping?

Friday, April 6, 2012

I love flowers

     If there is one thing that I don't think I could do enough of that would be flowers.  I wasn't really sure what I wanted to put on my nails the other day so I started looking around at the blogs that I follow and I stumbled across this tutorial over at Polish Art Addiction.  Once you see this tutorial you will become minorly (majorly) obsessed with her artwork and waste enough time to make your husband think you have really lost it be inspired for countless hours to come.  I would post flowers everyday if I wouldn't lose readers.  He he.  Ok, so please go check out her blog if you like what I have done because it is WAY better than what I have done.


Indoors with flash


Indoors with out flash


Base Coat: Avon Smooth Beginnings
Base Color: Black Cream by Wet N' Wild - 2 coats
Blue and pink flowers: Acrylic
Purple flowers: Simple??? by Sally Girl (Not sure if that is what it is called.  It is a little bottle that was sent to me as a gift and that is the only name I see on it.)
Yellow: Acrylic paint

Monday, March 19, 2012

First attempt at roses

Remember this is my FIRST time doing roses, as you can see.  And as you can see, I'm pretty much a pro at the daisies.  He-he.

Base except for ring - Jazz by Essie 2 coats
Base on ring finger - Bryant Park by N.Y.C. 2 coats

The roses, leaves, and daisies were done with acrylic paint.

I know this is a super short post but I don't really know what else to say...  Do you guys have any tips for me?


Friday, March 9, 2012

Daisy mani and first time with acrylic painting

Wow, seriously what a LONG week.  To bad I have to work tomorrow as well.  We have been so busy and I am so exhausted.  I don't want to do anything right now, but I really wanted to get this post up because I am in love with this mani.  I bought this Sally Hanson orange color a few months ago to do a giraffe mani and never got around to it.  I really thought that I wouldn't be using it for any thing else but I should know by now to never say never.

In this post last week I discussed my sickening love for Robin Moses and how you can find her beautiful tutorials and works of art.  I was watching her tutorial for a beautiful spring wedding mani and thought, I need to try this.  I have the perfect color for it.  I hadn't played around with acrylic paints yet for my mani's so I scrounged up my tip money from the day and went to JoAnns to buy a brush and some paints.  I spent eight dollars and got five brushes and 24 little things of acrylic to play with.  This will keep me busy for a long long long time and I couldn't be happier.

I first applied my O.P.I. Nail Envy as the base.  Then applied three coats of Sally Hanson's Xtreme Wear in Sun Kissed on all fingers except my ring fingers.  On my ring fingers I applied two coats of N.Y.C's  105A.  (A silver glitter).  Three coats is more than I like to apply when it comes to a polish but it was really streaky after two coats so I had to take one for the team.


After those layers dried I applied on layer of the glitter to the fingers with the orange and then went to town following the tutorial.  No point in me explaining step by step when Robin can do it way better in her video. :)  So here is the finished product!


Not to shabby for a first time attempt at this, right?  Have you guys experienced the love for Robin Moses yet?  If not, jump on it.  You will not be let down!

I also really enjoyed playing with acrylics for the first time.  I can't wait to keep trying them out.  What are your thoughts on acrylic?