Showing posts with label Wet N' Wild. Show all posts

Sunday, January 6, 2013

31 Day Challenge - Day 6: Your Favorite Color Family

       Happy Sunday!  My post for you today is the 6th post in the 31 day challenge being hosted by Debbie Crumpet of The Crumpet.  Today we are supposed to show our favorite color family.  Mine just so happens to be pink.  Like I said a few days ago when our challenge was pink, pink is my favorite color, but I try not to show it too much here because I would do every post with pink in it.  Lol.  Whelp, I don't really have much else to say.  This mani was pretty simple, but I really like it and I hope you do too.

Base coat:  Pro Fx Fiberized Ridge Filler
Pinky: Princesses Rule! from OPI - 3 coats
Ring: Lolly from Zoya - 2 coats
Middle: Charming Rose Creme from NYC - 2 coats and one coat of Sparked from Wet N' Wild
Pointer: Koala Bear-y from OPI - 2 coats with one coat of Essence Nail Art Special Effect! Topper
Thumb: White on the Spot from Milani - 2 coats with two coats of a no name pink neon from Claire's
Top coat: Seche Vite except for the pointer finger

I'm not sure what is on my pointer finger; I think maybe some snow fell on it as I was taking the pictures.


What is your favorite polish color?


Happy Saturday everyone all though I\'m sure it is Sunday for a lot of you right now.  I was really excited to wear Aurora from Zoya for this mani.  It is a part of the new Ornate Collection that was released last month.  I fell in love with Aurora when I saw the first swatches of it.  I received it in a secret santa swap that I did in one of my Facebook groups and I was pretty much jumping up and down when I got it.
     To achieve this look I painted two coats of  each polish onto each nail then a coat of Seche Vite to help it dry quick.  After it dried I applied striping tape to each nail and then painted each nail with one coat of the opposite color.  

Base coat: Pro FX Fiberized Ridge Filler
Accent color base: Aurora from Zoya - 2 coats
Main base: I\'ve Got Bieber Fever from Nicole by OPI - 2 coats
Top coat: Seche Vite


Tuesday, January 1, 2013

31 Day Challenge: Black and White

     Happy New Year everyone!  Today not only starts 2013, but also a new nail challenge.  In the Facebook group, Crumpets Nail Tarts, we are doing a new 31 day challenge.  I am really hoping I can keep up with this one.  Today's challenge is black and white and I decided the best way to showcase these two colors was in a water marble.  I was really nervous that this wouldn't turn out, but I couldn't have been more wrong.  This is my third one and I love it!

Base coat: Pro FX Fiberized Ridge Filler
Base color: White on the Spot from Milani -2 coats
Marble colors: Black Creme from Wet N' Wild and Bubble Bath from Sinful Colors
Top coat: Seche Vite


Monday, December 10, 2012

Llama Nails: M is for... Minnie Mouse

       Happy Monday!  Today I have for you my weekly installment for the ABCs of nail art challenge in the Facebook group, Llama Nails.  Each week we have to do nail art related to a specific letter and this week's letter is M.  I decided to do Minnie Mouse.  I couldn't be happier with the way this turned out.  I tried a new base coat with this mani and it lasted two days!  My manicures never last this long.  I picked up the Fiberized Ridge Filler from the Pro FX line.  I got it at WalMart and a 2.5 fluid oz. bottle cost me right around five dollars.  I am so glad that I picked this up because I used it on this mani and the one I did yesterday, and my mani's have never stayed on my nails better!

Base coat: Fiberized Ridge Filler from Pro FX
Base color: Red Red from Wet N Wild - 1 coat.  UMM CAN YOU BELIEVE ONE COAT?!?!  YEAH, ME NEITHER.  OK, done freaking out about that.
White on the Spot from Milani -2 coats
White dots: Superstar from Pure Ice
Minnie Mouse: All acrylic paint is from Artist's Loft that I bought at Michaels
Black-Lamp Black
Face-Titanium White, Burnt Sienna, and Yellow Ochre
Bow-Crimson Red and Titanium White for the dots
Tongue-Crimson Red mixed with Titanium White
Top coat: Seche Vite

I used a dotting tool to apply all the polka dots that are not on my accent nail.  I used my smallest brush for all of Minnie except for the eyelashes; I used my striping brush for that.


You can check out these other "M" challenge's using the codes below.  I hope you enjoyed my Minnie Mouse mani.


Tuesday, December 4, 2012

Reverse Gradient With Sinful Colors Ice Dream

       Hi everyone!  I hope you all had a great Tuesday.  I only had to work a half day today because the weather was so crappy!  But I got a lot done today.  I went to Ace, bought some pegboard, spray paint, hooks, and organized my kitchen.  It looks so good!  I'm glad I didn't just sit on my butt all afternoon, like I usually do!
     Today I have one of the winter polishes that Sinful Colors released last month.  This color is called Ice Dream.  I researched Ice Dream a little bit before I wrote this post and I found out that it is a dupe for China Glaze Lorelei's Tiara, and Sally Hansen Gem Crush in Showgirl Chic.  I don't own either of these polishes so I can't show you, but you can click on the links to see the comparisons.  I didn't want to just wear Ice Dream by itself, so I decided to wear it over black.  Then I remembered this mani for a reverse gradient from A Polish Addict.  I love how this turned out!

Base coat: Sally Hansen Triple Strong Advanced Nail Gel Fortifier
Base coat: Black Creme from Wet N' Wild - 1 coat
Accent nail: Ice Dream from Sinful Colors - 2 coats
The gradient was done with one coat of Ice Dream
Top coat: Sally Hansen Insta-Dri Anti-Chip Top Coat

This was taken outside without the flash


This was taken inside without the flash


This was taken inside without the flash, just in different lighting


And here is a picture of my kitchen!


I hope you like my nails and my kitchen!!


Friday, November 23, 2012

ABC Nail Art Challenge: K is for...Keyboard

       Happy Friday everyone.  I hope that everyone that celebrates Thanksgiving had a great day.  My husband and I went over to my aunt's house, enjoyed some yummy food, and then went over to our friend's house to lie on their couch and relax.  :-)
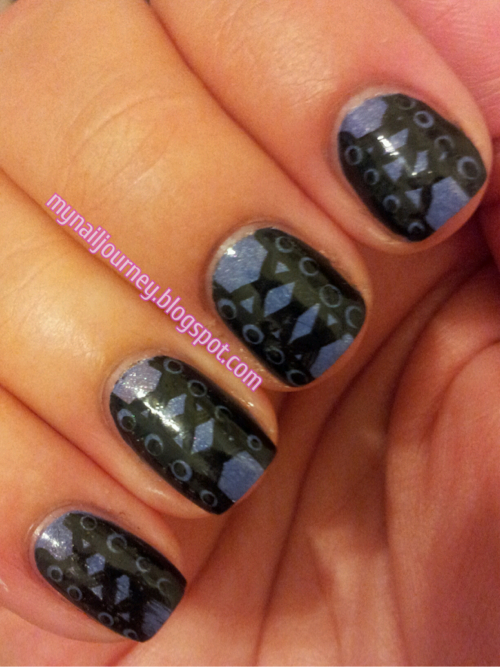
     Today's blog post is another installment in the ABC nail art challenge that is being hosted by the Facebook group, Llama Nails.  I wasn't sure what I was going to do for the letter K, but I remembered seeing someone using a stamping plate that I owned that had a keyboard on it.  I'm so glad I saw someone use this image because ever since I received this set of plates, I have been wondering what the hell this image was.  I was pretty impatient when I did this mani, and you can see it in quality of this one.  Not one of my best ones.  :-(  Now I know for next time.

Base coat: Sally Hansen Triple Strong Advanced Gel Nail Fortifier
Base color's: Black Creme from Wet N' Wild - 1 coat, Superstar! from Pure Ice - 3 coats
Stamping plate: Mash 44
Stamping color's: Stamp Me! White and Stamp Me! Black from Essence
Top coat: Seche Vite


What do you guys think?


Tuesday, October 23, 2012

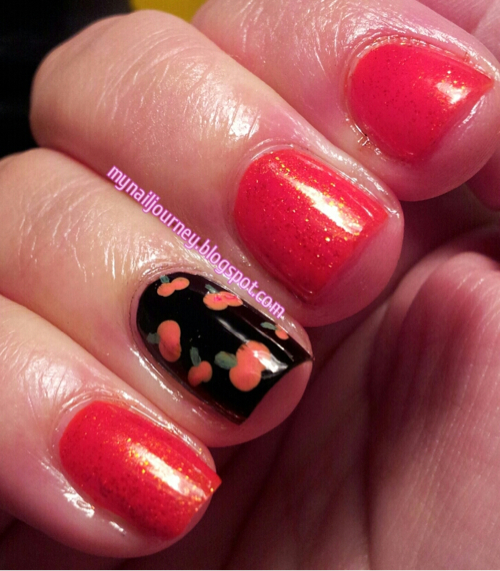
CNT Halloween Nail Art Challenge: Pumpkins

       It is time to post another mani for the Halloween Nail Art Challenge that is being put on by the Facebook group, Crumpet's Nail Tarts.  I threw this mani together at the last minute last night so I don't really have too much to say about it except that I really like the way that it turned out!  I think it is very simple, cute, and different.  All though I haven't looked at everyone else's manis so I could be wrong about the unique look.  I did forget to leave my accent nail blank while painting the orange, so the Black Creme is over a layer of orange, but Wet N Wild's Black Creme is opaque in one coat anyways.  :-)  Napping before mani-ing is dangerous.  ;-)

Base coat: Sally Hansen Triple Strong Advanced Gel Nail Fortifier
Base color: Citrine from Sinful Colors - 1 coat, Black Creme from Wet N Wild - 1 coat
Over Citrine I layered one Layer of Serena and Chloe from Sinful Colors.  I wanted to do both layers in Serena and Chloe but I was afraid it would photograph more red than orange.
Pumpkins:  A mixture of Crimson Red, Lemon Yellow, and Titanium White acrylic paint from Artist's Loft applied with a dotting tool
Stems: A mixture of Viridian acrylic paint from Artist's loft and my franken orange, applied with a small detail brush
Face: Lamp Black acrylic paint from Artist's Loft, applied with a small detail brush
Top coat: Sally Hansen Insta-Dri Anti-Chip Top Coat

Taken inside without flash


Thanks for stopping by and do feel free to leave some comment love, or creative criticism.

Check out the other pumpkin nails below!


Sunday, October 21, 2012

F is for... Finger Paints Flakie Polish

     This post if for the ABC Nail Art Challenge I am participating in with the Facebook Group Llama Nails.  This week's letter is F.   It took me all week and then some to figure out what I was going to do for this mani.  I then remembered that I had received one of my biggest lemmings, Finger Paints Twisted.  I first learned about Twisted from Colette of My Simple Little Pleasures when I first started my obsession with polish.  I had been into nail art for about a month or two and had heard about a water marble.  I had been told to watch her video's on YouTube and started following her, I was hooked.  She posted a video about her going out on Christmas Eve and about how excited she was that she found the Finger Paints Special Effects line that was scheduled to be released in the next week.  I had never heard of a Sally's before and didn't put to much thought into trying to find these because I would surely be able to find them soon enough.  Boy, was I wrong.  These are all very hard to find a few months after the release.  Especially Twisted.  You will see why when I show you the pictures.  I was lucky enough to stumble upon someone selling it in one of the polish exchange groups I am in on Facebook.  When I thought this had arrived at my house my husband stole the package and made me chase him all around the house, and I DO NOT run.  That is how excited I was to get this polish!
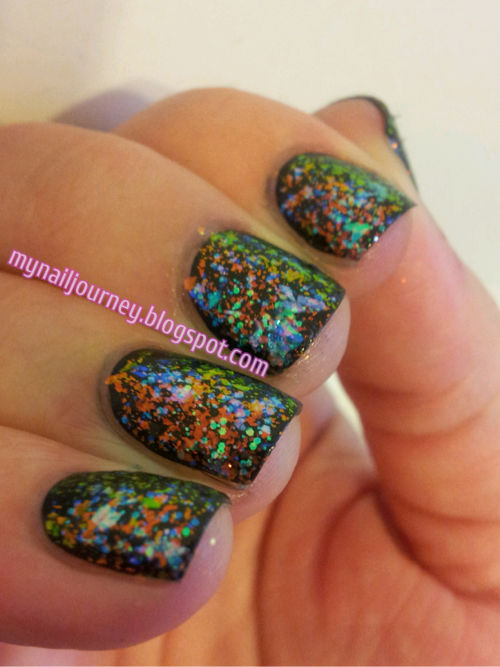
Base coat: Sally Hansen Diamond Strength Hardener
Base color: Black Creme from Wet N Wild - 2 coats
Flakie: Twisted from Finger Paints - 1 coat
Top coat: Sally Hansen Insta-Dri Anti-Chip Top Coat

These were all taken outside in indirect light


I hope you like this post!

You can check out the other F posts using the links below.  Have a great day!


Thursday, October 18, 2012

CNT Halloween Nail Art Challenge: Things That Go Bump In The Night

     If you're confused with the topic for today's challenge, don't worry, I was too.  Off to the side it said monsters and my brain isn't very creative so I was set on doing something with monsters.  I really wanted to do Monsters, Inc. Sulley and Mike, but as I watching a YouTube tutorial on One Stroke Petals another tutorial cought my eye.Play 
I am now in love with IHaveACupcake's YouTube channel.  If you are ever low on inspiration, please check her channel out!
     This mani was so easy to re-create and I am so happy with how it turned out.  I hope that you guys like it as well.
*All acrylic paint is from Artist's Loft*
*All black, unless otherwise specified, is Lamp Black acrylic paint*
*All white, unless otherwise specified, is Platinum White acrylic paint*
Base coat: Sally Hansen Diamond Strength Hardener
Top coat: Sally Hansen Insta-Dri Anti-Chip Top Coat
Pinky: face - Black Cream from Wet N' Wild - 1 coat
            yellow: Lemon Yellow acrylic paint
            pink: My own creation using Platinum White and Crimson Red acrylic paint
Ring finger: French White Tip from NYC - 3 coats
                     bow: same mixture as used for the cat nose
Middle finger: Black Creme from Wet N' Wild - 2 coats
                        green: a mixture of Viridian, Platinum White, and Lemon Yellow acrylic paint
Pointer finger: Sassy from Revlong - 2 coats
                        eyeball: Cobalt Blue acrylic paint
Thumb: Wet Cement from Wet N' Wild - 3 coats
Taken inside with flash
If you would like to see what the other ladies in this group are doing, please check out their blogs using the thumbnails below.
Thanks for stopping by and please feel free to comment.  I love hearing from you gals and guys.
 

Tuesday, October 16, 2012

CNT Halloween Nail Art Challenge: Free Style

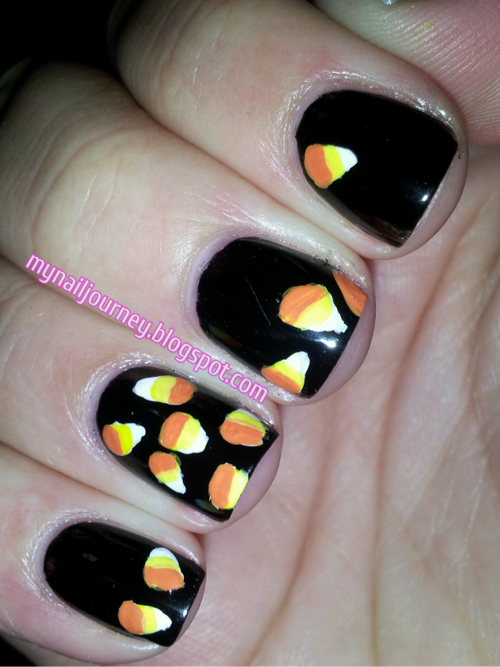
     Today in the Facebook group,Crumpet's Nail Tarts, our challenge topic is free style.  I took this to mean we could do whatever we wanted.  I saw this candy corn tutorial over on Nail Wish's blog a few weeks ago and I have been dying to try it out.  I wish mine looked as good as hers!  But as we all know, practice, practice, practice.  It's funny how good you can think something is until you see it next to a master's work! :-)

Base coat: Sally Hansen Diamond Strenght Hardener
Base color: Black Creme - 1 coat
Candy corns: Artist's Loft acrylic paint in Titanium White, Lemon Yellow, and I made the orange out of Lemon Yellow, Crimson Red, and a touch of Titanium White
Top coat: Sally Hansen Insta-Dri Ant-Chip Top Coat

Taken inside with the flash


Check out these other free style manicures that are sure to impress!


Saturday, October 13, 2012

CNT Sat-ART-Day: The 50's

     Ok, so for most of you it is Sunday, but the great advantage of living on the West Coast of the United States is that we are way behind everyone else!  I still have four hours left to post this.  :-)  I am not going to lie, I am very pleased with how this turned out.  Are you getting curious?  Good!
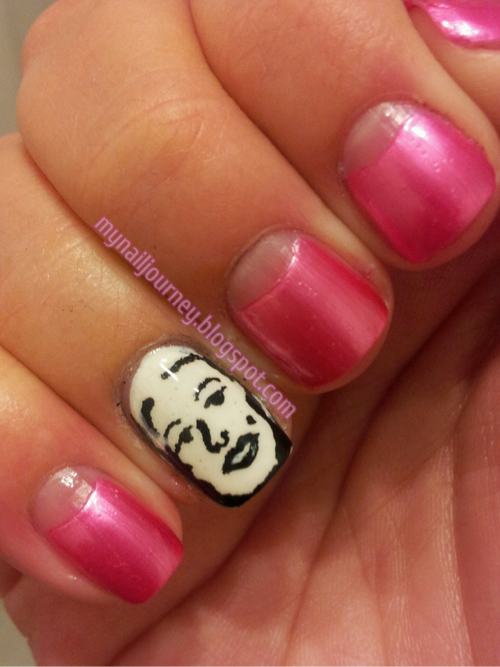
     Today's mani comes from two things.  I brain stormed this mani this morning with the assistance of Google.  I did a search for 50's fashion and stumble upon Marilyn Monroe.  I'm sure most of you know she is from the 50's and I hate to admit that I had no idea.  I didn't even know she was an actress until I saw a video at my girlfriends house the other day, (that of course I can not find on YouTube for the life of me right now! (I had a very sheltered childhood. ))  In 1953 Marilyn played in Gentleman Prefer Blonds.  In this movie she preforms the song, "Diamonds Are A Girls Best Friend" in a beautiful yet shocking (for the times) pink dress.  This is where the inspiration for the pink half moons came.
     I then remembered the first Robin Moses video I saw.  In this video Robin shows us how to do a beautiful Marilyn manicure.  When I saw this for the first time I thought there would never be a day that I would be able to do something like this.  Well, Robin's advice of practice, practice, practice paid off.  
     I am a little dissapointed with the bubbling that occured.  My top coat is basically gone and I tried to be a cheapskate and get the last little bit out.  I wish I would have just opened my new bottle.  Does anyone know why polish companies don't let the brushed extend further into the bottle?  I feel like it is such a waste of polish once you get half way through the bottle.

Base coat: Sally Hansen Diamond Strength Hardener
Pink: Lavendar Pearlescent from Wet N' Wild Wild Shine - 3 coats
White: White on the Spot from Milani - 1 coat
Marilyn: Black acrylic paint
Top coat: Sally Hansen Insta-Dri Anti-Chip Top Coat


Well, what do you think?

If you want to check out some more 50's inspired manicures, check out these other blogs!


Tuesday, October 9, 2012

CNT Halloween Challenge Day 3: Zombies

     Today in Crumpet's Nail Tarts Halloween Challenge we are supposed to do Zombies.  Now, let me start off by saying, I am not a fan of zombies.  Don't like them, don't watch them, don't know what they look like, don't want anything to do with them.  Off to Google I went... (Does this sound familiar?  I love Google).  I searched "cute zombies" and found this image.  It was the cutest one I could find and I figured that I could re-create it.  I think I did a pretty good job.  
     After I painted Ibiza on my ring finger I painted the entire zombie in white acrylic paint so that when I added the color it would pop.  

Base coat: Sally Hansen Diamond Strength Hardener
Base color:
  accent nail: Ibiza from Zoya - 1 coat
  other nails: Night Prowl from Wet N' Wild - 2 coats - How ironic, right!  Perfect name.
Zombie attire:
  face and hand: San Tan-Tonio from O.P.I.
  brain: The One That Got Away from O.P.I. mixed with white acrylic paint
  shirt: I Need A Refresh-Mint from Wet N' Wild
  pants: Why Not from Sinful Colors
  heart: The One That Got Away from O.P.I.
  outline: Lamp Black from Artist's Loft acrylic paint
Top coat: Sally Hansen Insta-Dri Anti-Chip Top Coat      


AND a close up of my cute little zombie...

I hope you guys like my take on the zombie mani.  If you are interested in more gorey zombies, check out the other manis from this challenge.


Thursday, October 4, 2012

CNT Halloween Nail Art Challenge Day 2: Black Cats

     Today is day 2 of Crumpet's Nail Tarts Challenge.  Our challenge today is, "black cats".  I wasn't quite sure what to do so I decided to Google Robin Moses + cats and was super excited with what I found.
 

Now of course mine isn't as good as the amazing, spectacular, glorious Robin, but I think it is pretty dang good.  I mean, you can tell my cat is a cat, can't you?!
Base coat: Sally Hansen Diamond Strength Hardener
Base color: Audrey from Zoya - 2 coats
Top coat: Sally Hansen Insta-Dri Anti-Chip Top Coat
Acrylic paints: Lemon Yellow and Lamp Black from Artist's Loft


How did I do?

Please feel free to check out these other "black cat" manis. :-)


Tuesday, October 2, 2012

Sassy Nails Nailaween Art Challenge: Day 1 - Water Marble

     Today marks day one of my second Halloween nail challenge.  I am involved in two Halloween challenges, Adventures In Stamping on Sunday's, MSMD Monday's, and also in an ABC's of nails on Wednesdays.  I have my work cut out for me this month.  If all goes as planned I should have a new post for you every single day this month.  *Not really sure how I got myself into this* :-)
Here are the rules for this challenge taken directly from Sassy Nail's Facebook page:

Nail-Aween Nail Art Challenge will be from October 1-31st. 

Rules of this challenge:
-Complete it during the month of October, so you have 31 days to do all 10 challenges.

-Add list of Nail-Aween Nail Artists so we can all be linked up. There will be a post with additional information on Sep 30th. Link will be shared here, so dont worry. 
***This is at the bottom of my post***
Disclosure: This is a self paced challenge. You will set up your own schedule at your own pace. 

WooHoo and Happy Halloween!

*Update. I am taking blogs and FB pages until October 10th.


     I cringed when i saw that today's mani was a water marble.  They are so stinking messy and I hate having stuff on my hands.  I know, I'm weird.  I have this thing about anything, (water, lotion, food, anything) being on my hands.  *Hangs head in shame***  I think that I was high from all the fumes by the time that I was done with this.  I think it turned out OK.  My favorite nail has to be my pointer finger.

Base coat: Sally Hansen Diamond Strength Hardener
Base color: Sunrise, Sunset from Sally Hansen Diamond Strength - 1 coat
Water marble colors: Clementine from Sinful Colors and Black Creme from Wet N' Wild 
Top coat: Sally Hansen Insta-Dri Anti-Chip Top Coat


Monday, September 10, 2012

MSMD: Shoelace Manicure

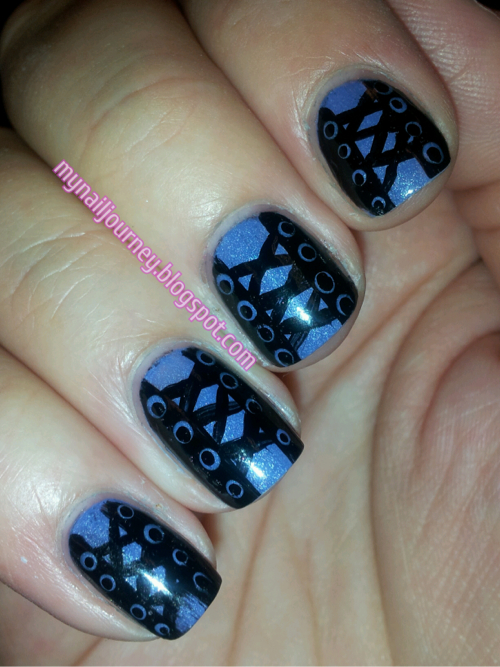
     Today's Monkey see, Monkey do (MSMD) manicure is brought to you via Michelle from Mimi's Manicure's.  She posted this manicure in Polish-o-rama, one of the Facebook groups that I am in, and I immediatly fell in love.  She quickly came out with a tutorial and I followed it to the tea.  I love the way that this turned out.  I should have waited a little longer to apply my top coat, as you can see it smeared on my pinky, but what's a manicure without a little smear?!  I also think that this looks more like the back of a  corset then shoes, which makes them even more sexy.  I really encourage you to check out the mani that Michelle did because her nails are sexy long and look way better than mine.


Base coat: Sally Hansen Diamond Strenght Hardener

Base color: Smooth Sailing from Essie - 2 coats

Black: Black cream from Wet N' Wild - applied with a striping brush

Top coat:  Sally Hansen Insta-Dri Anti-Chip top coat


Taken inside with flash


Taken inside without the flash


Do you think shoes or corset when you see these?  I hope to hear from you all, have a great Monday!  Oh, and don't forget to check out these other lovely ladies who have participated in the MSMD challenge today! :-)


Sunday, September 9, 2012

Adventures In Stamping: Stamping With Mash Plate 38

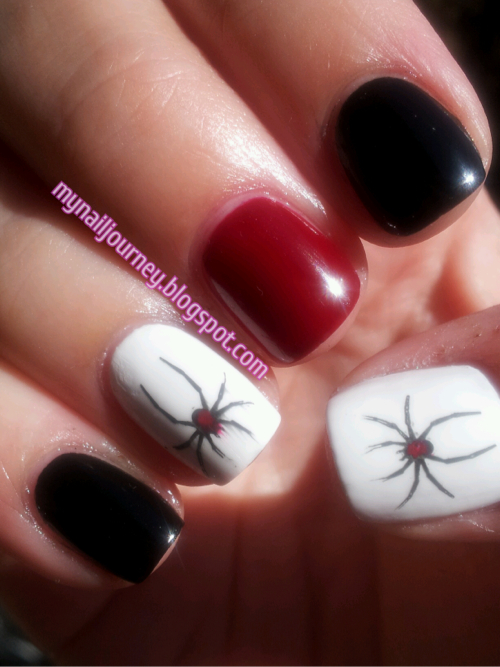
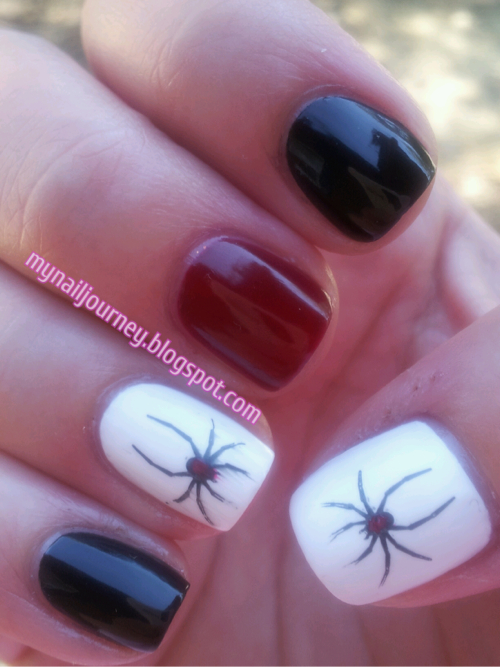
     Our Sunday stamping challenge for the Facebook group, Adventures In Stamping, was to stamp with the theme of something toxic or poisonous.  I was at a standstill with what to do.  I googled poisonous plants and learned that parts of cherries are poisonous.  So I thought that that would at least be a cute mani.  While I was digging through my plates searching for the plate with the cherries on it, I found a plate with a spider on it.  That brought back vivid memories of the four black widows we have killed in the last few years, and what I beleive to be a hobo spider that was on our porch just a few days ago.  My poor husband.  I just stood there freaking out.  I never had a fear of spiders up until we started killing those black widows.  So I figured today would be the best day to use this stamp because I will probablly never use it again.

Base coat:  Sally Hansen Diamond Strength Hardener
Base colors: Pinky and pointer finger - Black Cream from Wet N' Wild - 1 coat
                     Ring finger and thumb - French White Tip from N.Y.C. - 3 coats
                     Middle finger - Sealed With A Kris from Nicole by OPI - 3 coats
Stamping color: Black Cream from Wet N' Wild
Stamping plate: Mash 38
Red on back of spider: Red Red from Wet N' Wild
Top coat: Sally Hansen Insta - Dri Anti - Chip Top Coat


Taken outside in direct light


Taken inside without flash


Taken outside in indirect light


I know these pictures aren't the greatest but I couldn't handle looking at the spiders up close anymore.  Sorry.


Friday, September 7, 2012

Glue Base Coats for Glitter Manicures: How Effective Is It?

     Today's post is my attempt at using Elmer's School Glue as a base for glitter polishes.  If you are thinking, what the hell is this lady talking about, I really think you HAVE to read LabMuffin's blog post.  Did you read it?  Don't lie.  Just do it.  It is fast and easy and you will thank me.
     Ok, now that you have read Lab Muffin's blog post, I feel it is of dire importance that you also check out this blog post from Pretty Purple Polish, where she showed me that I really needed to try this.  She did a 5 day wear test of not only the glue as a peel of base, but also included different base coats and orders of application to show which way worked the best for her.  Now, you may be wondering why, with this wealth of knowledge, I feel the need to share my experience with you.  Let me tell you my story.
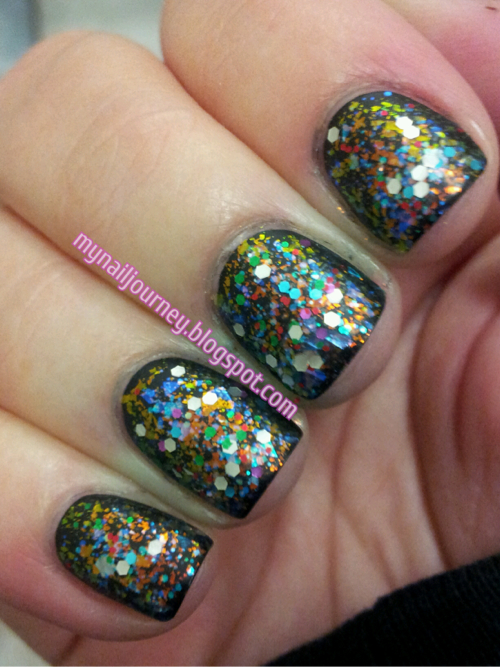
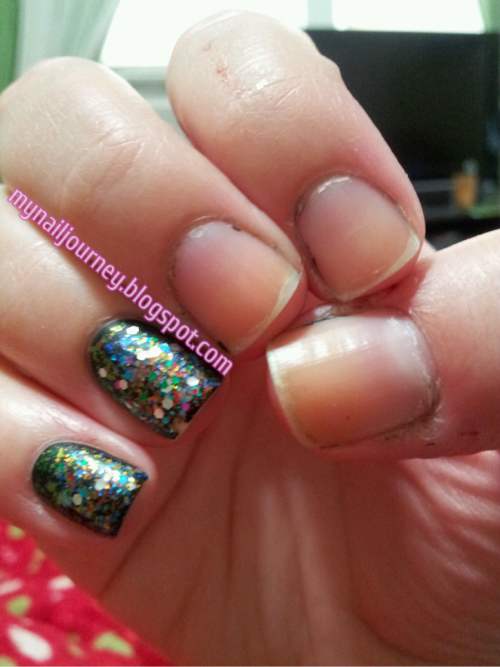
     I wash my hands a lot.  And when I say a lot, I mean probablly somewhere close to 100 times a day.  No, I am not a germaphobe, but I work in food service.  My hands are constantly in and out, in and out, in and out of water.  My hands crack, bleed, chap, and hurt.  But at least you know I won't make you sick!  (It takes a lot for me to have my hands picture ready for you guys).  I knew that I would be a perfect test subject for this new phenomenon.  I honestly didn't think that it would work.  I wish that I could tell you guys that it was great and that I will be doing this all the time, but I can not say that.  :-(  With in four hours my polish was gone from three fingers.  Before my shift was over, it was completely gone.  I am so sad that I can't use this method because it really does just peel right off.  I was uber, uber careful like Lab Muffin said to be.  I made sure there was no glue what so ever touching my skin, but it still didn't help.
     I will however say that I may have gotten a little carried away with the amount of glitter and top coats that I used, which could of had a harsher effect on the outcome of my testing.  I may have to try this again with only one or two layers of glitter and a top coat.  I do, however, plan on using this method when I do swatches.  It will be fantastic to remove the polish within a minute rather than 15.

Base coat: Elmer's School Glue
Base color: Black Cream from Wet N Wild - 1 coat
Glitter- in order of application: Green Ocean from Sinful Colors - 1 coat
Shine of the Times from Essie - 1 coat
Party of Five Glitters from Wet N' Wild - 1 coat 
Top coat: Essence Nail Art Special Effect! Topper - 2 coats

As you can read, a lot of layers.

At least I got a beautiful mani out of this experiment.


All of these were taken inside with out the flash.


And here is my nails on my lunch break. :-(  I didn't want to show my thumb but whated you guys to see how it peeled off.  Side note, my cuticles used to all look like my thumb!  I can't believe how much blogging has made me change my terrible cuticle habbits!


So, have you tried using a glue as your base coat?  What about the glittler removal method?  Do you scrub, scrub, scrub it off, or have you just sworn off glitter all together?  I hope you like this post and feel free to comment, comment, comment.  :-)


Monday, August 27, 2012

Tic-Tac-Toe Nail Art

     In the Facebook group Crumpet's Nail Tarts, formally know as the Purple Crumpet Fairy, on Mondays we do Monkey See, Monkey Do manicures.  All this means is that we recreate our favorite mani's that we have seen on other blog's and show our interpretation of them on ours.  I like doing this because it showcases other's blogs and gets the word out about them.  Hopefully bringing in new readers to their blogs.
     I found this image on Pinterest and from what I can see Steff did this manicure.  I don't quite understand Reddit's layout or what it even is but, the Pinterest link took me to her page.  You can see her mani here.  I immediately knew I needed to do this mani.  Now, I got VERY sidetracked while doing this mani.  I wanted it to be perfect so I ended up redoing the pinky, which still smeared, and the thumb.  I spent WAY to much time on it, but I think it paid off.  It is so stinking cute.  I applied the hearts with different sized dotting tools and used a stiping brush for the Tic-Tac-Toe board and the x's on my thumb.

Base coat: Sally Hansen Diamond Strength Hardener
White: French White Tip from N.Y.C. - 3 coats
Black: Black Creme from Wet N' Wild - 2 coats
Pink: Strawberry from Avon
Black for the tic tac toe board: Black from Kiss Brush On Nail Art Paint


Both of these pictures were taken inside with out flash, in the same room.  Can anyone explain to me why my skin tone is so different in each of these pictures?


Sorry for my crusty cuticle on my thumb.  I try to hide my thumbs as much as possible but I had to show it for this post.  I really hope that you guys like this.  

If you would like to see some more MSMD manis please feel free to check out these other blogs!


Debbie at The Crumpet - http://thecrumpet.blogspot.co.uk
Missy @ Gnarly Gnails - http://gnarlygnails.blogspot.com
Nayade at Toxic Vanity - http://www.toxicvanity.com
Alyssa at Fancy Phalanges - http://fancyphalanges.blogspot.com/
Misha @ Enigmatic Rambles: www.enigmatic-rambles.blogspot.com
Carrie @ LeSamowen:Life, Love, and Nail Polish: http://lesamowen.blogspot.com/
Basia (or Bazzia) @ polish my mind: http://polishmymind.blogspot.com/
Isabel - Little Fairy: http://isaspinods.blogspot.com/
Stella - My Wet Nails: http://mywetnails.blogspot.com
Michelle-Lacquer Or Leave Her!: http://lacquerorleaveher.blogspot.com
Angi @ Angelina´s Nails & More www.angelinaswelt.blogspot.de/
Kia @ Lacquered Libra  http://lacqueredlibra.blogspot.com/