Showing posts with label accent nail. Show all posts

Saturday, January 5, 2013

31 Day Challenge - Day 5: Purple

     Happy Saturday everyone although I'm sure it is Sunday for a lot of you right now.  I was really excited to wear Aurora from Zoya for this mani.  It is a part of the new Ornate Collection that was released last month.  I fell in love with Aurora when I saw the first swatches of it.  I received it in a secret Santa swap that I did in one of my Facebook groups and I was pretty much jumping up and down when I got it.
     To achieve this look, I painted two coats of  each polish onto each nail then a coat of Seche Vite to help it dry quick.  After it dried I applied striping tape to each nail and then painted each nail with one coat of the opposite color.  

Base coat: Pro FX Fiberized Ridge Filler
Accent color base: Aurora from Zoya - 2 coats
Main base: I've Got Bieber Fever from Nicole by OPI - 2 coats
Top coat: Seche Vite


I know this one is fuzzy but I wanted you to see the holographic goodness in Aurora.


Have you guys been able to try any of the Ornate polishes?  Tune in tomorrow for our "favorite color family" mani.

Wednesday, January 2, 2013

31 Day Challenge Day 2: Silver

     Hey guys!  Whelp, today was another cold one.  My truck would barely start this morning, and we couldn't even open the car wash today because we were so cold.  Well, enough about work, let's get to the important things.  I have tried to wear Silver Star a few times, but there has never been any sun to capture it in, or I couldn't get good pictures.  Well, this time I was able to photograph it.  But that was about the only great thing about this mani.  I used two coats of the Silver Sweep and a top coat.  Both of those made it bubble pretty bad.  The Sally Hansen Insta Dri polishes are one coaters, but I wanted to do a second one for a deeper color.  Uff duh.  I wore Silver Sweep the day after I did this mani and only did one coat and it didn't bubble.  I wanted to photograph it again, but then I remember that I am not perfect and my blog is not perfect and I don't want to have crazy expectations for my hobby because that will make me hate it.

Base coat: Pro FX Fiberized Ridge Filler
Accent nail: Silver Star Hello Kitty by Sephora - 2 coats
Main polish: Silver Sweep from Sally Hansen Insta Dri - 2 coats
Top coat: Essence Better Than Gel Top Coat


I know these pictures look similar, but I want you to see all the different colors that are in Silver Star


Penguins are my favorite animal and I got these for Christmas.  


Tune in tomorrow for Day 3 - Gold.  Check out these other silver manicures!


Monday, December 31, 2012

Llama Nails: O is for... Owl

       All I can say is brrr!  Now, I am not one to complain about the weather, whether I like it or not, but it is downright freezing today!  I had to leave out heater on all day so my polish wouldn't get too cold.  ;-)  All right, now on to business.  Today's post is another installment in the ABCs of nail art challenge that is being hosted by the Facebook group, Llama Nails.  Each week we post a manicure that has to do with the letter for that week.  "O" was actually last week, and this mani was done on time, but I took a little blogging hiatus when we were supposed to post these.  Better late than never, right?

Base: Pro FX Fiberized Ridge Filler
Accent base:  Audrey from Zoya - 3 coats
Base: Pink Friday from OPI - 2 coats
Owl: Body - Fly from OPI
         Belly - Olympia from Sinful Colors 
         Eyes - Morning Breath from Sinful Colors mixed with French White Tip from NYC and Black Creme from Wet N'                  
                    Wild
         Nose - Clementine from Sinful Colors
Top coat: Seche Vite


Whoops, I almost forgot the most important part of this post!  I was inspired by this post on Let Them Have Polish.  I have been wanting to do this since she first posted the adorable mani.

How is the weather in your neck of the woods?  Hopefully a little warmer than 11 degrees F.

Here are some other "O" manis, please, check them out!


Monday, December 10, 2012

Llama Nails: M is for... Minnie Mouse

       Happy Monday!  Today I have for you my weekly installment for the ABCs of nail art challenge in the Facebook group, Llama Nails.  Each week we have to do nail art related to a specific letter and this week's letter is M.  I decided to do Minnie Mouse.  I couldn't be happier with the way this turned out.  I tried a new base coat with this mani and it lasted two days!  My manicures never last this long.  I picked up the Fiberized Ridge Filler from the Pro FX line.  I got it at WalMart and a 2.5 fluid oz. bottle cost me right around five dollars.  I am so glad that I picked this up because I used it on this mani and the one I did yesterday, and my mani's have never stayed on my nails better!

Base coat: Fiberized Ridge Filler from Pro FX
Base color: Red Red from Wet N Wild - 1 coat.  UMM CAN YOU BELIEVE ONE COAT?!?!  YEAH, ME NEITHER.  OK, done freaking out about that.
White on the Spot from Milani -2 coats
White dots: Superstar from Pure Ice
Minnie Mouse: All acrylic paint is from Artist's Loft that I bought at Michaels
Black-Lamp Black
Face-Titanium White, Burnt Sienna, and Yellow Ochre
Bow-Crimson Red and Titanium White for the dots
Tongue-Crimson Red mixed with Titanium White
Top coat: Seche Vite

I used a dotting tool to apply all the polka dots that are not on my accent nail.  I used my smallest brush for all of Minnie except for the eyelashes; I used my striping brush for that.


You can check out these other "M" challenge's using the codes below.  I hope you enjoyed my Minnie Mouse mani.


Tuesday, December 4, 2012

Reverse Gradient With Sinful Colors Ice Dream

       Hi everyone!  I hope you all had a great Tuesday.  I only had to work a half day today because the weather was so crappy!  But I got a lot done today.  I went to Ace, bought some pegboard, spray paint, hooks, and organized my kitchen.  It looks so good!  I'm glad I didn't just sit on my butt all afternoon, like I usually do!
     Today I have one of the winter polishes that Sinful Colors released last month.  This color is called Ice Dream.  I researched Ice Dream a little bit before I wrote this post and I found out that it is a dupe for China Glaze Lorelei's Tiara, and Sally Hansen Gem Crush in Showgirl Chic.  I don't own either of these polishes so I can't show you, but you can click on the links to see the comparisons.  I didn't want to just wear Ice Dream by itself, so I decided to wear it over black.  Then I remembered this mani for a reverse gradient from A Polish Addict.  I love how this turned out!

Base coat: Sally Hansen Triple Strong Advanced Nail Gel Fortifier
Base coat: Black Creme from Wet N' Wild - 1 coat
Accent nail: Ice Dream from Sinful Colors - 2 coats
The gradient was done with one coat of Ice Dream
Top coat: Sally Hansen Insta-Dri Anti-Chip Top Coat

This was taken outside without the flash


This was taken inside without the flash


This was taken inside without the flash, just in different lighting


And here is a picture of my kitchen!


I hope you like my nails and my kitchen!!


Tuesday, November 27, 2012

Sinful Colors Athens and Olympia and Stamping With Mash 45

       Happy Tuesday evening everyone.  Or if you are over on the East Coast I'm sure it is much later.  I won't rub in the fact that I am enjoying a nice cup of coffee at the moment.  Mmmmm.  Coffee.  I.  Love.  Coffee.  OK, now onto the more important things in life, my nails!  When I first saw this image on the Mash 45 plate, I was not to keen on it, but after seeing a few people use it, I wanted to try it out.  I will say that I really enjoy how this turned out.  It is a little splotchy in spots, but that is because I wasn't using "real" stamping polishes, but I think these turned out pretty good considering the fact.

Base coat: Sally Hansen Triple Strong Advanced Nail Gel Fortifier
Base colors: Accent nail: Athens from Sinful Colors - 2 coats.
                     Olympia from Sinful Colors - 2 coats
Stamping plate: Mash 45
Stamping colors: Same as the base colors
Top coat: Seche Vite

These were taken inside without the flash.


Have you guys tried this stamp before?  If so, did you like it?  If you haven't tried it yet, would you?  I look forward to hearing from you!  I'm off to enjoy the rest of my coffee and start a new mani!  Have a great night.


Monday, November 19, 2012

Pure Ice Femme Fatale With Treasure Hunt Accent Nail

       Happy Monday!  Today started out crappy, but towards the end of my workday things started looking up.  My husband finally got a job!  He starts tomorrow and I am so freaking excited.  I have been having far too many meltdowns lately, and having a $40.00 food budget for the month is way too hard.  With all the damn rice I have been eating, you would think I would have lost some freaking weight!  Ugh.  Oh well.  One thing at a time.
     Today I have two of the new Pure Ice polishes to show you.  Pure Ice is sold exclusively at WalMart, (as far as I know) and they retail for less than $2.00.  I have been using this brand for years and years and still really like it.  About a month ago I was at WalMart and my mother-in-law walked up to my husband and me.  In an effort to avoid talking to her I started looking at all the pretty nail polish that just happened to be right in front of me.  I grabbed a handful of them and then went to the normal place where the Pure Ice is, logged onto Facebook to see which ones I needed for a stamping project, and lo and behold, I found out that the display I was just looking at was brand new.  They had just released 55 new shades and they were right there in front of me in all of their glory.  If I had $110.00 you bet your ass I would have bought them all, but I had like $20.00 so I got five of them.
     Femme Fatale is from their Velour line of this release.  In my opinion, they are just like the suede polishes that OPI and Avon have come out with.  This is a beautiful dark forest green polish that also has lighter green matte flecks throughout.  I did use a matte top coat over these because I could not tell a difference in the finish with or without it.  I painted half of my nail with the top coat and the other half without and it looked exactly the same.
     Treasure Hunt is part of their Diamond Couture line in this release.  Treasure Hunt is a light green glitter suspended in a clear base with green and purple diamond glitter sprinkled throughout.  This is so much fun, but it reminds me more of spring than anything.

Base coat: Sally Hansen Triple Strong Advanced Gel Nail Fortifier
Base color: Femme Fatale from Pure Ice - 2 coats
Accent nail: Treasure Hunt from Pure Ice - 2 coat
Top coat: ***Not on accent nail*** Essence Nail Art Special Effect! Topper
               On accent nail - Sally Hansen Insta-Dri Anti-Chip Top Coat


This next picture is in a different light.  I really want you to see the lighter green flecks in Femme Fatale.


Have you been able to try any of these new polishes from Pure Ice?  If yes, what are your thoughts on them?


Sunday, November 4, 2012

AIS: Stamping With Mash Plate 41

       Happy Sunday all.  I hope that you are all enjoying your extra hour of sleep.  I haven't participated in one of Sunday's Stamping Challenges in the Facebook group Adventures In Stamping in a few weeks now.  Today's challenge was for us to stamp over glitter.  When I was playing with some of my new polishes last night I came up with this color combination and was very excited to try it out.  It turned out a lot better in my head, but I still really like it.  I hope you do as well.

Base coat: PVA Glue - If you're not sure what I am referring to, you can check out my blog post about it here.
Base color: Skull and Glossbones from OPI - 2 coats
Accent color: Luxe Lavender from Avon - 2 coats
Glitter: Cheatin from Pure Ice - 1 coat
Top coat: Sally Hansen Insta-Dri Anti-Chip Top Coat
Stamping plate: Mash 41
Stamping color: Stamp Me! White and Stamp Me! Black from Essence


This photo was taken inside with the flash


This was taken outside without the flash


Skull and Glossbones is slowly becoming one of my favorite polishes!  I really like the white over the purple.  I think next time I will use all white instead of the black over the glitter and Skull and Glossbones.

Sunday, October 28, 2012

SassyNails Nail-Aween Nail Art Challenge: Day 7 - Spiders

       Well, if you have been reading my blog for the last month you will know that I started out this month by doing two Halloween challenges.  This one, which is a self paced one, and another one for the Facebook group, Crumpet's Nail Tarts.  I can't express how crazy it has been to be doing nail art every single day.  It is hard to get everything done.  Much respect to those who can do it.  I decided yesterday that I am not going to finish the one for Crumpet's Nail Tarts.  The main reason is because the next challenge I had to do was inspired by a scary movie.  I DO NOT watch scary movies and I don't really want to spend 3 hours doing intense nail art and then take it right back off.  Blood, guts, and creepy movies are not my thing.  
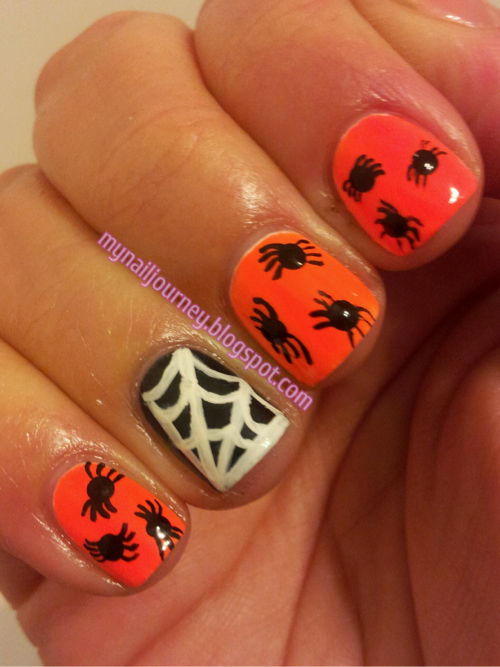
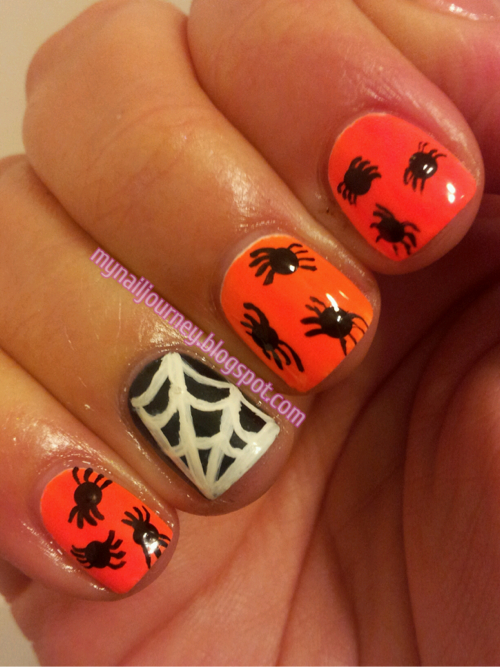
     On to today's mani, spiders.  I really don't like spiders, but this mani turned out pretty cute.  I received some Sally Girl mini polishes in a swap last week and they were perfect for this one.  As with most neons, I layered Amped over a white base to make the neon color really pop.  Unfortunately this resulted in easy chipping.  I didn't even do anything except sweep and mop last night and it was chipped.  :-(  I applied the spider webs and legs of the spiders with a small nail art brush and the bodies of the spiders with a dotting tool.  I hope you like these.

Base coat: Sally Hansen Triple Strong Advanced Gel Nail Fortifier
Base color: Orange - Amped (812161) from Sally Girl - 2 coats over 2 coats of Superstar! from Pure Ice
                   Black -  Poser (812051) from Sally Girl - 2 coats
Nail Art is done with Artist's Loft Acrylic paint in Titanium White and Lamp Black
Top Coat: Sally Hansen Insta-Dri Anti-Chip Top Coat

Taken inside without the flash


Thursday, October 25, 2012

G is for... Garfield

     Happy Thursday everyone.  This week is going by so slow!!!!  Is anyone else having a long week?  I took a break from doing my nails on Tuesday night and just did a bunch of blog reading so I didn't have this mani done until last night.  On Wednesday night's, my husband and I go over to our best friends for dinner so I didn't have time to post this until today.  Today's mani is for the ABC's of Nails Challenge that we are doing in the Facebook group, Llama Nails.  We are going week by week through the alphabet, in alphabetical order, and doing a manicure that coincides with that letter.  I was going to settle with glitter for this week because I am really brain dead from all of these Halloween challenges, but someone had posted a Garfield comic on my Facebook and an idea clicked.  I am so happy with the outcome of this, so I really hope you like it as well.  Enjoy!
Base coat: Sally Hansen Triple Strong Advanced Gel Nail Fortifier
Base color: Sun Kissed from Sally Hansen Hard As Nails Xtreme Wear - 2 coats
*All artwork was done with Artist's Loft acrylic paint*
Black-Lamp Black
Pink- a mix of Titanium White and Crimson Red
Yellow- Lemon Yellow layered over Titanium White
Top coat: Sally Hansen Insta-Dri Anti-Chip Top Coat

Taken inside without flash


I must apologize for my crusty cuticle's.  Winter hit hard last week and I did not take care of my cuticles.  I am all over it now though.  Don't you fret.

If you would like to see some more G inspired maicure's, look at these other posts below.


Tuesday, October 23, 2012

SassyNails Nail-Aween Nail Art Challenge: Day 6 - Frankenstein

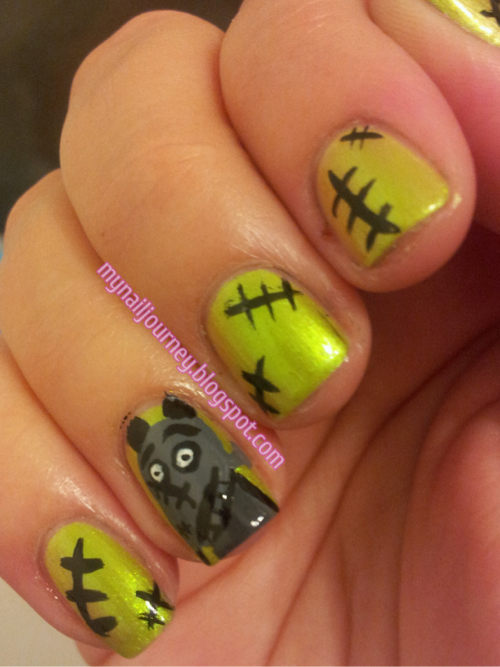
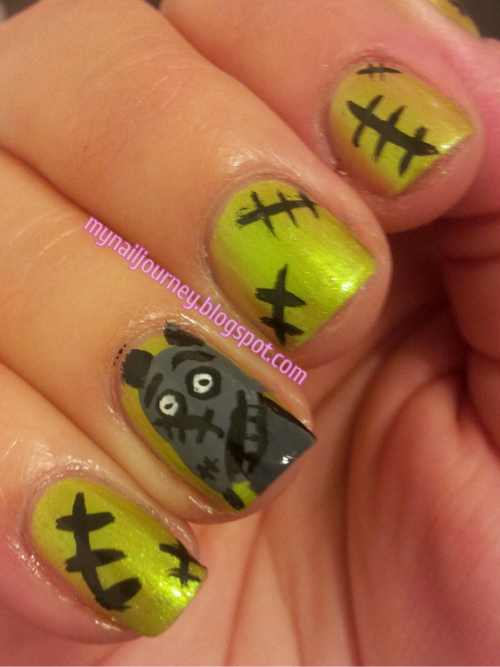
       On Facebook SassyNails is hosting a self paced Nail-Aween Nail Art Challenge.  Today I have the sixth day of that challenge for you.  Our topic was Frankenstein.  I really wanted to do something than just a Frankenstein face and my mind wandered off to a new movie entitled, Frankenweenie.  In my opinion the Tim Burton movies are a little to creepy for me, so I won't be seeing this one, but I didn't mind doing this on my nails.  I think he looks more like a rat on my nails, but oh well.  At least I tried, right?!

Base coat: Sally Hansen Triple Strong Advanced Gel Nail Fortifier
Base coat: Tangy from Zoya - 2 coats

*All the artwork was done with Lamp Black and Titanium White acrylic paint from Artist's Loft.  Frankenweenie's body is a franken, lol, of the black and white.  I know, cheesy, but I had to.

These were taken inside without flash.


Here is the movie poster so you can see how I compare. 

This image is from Wikipedia.

So, what do you guys think, does he at least look some what close to the original?


CNT Halloween Nail Art Challenge: Pumpkins

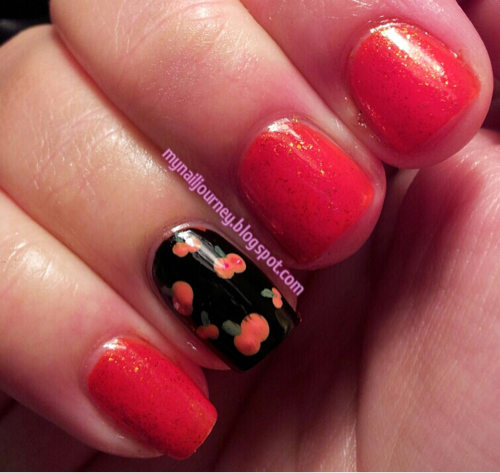
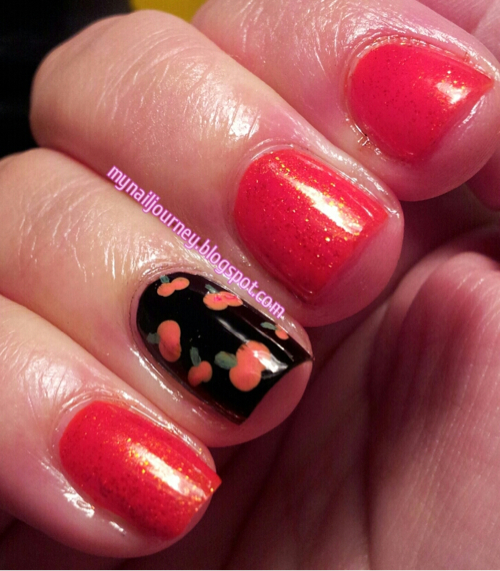
       It is time to post another mani for the Halloween Nail Art Challenge that is being put on by the Facebook group, Crumpet's Nail Tarts.  I threw this mani together at the last minute last night so I don't really have too much to say about it except that I really like the way that it turned out!  I think it is very simple, cute, and different.  All though I haven't looked at everyone else's manis so I could be wrong about the unique look.  I did forget to leave my accent nail blank while painting the orange, so the Black Creme is over a layer of orange, but Wet N Wild's Black Creme is opaque in one coat anyways.  :-)  Napping before mani-ing is dangerous.  ;-)

Base coat: Sally Hansen Triple Strong Advanced Gel Nail Fortifier
Base color: Citrine from Sinful Colors - 1 coat, Black Creme from Wet N Wild - 1 coat
Over Citrine I layered one Layer of Serena and Chloe from Sinful Colors.  I wanted to do both layers in Serena and Chloe but I was afraid it would photograph more red than orange.
Pumpkins:  A mixture of Crimson Red, Lemon Yellow, and Titanium White acrylic paint from Artist's Loft applied with a dotting tool
Stems: A mixture of Viridian acrylic paint from Artist's loft and my franken orange, applied with a small detail brush
Face: Lamp Black acrylic paint from Artist's Loft, applied with a small detail brush
Top coat: Sally Hansen Insta-Dri Anti-Chip Top Coat

Taken inside without flash


Thanks for stopping by and do feel free to leave some comment love, or creative criticism.

Check out the other pumpkin nails below!


Sunday, October 21, 2012

AIS: Halloween - Stamping With Mash Plates 48 and 29 Over OPI Skull and Glossbones

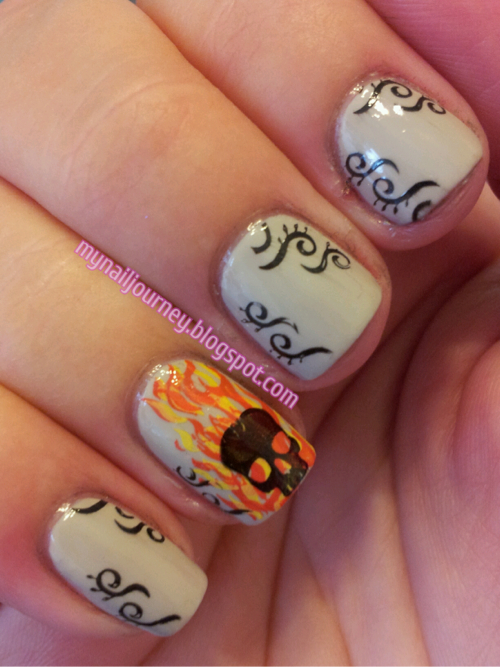
       It is Sunday and that means it is time for another stamping challenge in Adventures In Stamping, a group that I am in on Facebook.  Today's voted on theme was Halloween.  I am getting a little Halloween'd out with all of these other challenges I am involved with and wasn't going to participate until I remembered that I had a skull stamp in my collection that would never be used otherwise.  You see, I am not a skull person.  I don't understand why they are on everything right now, like the mustache.  But, to each their own.  I wasn't even sure how to use the skull in a mani when my husband grabbed the three plates I playing around with and told me what I should do.  The accent nail was his idea, except for the multiple stamping of the flames, and the little squirly q's were my idea.
     I just picked up Skull and Glossbones at T.J. Maxx for $3.99 yesterday and thought it would be perfect for a mani with a skull on it.  Upon further google searches, I am not even close to the only one who thought this was a good idea.  :-)  As described by Scrangie, Skull and Glossbones is a "ghostly light grey cream."  I thought this was going to be a three coater but after the second coat it has reached full opacity.  OPI is my favorite brand of polish and I really liked this more than I thought I would.  The half price price tag helped a lot, too.

Base coat: Sally Hansen Triple Strong Advanced Gel Nail Fortifier
Base coat: Skull and Glossbone from OPI - 2 coats
Top coat: Sally Hansen Insta-Dri Anti-Chip Top coat
Stamping plates: Mash 29 & 48
Stamping colors: Lightning and Heat Flash from Sally Hansen Insta-Dri and Stamp me! Black from Essence
Top coat: L.A. Colors Rapid Dry Top Coat

Taken inside without flash


This is how I came up with the little curls on the sides of each nail


I hope you guys enoy this!  Feel free to comment, I read each and every one of them.  They make me  happy!

Monday, October 15, 2012

SassyNail Nail-Aween Nail Art Challenge: Day 4 Mummy Nails FAIL!!!

     I decided to skip MSMD (Monkey See, Monkey Do) Monday's again this week so that I could get past my mummy nail challenge hurdle.  I have been putting this off for far to long and I knew that since the month was half way over today I just needed to buck up and do this.  See, my problem is that I don't like to do the same type of thing as everyone else.  I like to be a little different.  (Funny because I spent my entire childhood trying to be like everyone else, but that is an entirely different issue :-))  Everyone in the challenge came up with awesome mummy mani's and I thought mine would be just as creative, but alas, it is not.  My husband thought it was a gingerbread man!!!  See, fail!  Lol.  I don't even want to show you guys this but I promised myself when I started my blog that I would post the good, the bad, and the ugly.  I don't think I knew what I was getting myself into.
     There is a silver lining to this mani though, well actually, two.  I did NO cleanup and I got to use my first ever China Glaze polish!!!  I just bought it the other day when I was shopping for my nail polish buddy and got uber jealous of the beauties I was purchasing for her!  I'm Not Lion was just released as part of China Glaze's On Safari collection.  I only wanted two of the polishes from the collection, and this was one of them!

Base coat: Sally Hansen Diamond Strength Hardener
Base color: I'm Not Lion from China Glaze - 3 coats
White base color: White On The Spot from Milani - 1 thick coat
Mummy/gingerbread man ;-): Black acrylic paint from Artist's Loft
Top coat: Sally Hansen Insta-Dri Anti-Chip Top Coat

Taken inside my truck with the flash because I don't care how the picture turned out!


You can check out the original image here.  Trust me, it's much better looking than mine.  

This challenge is being put on by SassyNails over on Facebook.  If you're not a Facebook person you can check out her blog here.

If you want to see some much better mummy manicure's please check out these other lovely ladies blogs!


Saturday, October 13, 2012

CNT Sat-ART-Day: The 50's

     Ok, so for most of you it is Sunday, but the great advantage of living on the West Coast of the United States is that we are way behind everyone else!  I still have four hours left to post this.  :-)  I am not going to lie, I am very pleased with how this turned out.  Are you getting curious?  Good!
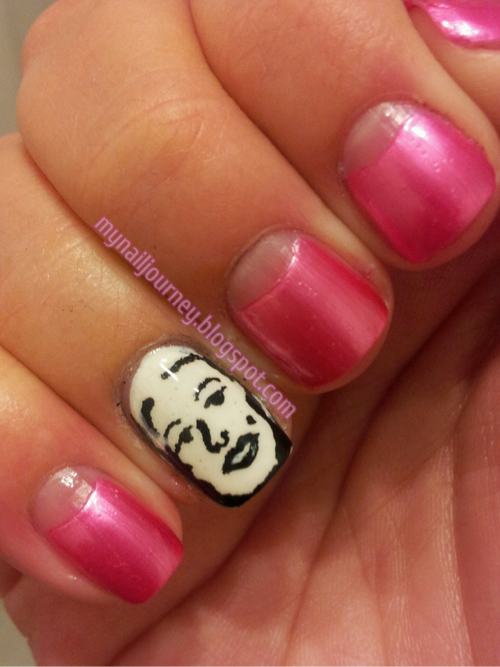
     Today's mani comes from two things.  I brain stormed this mani this morning with the assistance of Google.  I did a search for 50's fashion and stumble upon Marilyn Monroe.  I'm sure most of you know she is from the 50's and I hate to admit that I had no idea.  I didn't even know she was an actress until I saw a video at my girlfriends house the other day, (that of course I can not find on YouTube for the life of me right now! (I had a very sheltered childhood. ))  In 1953 Marilyn played in Gentleman Prefer Blonds.  In this movie she preforms the song, "Diamonds Are A Girls Best Friend" in a beautiful yet shocking (for the times) pink dress.  This is where the inspiration for the pink half moons came.
     I then remembered the first Robin Moses video I saw.  In this video Robin shows us how to do a beautiful Marilyn manicure.  When I saw this for the first time I thought there would never be a day that I would be able to do something like this.  Well, Robin's advice of practice, practice, practice paid off.  
     I am a little dissapointed with the bubbling that occured.  My top coat is basically gone and I tried to be a cheapskate and get the last little bit out.  I wish I would have just opened my new bottle.  Does anyone know why polish companies don't let the brushed extend further into the bottle?  I feel like it is such a waste of polish once you get half way through the bottle.

Base coat: Sally Hansen Diamond Strength Hardener
Pink: Lavendar Pearlescent from Wet N' Wild Wild Shine - 3 coats
White: White on the Spot from Milani - 1 coat
Marilyn: Black acrylic paint
Top coat: Sally Hansen Insta-Dri Anti-Chip Top Coat


Well, what do you think?

If you want to check out some more 50's inspired manicures, check out these other blogs!


Thursday, October 11, 2012

CNT Halloween Nail Challenge: Witches

     Today in the Facebook group, Crumpet's Nail Tarts, our challenge is witches.  As with all these challenge post's I never have any idea what the heck I am going to do.  All I knew is that I wanted to use Scandalous from Revlon as the base.  Scandalous is a black base with purple hex and micro glitter.  This formula dried very fast on me and is opaque in two coats.  I am a sucker for a dark color and this seemed perfect for a Halloween mani.  I was going to use a dark purple creme for my accent nail but then figured my witch design wouldn't show well against a dark base.  Then I saw Essie's Pretty Edgy and knew that this was the perfect accent color.  A beautiful green that would be perfect for a witches face.  And the rest is history from there!

Base coat: Sally Hansen Diamond Strength Hardener
Base color: Scandalous from Revlon -2 coats
Accent color: Pretty Edgy from Essie - 2 coats
Witch colors: Lamp Black and Lemon Yellow from Artist's Loft acrylic paint
Top coat: Sally Hansen Insta-Dri Anti-Chip Top Coat


I hope you enjoy my witch!  If you want to check out some crazy, awesome witch manis check out these ladies blogs who are also doing this challenge.


Tuesday, October 9, 2012

CNT Halloween Challenge Day 3: Zombies

     Today in Crumpet's Nail Tarts Halloween Challenge we are supposed to do Zombies.  Now, let me start off by saying, I am not a fan of zombies.  Don't like them, don't watch them, don't know what they look like, don't want anything to do with them.  Off to Google I went... (Does this sound familiar?  I love Google).  I searched "cute zombies" and found this image.  It was the cutest one I could find and I figured that I could re-create it.  I think I did a pretty good job.  
     After I painted Ibiza on my ring finger I painted the entire zombie in white acrylic paint so that when I added the color it would pop.  

Base coat: Sally Hansen Diamond Strength Hardener
Base color:
  accent nail: Ibiza from Zoya - 1 coat
  other nails: Night Prowl from Wet N' Wild - 2 coats - How ironic, right!  Perfect name.
Zombie attire:
  face and hand: San Tan-Tonio from O.P.I.
  brain: The One That Got Away from O.P.I. mixed with white acrylic paint
  shirt: I Need A Refresh-Mint from Wet N' Wild
  pants: Why Not from Sinful Colors
  heart: The One That Got Away from O.P.I.
  outline: Lamp Black from Artist's Loft acrylic paint
Top coat: Sally Hansen Insta-Dri Anti-Chip Top Coat      


AND a close up of my cute little zombie...

I hope you guys like my take on the zombie mani.  If you are interested in more gorey zombies, check out the other manis from this challenge.


Sunday, October 7, 2012

AIS: Metallic Madness - Silver Sweep from Sally Hansen With Mash Plate 46

     Happy Sunday all.  I hope that you are all having a very relaxing weekend.  I am not. :-) On top of my normal 60 hour work week I added on an extra ten hours working at the fall festival yesterday and today.  Oh well.  Other than my feet hurting, I can't complain.  Made enough money to cover a bill so that is all that matters, right?!
     Today's stamping challenge in the Facebook group, Adventures In Stamping, is Metallic Madness.  Now, I don't have that many metallics so I knew that I would be stamping with Silver Sweep from the Sally Hansen Insta Dri line.  For my accent nail I also used this color.

Base coat: Sally Hansen Diamond Strength Hardener
Base color: Ibiza from Zoya - 1 coat
Accent nail and stamping color: Silver Sweep from Sally Hansen Insta Dri - 1 coat
Stamping plate: Mash 46
Top coat: Sally Hansen Insta-Dri Anti-Chip Top Coat


Taken inside with flash


Taken inside without flash

All right, well I need to get caught up on my laundry for tomorrow since I wasn't able to get it done today.  I hope you guys enjoy this mani.


Monday, October 1, 2012

CNT Halloween Nail Challenge Day 1: Trick or Treat Nails

     It's Monday again and that means two things.  It is MSMD Monday and day one of our Halloween challenge in the facebook group, Crumpet's Nail Tarts.  MSMD, for those of you that are not familiar stands for Monkey See, Monkey Do. We recreate mani's from other bloggers that we like and pay some long due respect to the creators of our inspiration.  I didn't have time to do two manicures so I figured that this would be the perfect opportunity to do a post that killed two birds with one stone.  Today's inspiration came from D'Anna at Not Another Nail Blog.
     I tried out one of the new Fantasy Makers from Wet N' Wild in this mani and I have to say that I am not impressed.  I bought this color because it is a black base with pink and blue micro glitters in it.  Well, they are micro for sure.  I could barely see any of the cute colors shinning through in this polish.  :-(  I had such high expectations.  Oh well.  What can ya do.

Base coat: Sally Hansen Diamond Strength Hardener
Orange base color: Clementine from Sinful Colors - 2 coats
Black base on ring finger: Black Creme from Wet N' Wild - 1 thick coat
Black base on other nails: Nail in the Coffin from Fantasy Makers by Wet N' Wild - 3 coats
Top coat:  Sally Hansen Insta-Dri Anti-Chip Top Coat
Lettering and pumpkin face: White - Titanium White acrylic paint from Artist's Loft
                                               Black- Titanium Black acrylic paint from Artist's Loft


Taken outside without flash


Here is a close up of Nail in the Coffin in direct sunlight


You can see the other Trick or Treat manicures by using the links below!

Have you guys tried any of the Fantasy Makers polishes yet?  Were you impressed?


Sunday, September 9, 2012

Adventures In Stamping: Stamping With Mash Plate 38

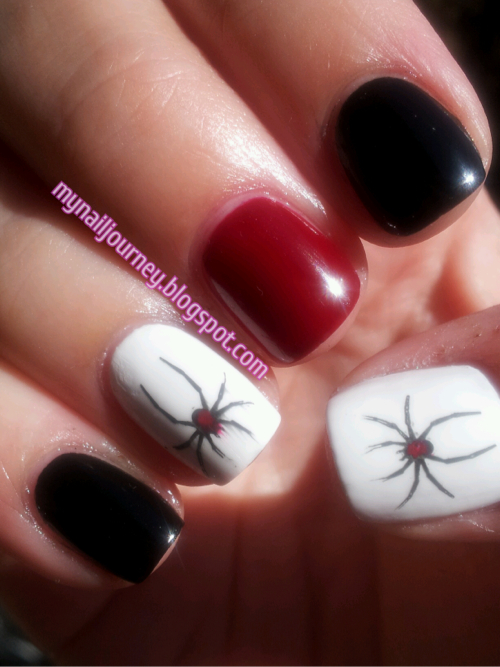
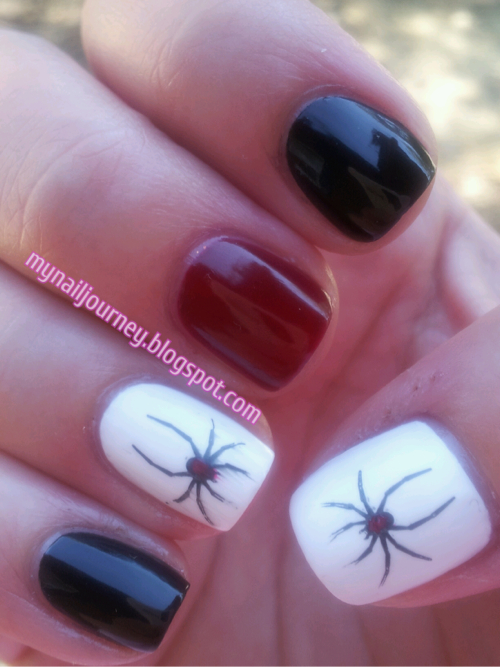
     Our Sunday stamping challenge for the Facebook group, Adventures In Stamping, was to stamp with the theme of something toxic or poisonous.  I was at a standstill with what to do.  I googled poisonous plants and learned that parts of cherries are poisonous.  So I thought that that would at least be a cute mani.  While I was digging through my plates searching for the plate with the cherries on it, I found a plate with a spider on it.  That brought back vivid memories of the four black widows we have killed in the last few years, and what I beleive to be a hobo spider that was on our porch just a few days ago.  My poor husband.  I just stood there freaking out.  I never had a fear of spiders up until we started killing those black widows.  So I figured today would be the best day to use this stamp because I will probablly never use it again.

Base coat:  Sally Hansen Diamond Strength Hardener
Base colors: Pinky and pointer finger - Black Cream from Wet N' Wild - 1 coat
                     Ring finger and thumb - French White Tip from N.Y.C. - 3 coats
                     Middle finger - Sealed With A Kris from Nicole by OPI - 3 coats
Stamping color: Black Cream from Wet N' Wild
Stamping plate: Mash 38
Red on back of spider: Red Red from Wet N' Wild
Top coat: Sally Hansen Insta - Dri Anti - Chip Top Coat


Taken outside in direct light


Taken inside without flash


Taken outside in indirect light


I know these pictures aren't the greatest but I couldn't handle looking at the spiders up close anymore.  Sorry.