Showing posts with label Tape mani. Show all posts

Saturday, January 5, 2013

31 Day Challenge - Day 5: Purple

     Happy Saturday everyone although I'm sure it is Sunday for a lot of you right now.  I was really excited to wear Aurora from Zoya for this mani.  It is a part of the new Ornate Collection that was released last month.  I fell in love with Aurora when I saw the first swatches of it.  I received it in a secret Santa swap that I did in one of my Facebook groups and I was pretty much jumping up and down when I got it.
     To achieve this look, I painted two coats of  each polish onto each nail then a coat of Seche Vite to help it dry quick.  After it dried I applied striping tape to each nail and then painted each nail with one coat of the opposite color.  

Base coat: Pro FX Fiberized Ridge Filler
Accent color base: Aurora from Zoya - 2 coats
Main base: I've Got Bieber Fever from Nicole by OPI - 2 coats
Top coat: Seche Vite


I know this one is fuzzy but I wanted you to see the holographic goodness in Aurora.


Have you guys been able to try any of the Ornate polishes?  Tune in tomorrow for our "favorite color family" mani.

Friday, January 4, 2013

31 Day Challenge - Day 4: Pink

       All right, getting back on track.  For blog post two today I have the fourth mani for the 31 day challenge, pink.  As many of you may not know, pink is my favorite color.  I basically stay away from it because if I didn't every mani in my blog would be pink.  I got three new pink polishes for Christmas and I couldn't decided which one to use for today's mani.  With a quick google search I decided to do this design.  I love how it turned out.  If you look closely you can see my learning curve.  My pinky was the first nail I did.  While doing this nail I tried to apply the polish with the nail polish brushes in each bottle and tried to contain each polish to its own section.  I did the same for the second one and it was really runny and hard to control.  On my middle finger I applied the polish to each section with a striping brush.  On my forefinger I applied the lightest pink over the entire nail, then the middle pink starting from the light pink and all the way up the nail, and applied the darkest pink on just the tip.  This seemed to work the best.

Base coat: Pro FX Fiberized Ridge Filler
Base color: White on the Spot from Miani - 2 coats
Pinks from lightest to darkest: Princesses Rule! from OPI
                                                 Shrimply Devine from Sally Hansen Complete Salon Manicure
                                                 Koala Bear-y from OPI
Top coat: Seche Vite

Sorry for the light tip wear, but I couldn't get any pictures the evening I did this, so this one was taken the next day after working for a few hours.


Now for an explanation of this picture.  Below we have Princesses Rule! and Koala Bear-y from OPI.  They were given to me from my sister for Christmas.  Let me see if I can explain how this was given to me without confusing you.  When I received this gift it was handed to me in as two boxes tied together with ribbon.  The tag told me to open the smaller box first, (seventh box down).  I start opening and it is just boxes inside of boxes.  In the smallest one was a little scroll that said: "see bigger box for gift," which happened to be the box on the bottom.  I started opening and was laughing so hard.  Finally I got to my prize!  Lol.  
     I received Shrimply Devine for Christmas as well.  I bought it with a gift card I recieved from one of my customers!  How sweet was that!


All right, enough for now.  I am glad to be caught up.  I will see you all tomorrow for purple.  


31 Day Challenge - Day 3: Gold

       Three days into the challenge and I'm already posting a day late!  So not how I like to be, but yesterday was a fluke.  I ended up having to work 5 am to 5 pm without a lunch, come home and shower, then go immediately to a friend's house for dinner.  I would have rescheduled except for the fact that we were in charge of bringing the ingredients and their car was broken down.  I very well couldn't leave them stranded like that, could I?!  
     As the title to this post states, yesterday's challenge was gold.  I was kinda freaking out about gold day because I have two gold polishes, or so I thought.  Turns out I had between 15 - 20 gold polishes I had never worn.  I am not a huge gold fan so I never wear it, but for some reason I buy it?  Can you explain this to me?  I guess that is what classifies my "hobby" as an "addiction".  Lol.  
     I loved Disco Dolls.  It has so many pretty colors jam packed into one polish.  I know that this is one coat over a base color, but I dare say it would be opaque with one coat.  To achieve this look I painted on Venus and let it dry completely which took about an hour.  Then one by one I taped off each finger, painted on Disco Dolls, and promptly removed the tape.  Had I used a coat of Seche on top of Venus I could have cut my dry time down to about 30 minutes, but it was my day off and I was watching a movie, so I wasn't it a big of a hurry. :-)

Base coat: Pro FX Fiberized Ridge Filler
Base color: Venus from Avon - 2 coats
Glitter: Disco Dolls from Nicole by OPI - 1 coat
Top coat: Seche Vite


All these pictures were taken outside without the flash.  Here is a close up of Disco Dolls so you can see all the different glitters in this amazing polish.


Have you guys ever been surprised by the amount of one polish you had that you didn't even know?  

Normally I post the little links so that you can view everyone's posts for the challenge, but I can't seem to be able to get them to work! :-(  I'm so sorry because I love adding this feature to my posts.  Once I am able to figure it out, I will add it to each post!

Friday, October 5, 2012

Sassy Nails Nailaween Challenge: Day 2 - Matte Doticure

     It is time for me to post day 2's post for the Nailaween Nail Art Challenge.  There are 10 topic in this challenge and the one thing that I love about this is that it is self pace.  We have until October 31 to post all of our manicures.  This works great seeing as how I am in like a gazillion challenges this month...  Not to sure why I did this, but oh well.  It is keeping me busy and I like it.
     The second day of this challenge is to produce a matte doticure.  I was really excited for this one because I have wanted to do a doticure like the one I am showing you for quite some time.  I am so let down with how this turned out.  I had such high hopes and it wasn't what I wanted.  It would have worked if I had a more opaqe orange, but this one would barely show up on the black so I ended up having to use a white base, only for the dots that are overlapping the black, and you can tell that it isn't right.
     I applied the black over the orange using the tape method. After the black dried I went in and added the dots with a dotting tool to give it the interlocking look.

Base coat: Sally Hansen Diamond Strength Hardener
Base color: Citrine from Sinful Colors - 2 coats
Black: Black Creme from Wet N' Wild
Top coat: Essence Nail Art Special Effect! Topper


Taken inside with flash


Taken inside without flash


Well I hope that you like this even though I don't. :)

Feel free to check out these other ladies blogs who are partcipating in this challenge.

Check out all of the NailAween Nail Art Artists!

datyorkLOVES


Monday, September 3, 2012

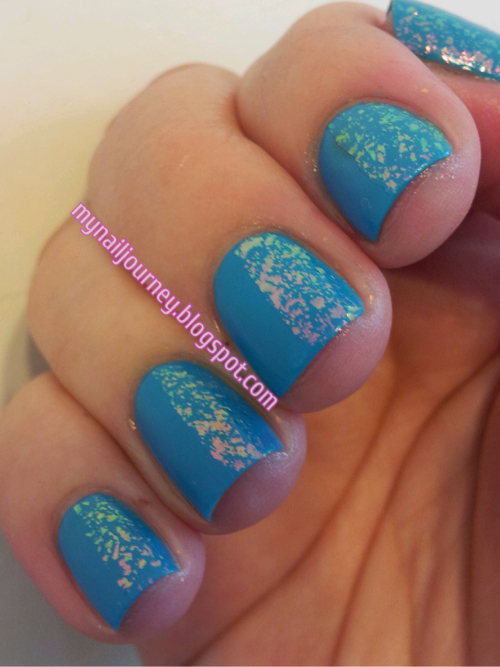
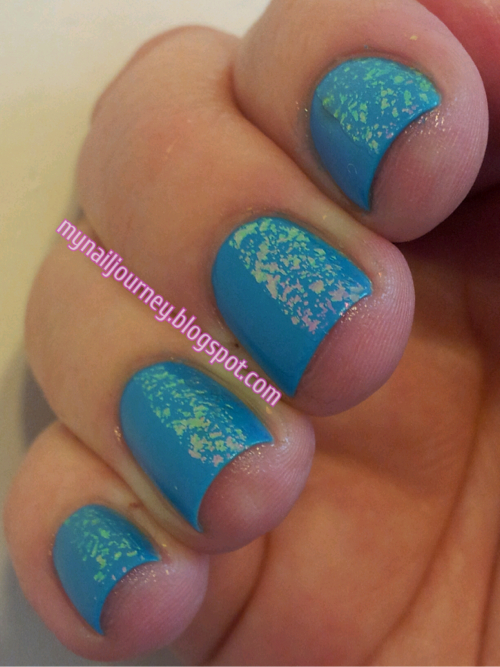
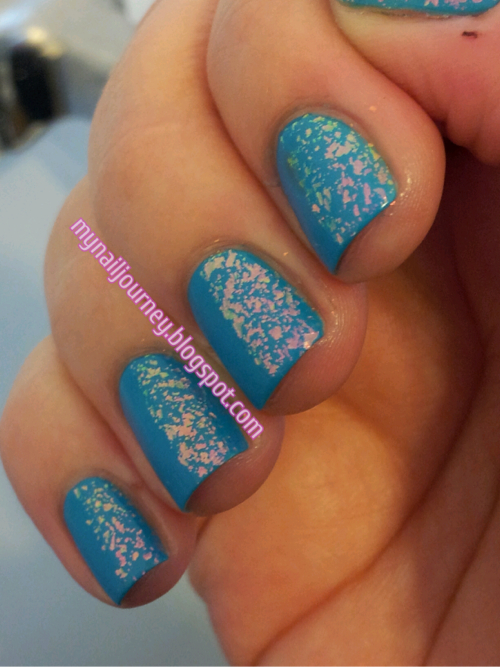
Blue Me Away! by Sally Hansen and Shine of the TImes Tape Mani

     It is time for another installment of Monkey See, Monkey Do.  If your new to my blog and have never heard of this, it is where a group of us, Crumpet's Nail Tarts, recreate mani's we see around the web, (usually from Pinterest or Facebook,) and post them on to our blogs.  I found the inspiration for today's mani on Victoria's Nails Blog.
     I kinda did something stupid and used Blue Me  Away! from Sally Hansen, which has a glossy finish, instead of just opting to use Phoebe from Zoya, which is already a matte polish!  Ugh.  I didn't think about this until I had to redo my pointer finger for the THIRD time due to being impatient!  Oh well.  Live and learn, right.  When I applied Shine Of The Times, I used to tape to make sure I got straight lines. :-)  I love me some straight lines.


Base coat: Sally Hansen Diamond Strength Hardener

Base color: Blue Me Away! from Sally Hansen - 2 coats

Flakie: Shine Of The Times from Essie

Top coat: Nail Art Special Effect! Topper from Essence - I did not apply this over Shine Of The Times


All pictures were taken inside with out the flash


Can you tell that I didn't use tape on my pointer finger?  I pretty much gave up.  :-(  What do you guys think of this?  If you want to see some more Monkey See, Monkey Do mani's, check out these other blogs.


(Submissions close in 6d 7h 19m)
Link tool by inlinkz.com

Thursday, August 23, 2012

Funky French With OPI's Pink Friday and Excuse Moi!

     If you can't tell, I have been really in to tape manis lately.  I have a type A personality and there is just something about a straight, clean edge that screams beautiful to me.  Trust me when I say that I wish I had a type B personality.  Art class was so hard in high school because everything had to be perfect and art is not about perfection. I loved clay but everything I did, as previously stated, had to be perfect.  My best friend was a complete B personality and she could throw the most AMAZING pieces of artwork together in an hour and be showcasing her items in artshows.  Where as my carefully planned out day and night projects got A's but never a ooooh or and aaahhhh and never the spotlight.  Maybe this is why I love blogging and doing my nails.  Because my blog is all about my artwork and it attracts people who are drawn to my style.
     Well, all that to say, I have another tape mani for you.  This is my first funky french on here, and I quite liked it.  As much as I love a crisp, clean line, I think next time I will invest in some binder paper rings.  You can see what I am refering to in this tutorial.  I would like my french manicure lines to be a little rounder than they are in these pictures.


Base coat: Sally Hansen Hard As Nails Hardener
Base color: Pink Friday by OPI
Tip color: Excuse Moi! by OPI
Top coat: Sally Hansen Insta-Dri Anti-Chip Top Coat


Taken outside in direct sunlight


Taken in indirect light


Taken inside without flash


Are you a type A personality, or type B?  Can you handle crazy fun nails, or do you like crisp, clean lines? lol.


Tuesday, August 21, 2012

Tape Mani and Doticure With Matte and Glossy Finish

     Hey guys.  I'm back from another 80 hour work week and my cuticles are proof of that.  They look like total crap!  Ugh.  It is so frustrating.  I will definitely be giving them some TLC this week.  The inspiration for today's manicure came from this post on Chloe's Nails.  I pinned it on Pinterest a few months ago and needed some inspiration yesterday.  Once I saw this I thought, hey, I can do that!  If you haven't visited Chloe's Nails I highly suggest you do because she is one of the biggest nail bloggers out there, (that I know of) with over 9000 friends.  She has not been blogging for a few months due to spending the summer with her kids but I have my fingers crossed that she will return soon.  I love all of her manicures.
     I was so in love with this mani until... I applied my top coat.  I should have listened to my gut and opened my new one but I thought, no, I don't want to waste my money, I will just use what is left in this bottle.  BAD IDEA!  IT RUINED MY MANI!  It came out completely gloopy, took hours to dry because it was so thick, and because of its thickness, it bubbled when it dried.  I wanted to cry!  I even had to redo one of the nails because it was so thick it just scraped right off.  :-(
     To achive this look I applied two coats of Wet Cement from Wet N' Wild.  I then applied my Essence Nail Art Special Effect! Topper to give it the matte look.  After completely drying I used tape to apply Lincoln Park At Midnight by OPI and then with a dotting tool applied Wet Cement of top of that.  I only applied my top coat to the glossy side of the mani since I wanted the matte side to stay mattefied.  If you need more specific directions on how to do a tape mani, you can view my blog post on it here.


I feel ok about this picture if you only look at my pinky and ring finger.  lol
This was taken inside without the flash


Again, ok if you look at the pinky and ring finger.


I am including this picture because it more acuratly shows the colors.  The colors
are more washed out in the above photos for some reason.  This was after a full day of wear
so I apologize for the tip wear and the huge chip missing from the pointer finger.


Have you ever done the perfect mani and then ruined it by applying your top coat?


Tuesday, August 14, 2012

Tape Mani With OPI Grape...Set...Match and Sally Hansen Celeb City

     As I was cleaning up my work station from the previous few days mani's, I piled all the polishes together and when I saw Grape...Set...Match next to Celeb City I knew that I had do something with these two colors.  I had seen this mani pop up in my Facebook News Feed a few days prior and knew this would be the perfect mani to attempt with these colors.
     I must say that I am pretty impressed with this tape mani.  I have tried others before and been impatient, but my patience paid off and I wore this proudly for three days.   If you do not know how to do a tape mani you can visit my blog post here.

Base coat: Sally Hansen Insta-Dri Anti-Chip Top Coat
Base color: Celeb City by Sally Hansen Xtreme Wear - 2 coats.  Swatches are available here.
Top color: Grape...Set...Match by OPI - 1 coat.  Swatches are available here.

All of these pictures were taken indoors with out the camera flash.


What do you think of my interpretation of this mani?  Yay or nay?


Tuesday, May 1, 2012

Lady Luck swatch and first successful tape mani

     As you may have seen in one of my posts a while back I failed miserably at my first tape mani.  I did try a second time and pretty much the same thing happened.  I decided not to do tape manis anymore until I saw a few blogs talking about how to successfully accomplish a tape mani.  Let me tell you, I can't believe the difference it made.  But I can show you, he he. :-)
     The first two times I did a tape mani all I knew was to make sure the base coat was dry and apply tape.  Well, there are a few more steps to this process.

  • MAKE SURE your base coat is COMPLETELY dry.  If you can't wait for the polish to dry use a quick drying top coat like Sesche Vite, OPI Rapidry, or Out the Door.  
  • Stick the tape to the back of your hand a few times to make the tape less sticky.  If you don't do this the base color will be pulled up when you take the tape off and you will be very upset.
  • Work with one nail at a time.  Apply tape to nail in the desired pattern, apply color, and immediately remove the tape.  If you wait for the polish to dry the tape will get stuck to the nail and again you will be very upset.  
     In my first attempts I applied the tape full sticky strength to all my nails, then applied the polish, then waited for the polish to dry, then attempted to remove the tape.  Click the link in the first sentence if you want to see how your mani will turn out.
     After all that is said, I didn't really like the end result.  I think I would have enjoyed it more with out the dots in the middle.  I did however get a lot of complements on this so at least other people liked it.  :-)


 Lady Luck outside with no flash


 Lady Luck in side with no flash


Lady Luck inside with flash


Base coat: Chip Skip from OPI and Smooth Beginnings from Avon
Base color: Lady Luck from Wet N' Wild - 2 coats
Overlay color: Let's Talk from Sinful Colors - 1 coat
Black dots: Acrylic paint applied with a dotting tool
Top Coat: Rapidry from OPI

Have you tried any tape manis?  Have you wanted to scream at the top of your lungs?

I LOVE hearing from my readers, weather it be constructive criticism, complements, ideas, anything, please talk to me in the comments!  I will reply and I read each and every comment.